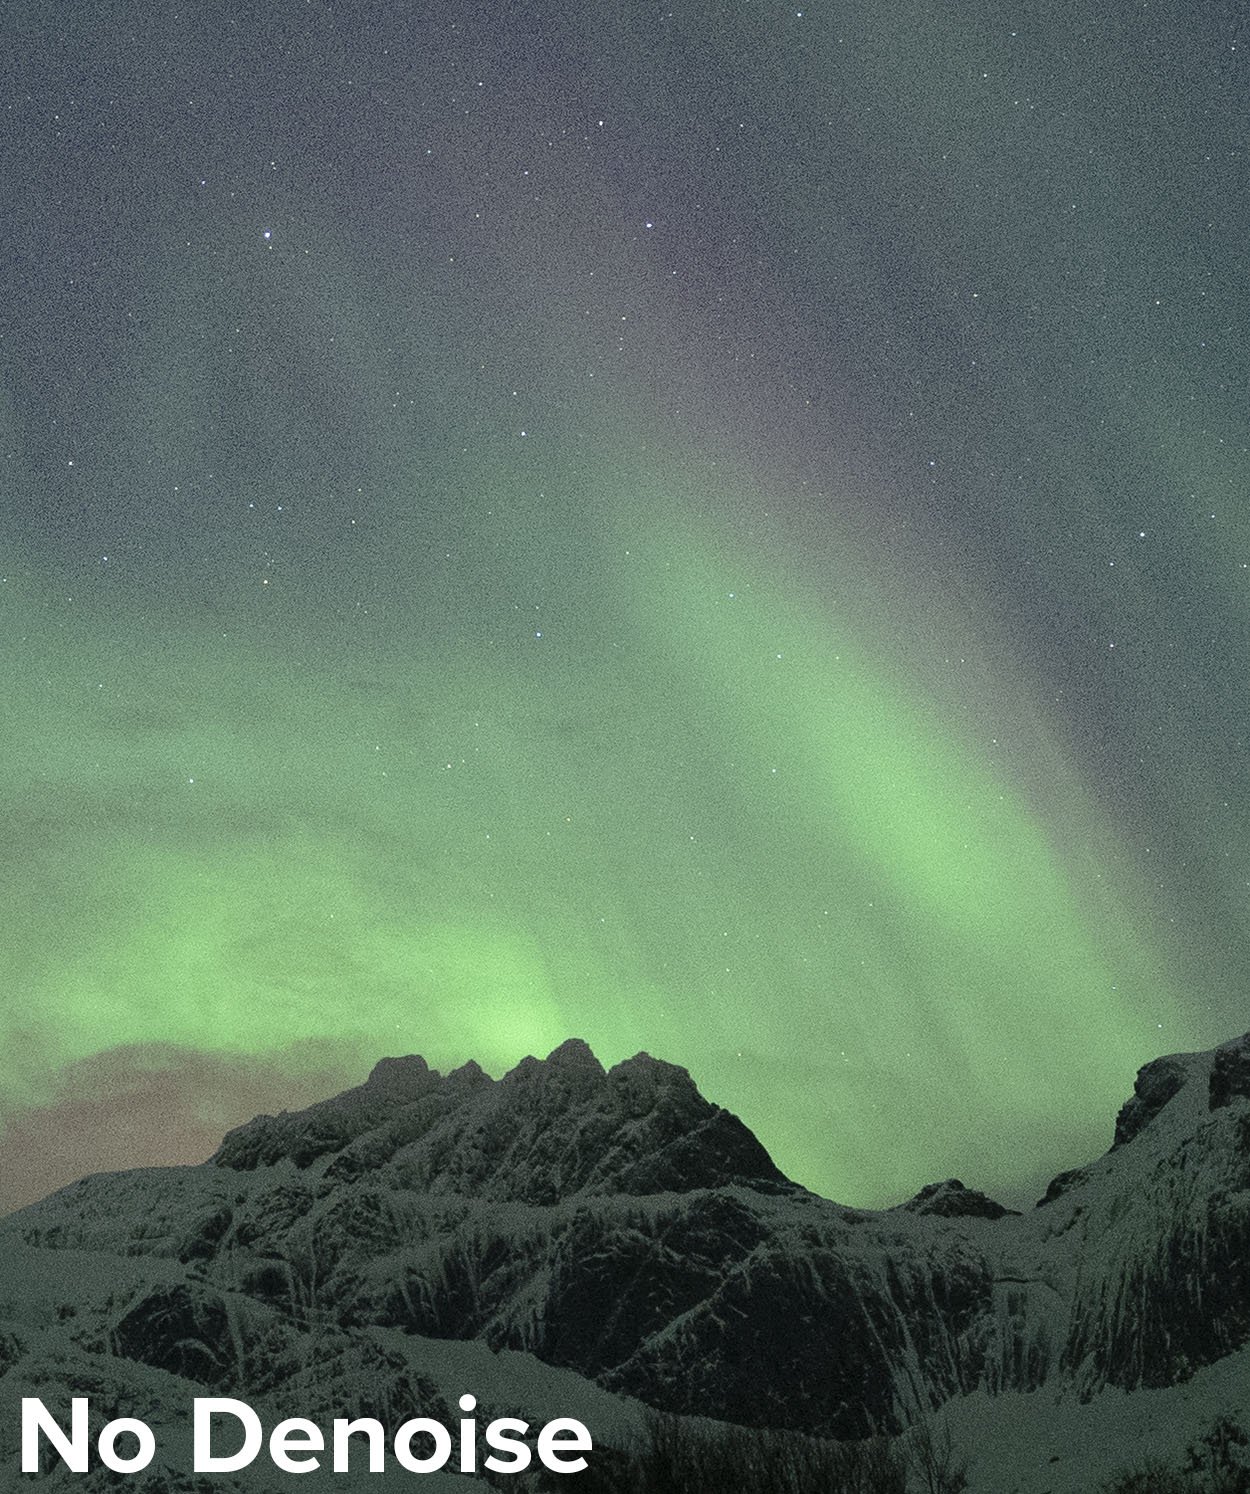
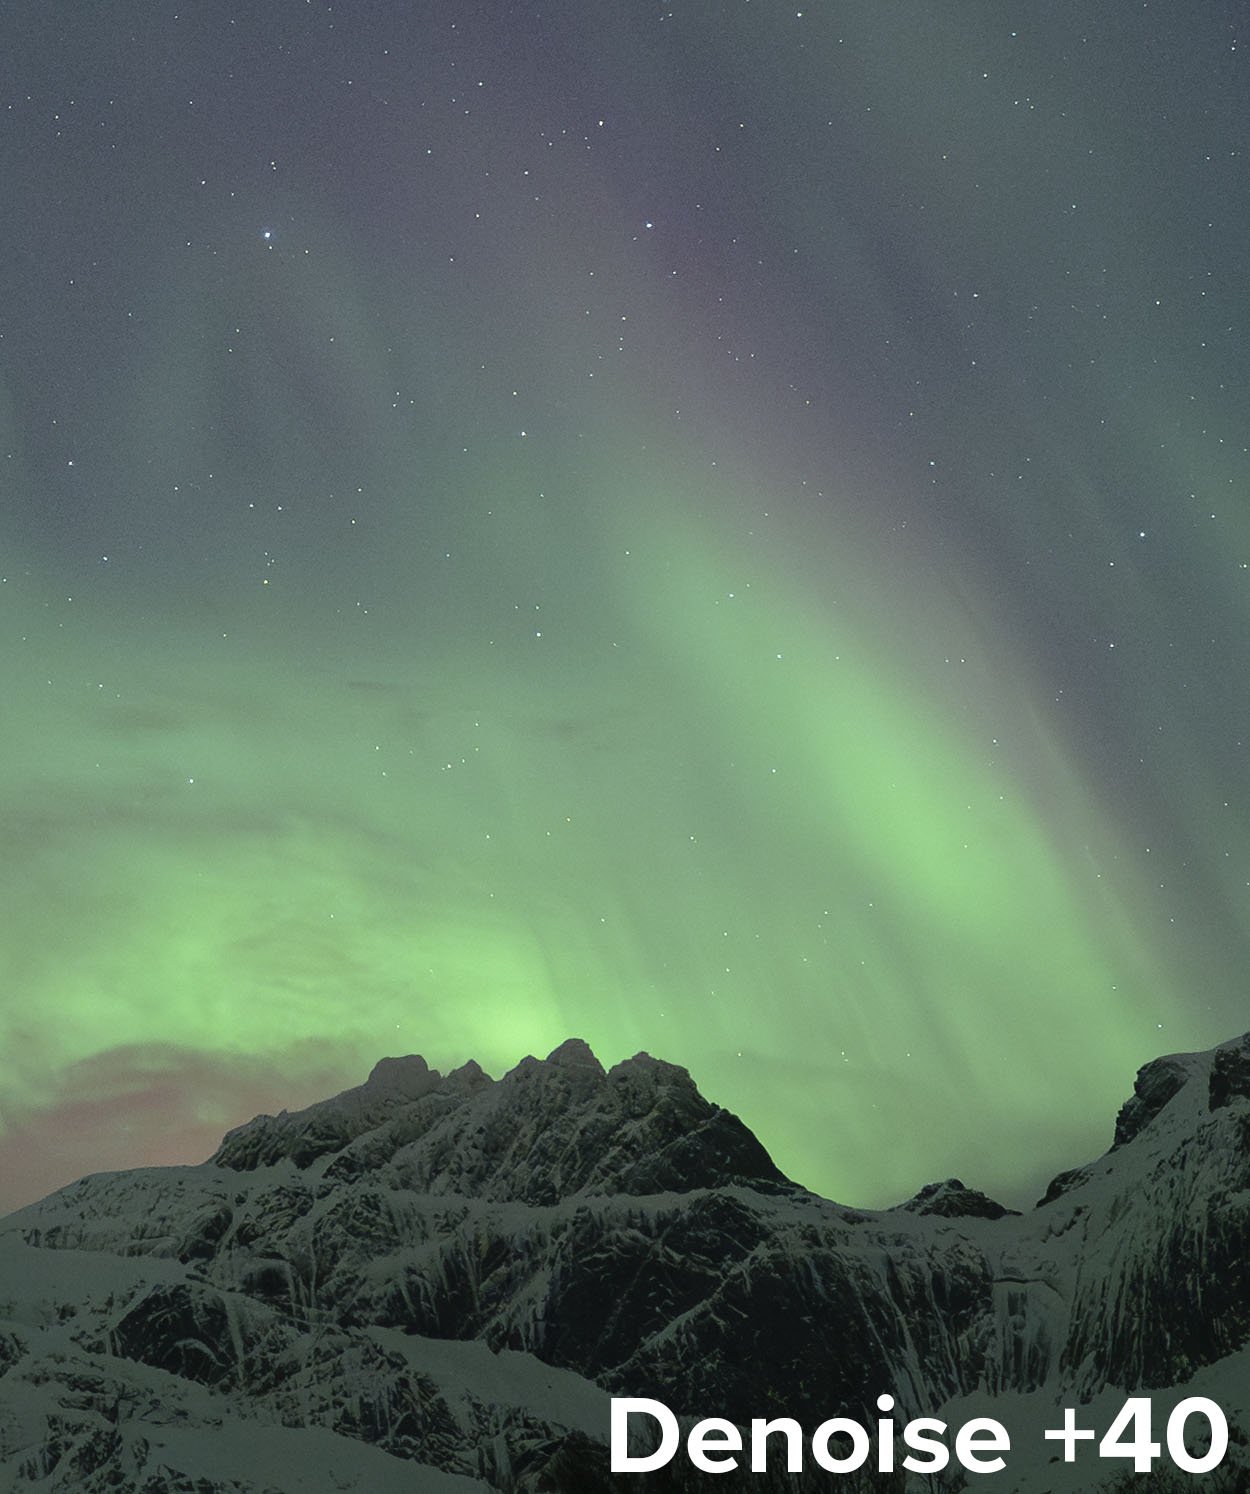
Everybody loves a clear night sky. It can be existential to feel the draw of an endless dome of stars, take in a brilliant Milky Way or be fortunate enough to catch a dazzling display of northern lights. Across the globe, photographers and non-photographers alike marvel at the magic of the night.
What then do we do when clouds move into our star-filled nights? Give up and go home? Heck no. We can change our approach. Embrace the clouds! They can be every bit as magical as the Milky Way or a display of auroras.
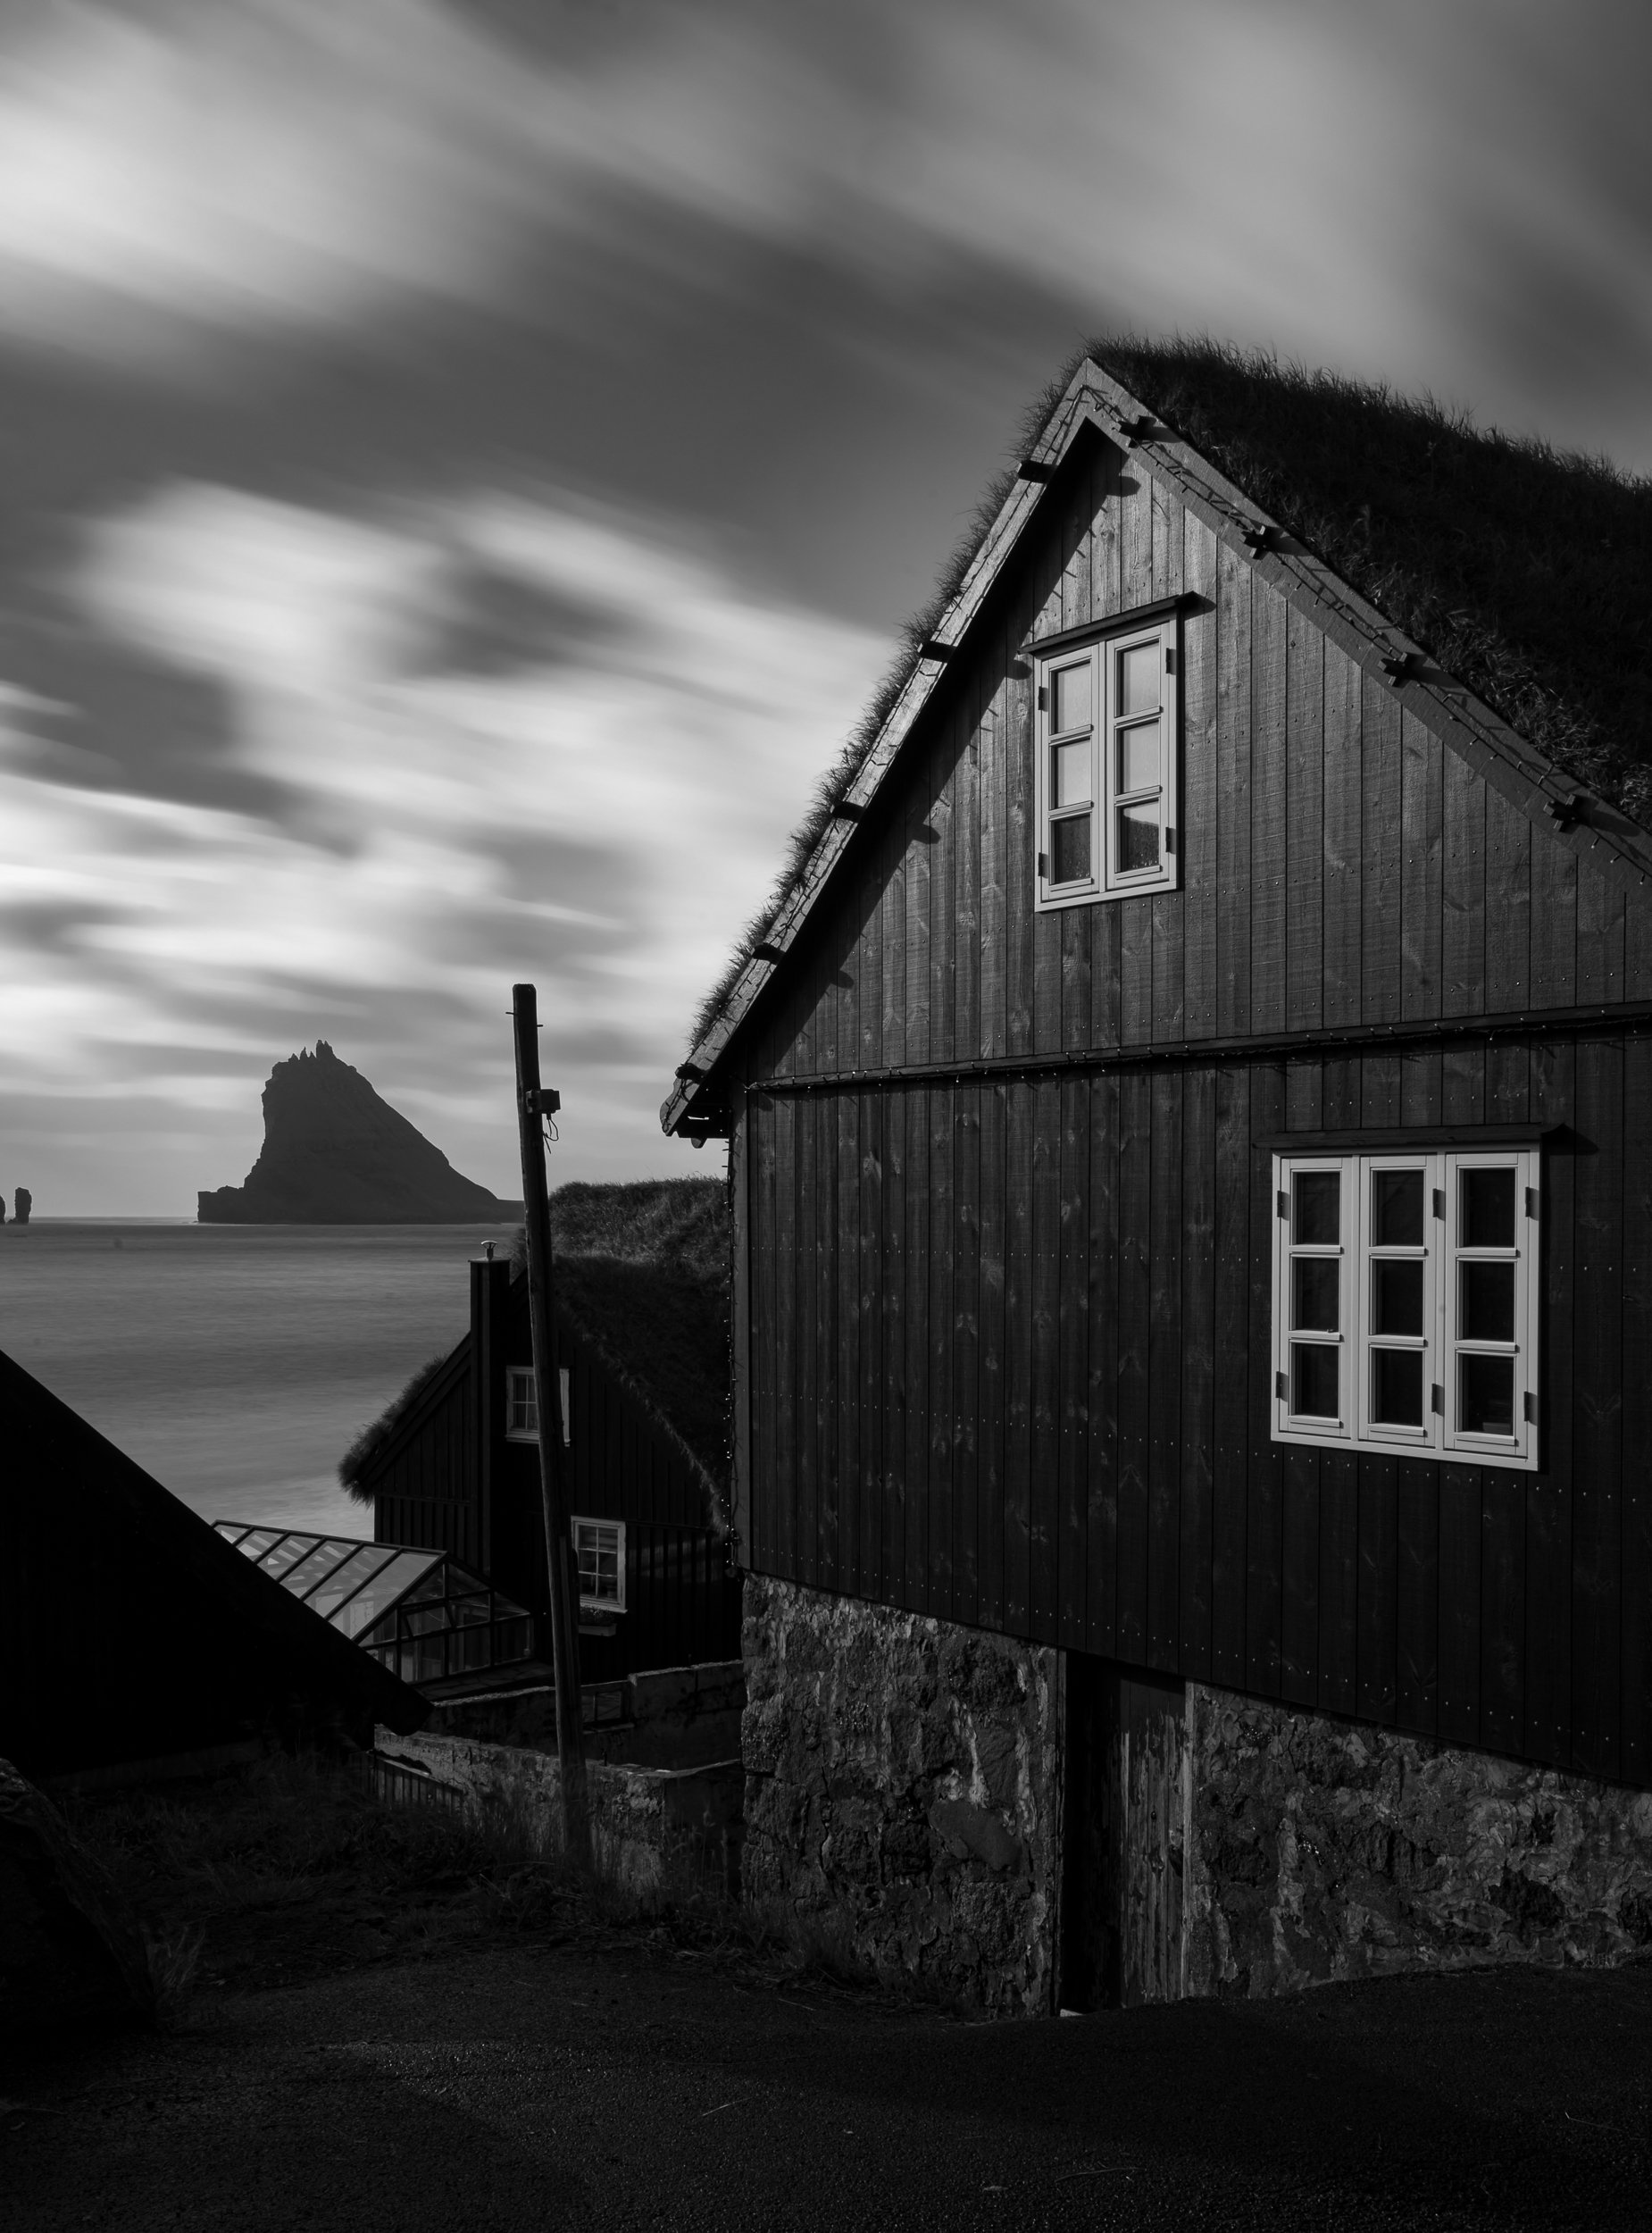
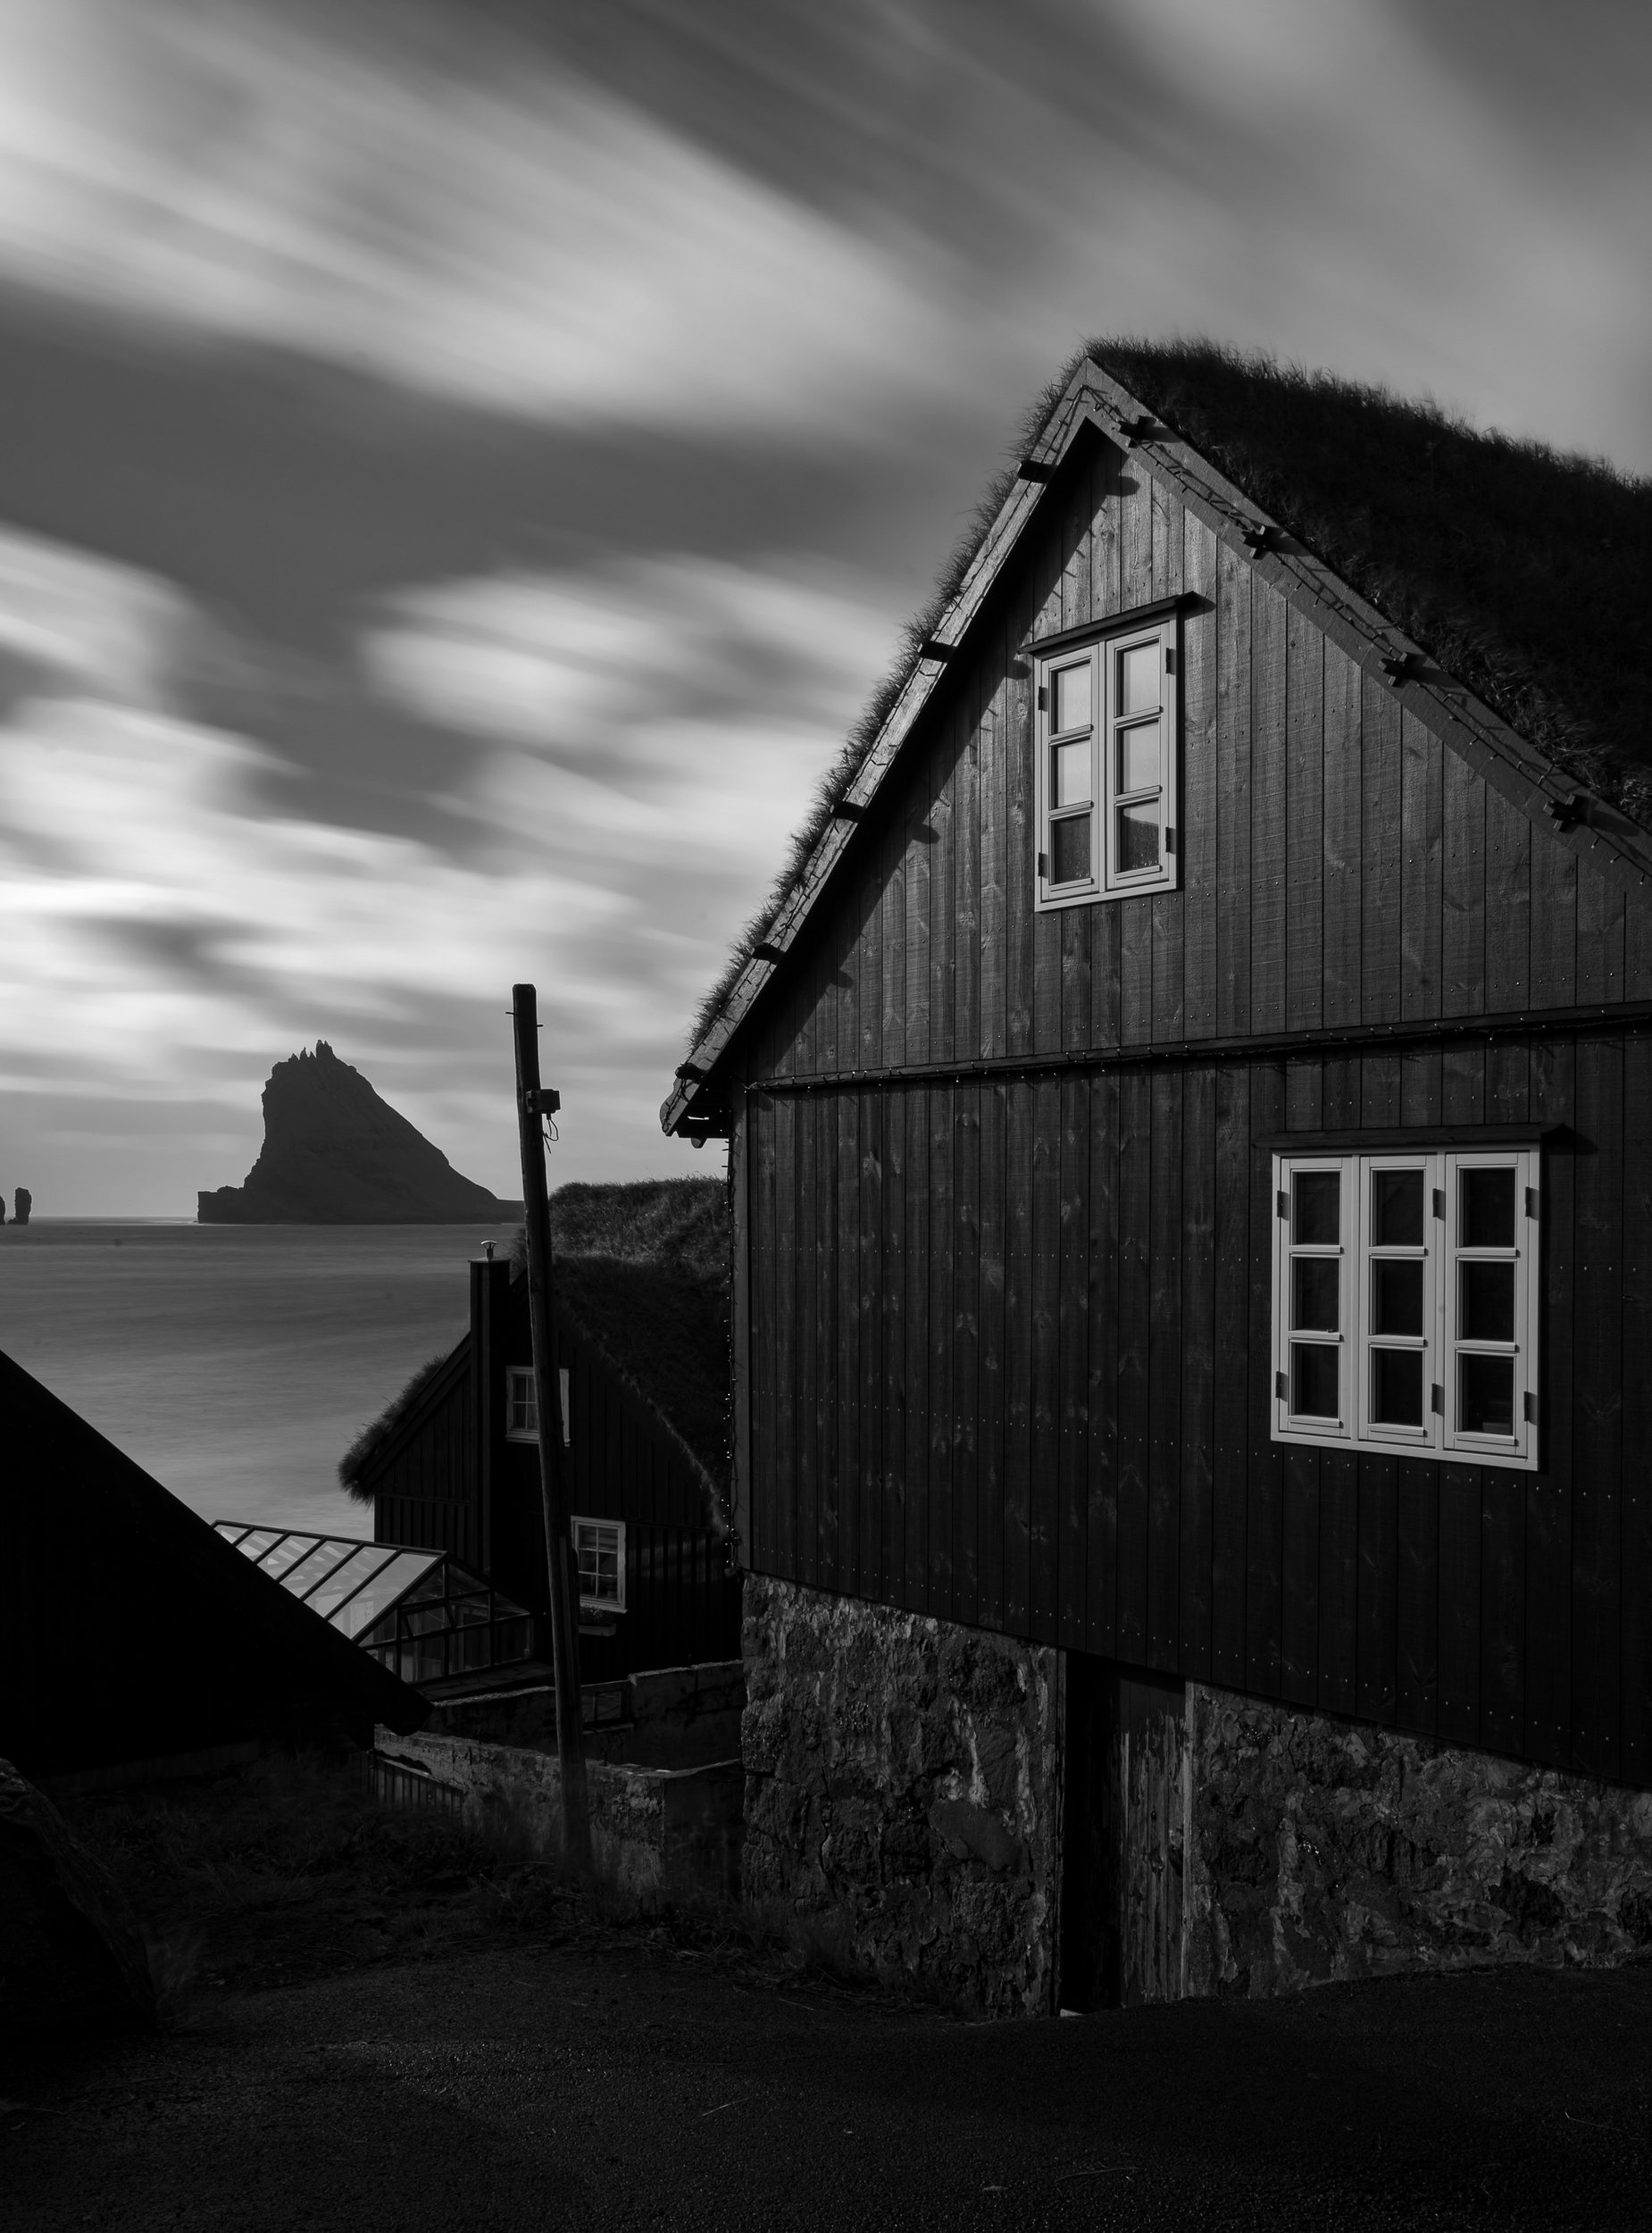
Faroe Islands. Nikon Z 6II with a Nikon 24-70mm f/2.8 lens at 27mm. 2 minutes, f/22, ISO 80.
Shifting Gears
One of the greatest pitfalls of landscape and astro-landscape photography is getting stuck on pre-conceived ideas. You may enter each night with an idea of exactly what you’ll see and how you’ll photograph it. This comes from being flooded with imagery from the most iconic places across the world captured under the most perfect conditions. So as we are getting ready to head out, we have already envisioned how our shots will look, and that is exactly what we expect and hope to happen.
So when the clouds roll in, obscuring our beloved stars, it’s time to shift gears. It’s really just a simple matter of moving your mindset from needing to capture a clear night sky to allowing yourself to experiment with the conditions above you. Don’t get caught in “I have to recreate this scene as I have seen it before”—instead embrace “What would it look like if I tried this?”
This mindset could be applied to most types of photography, and indeed it’s a worthwhile consideration for many situations. But for now, let’s focus on clouds at night. Once you pivot from preconceived notions, it’s easy to begin to experiment.
I was expecting to capture circumpolar star trails over Park Avenue in Arches National Park when the clouds set in. Shifting gears, I exposed for 5 minutes instead of a full hour, which would have resulted in very few stars and blanket of clouds. Nikon D4S with Nikon 16mm f/2.8 fisheye lens. 5 minutes, f/2.8, ISO 400.
Knowing that the clouds were sticking around all night, I chose to spend my time light painting this scene in Big Bend National Park rather than concentrating on the sky. Notice that the light-painted foreground dominates the scene while the sky is relegated to being the secondary subject. Nikon Z 6 with a Nikon 14-24mm f/2.8 lens at 14mm. 3 minutes, f/8, ISO 800.
Creating Cloud Trails
You can use clouds moving across a dark sky during a long exposure to create a very dynamic image.
For starters, try different shutter speeds. In some cases a 30-second exposure might do the trick, while in others you might need a 3-minute exposure to achieve the desired look.
Stopping down to f/10 from our typical wide nighttime apertures of f/2.8 or f/4 allowed me to expose for 2 minutes. This in turn provided time for me to light paint the moai of Rapa Nui (Easter Island). Nikon D4S with a Nikon 24-70mm f/2.8 lens at 60mm. 2 minutes, f/10, ISO 200.
It’s hard to say what shutter speed is best, because it varies in different conditions. Try different speeds to determine what may look best in your current situation. In the following example I tried multiple shutter speeds when shooting the Múlafossur Falls in the Faroe Islands.
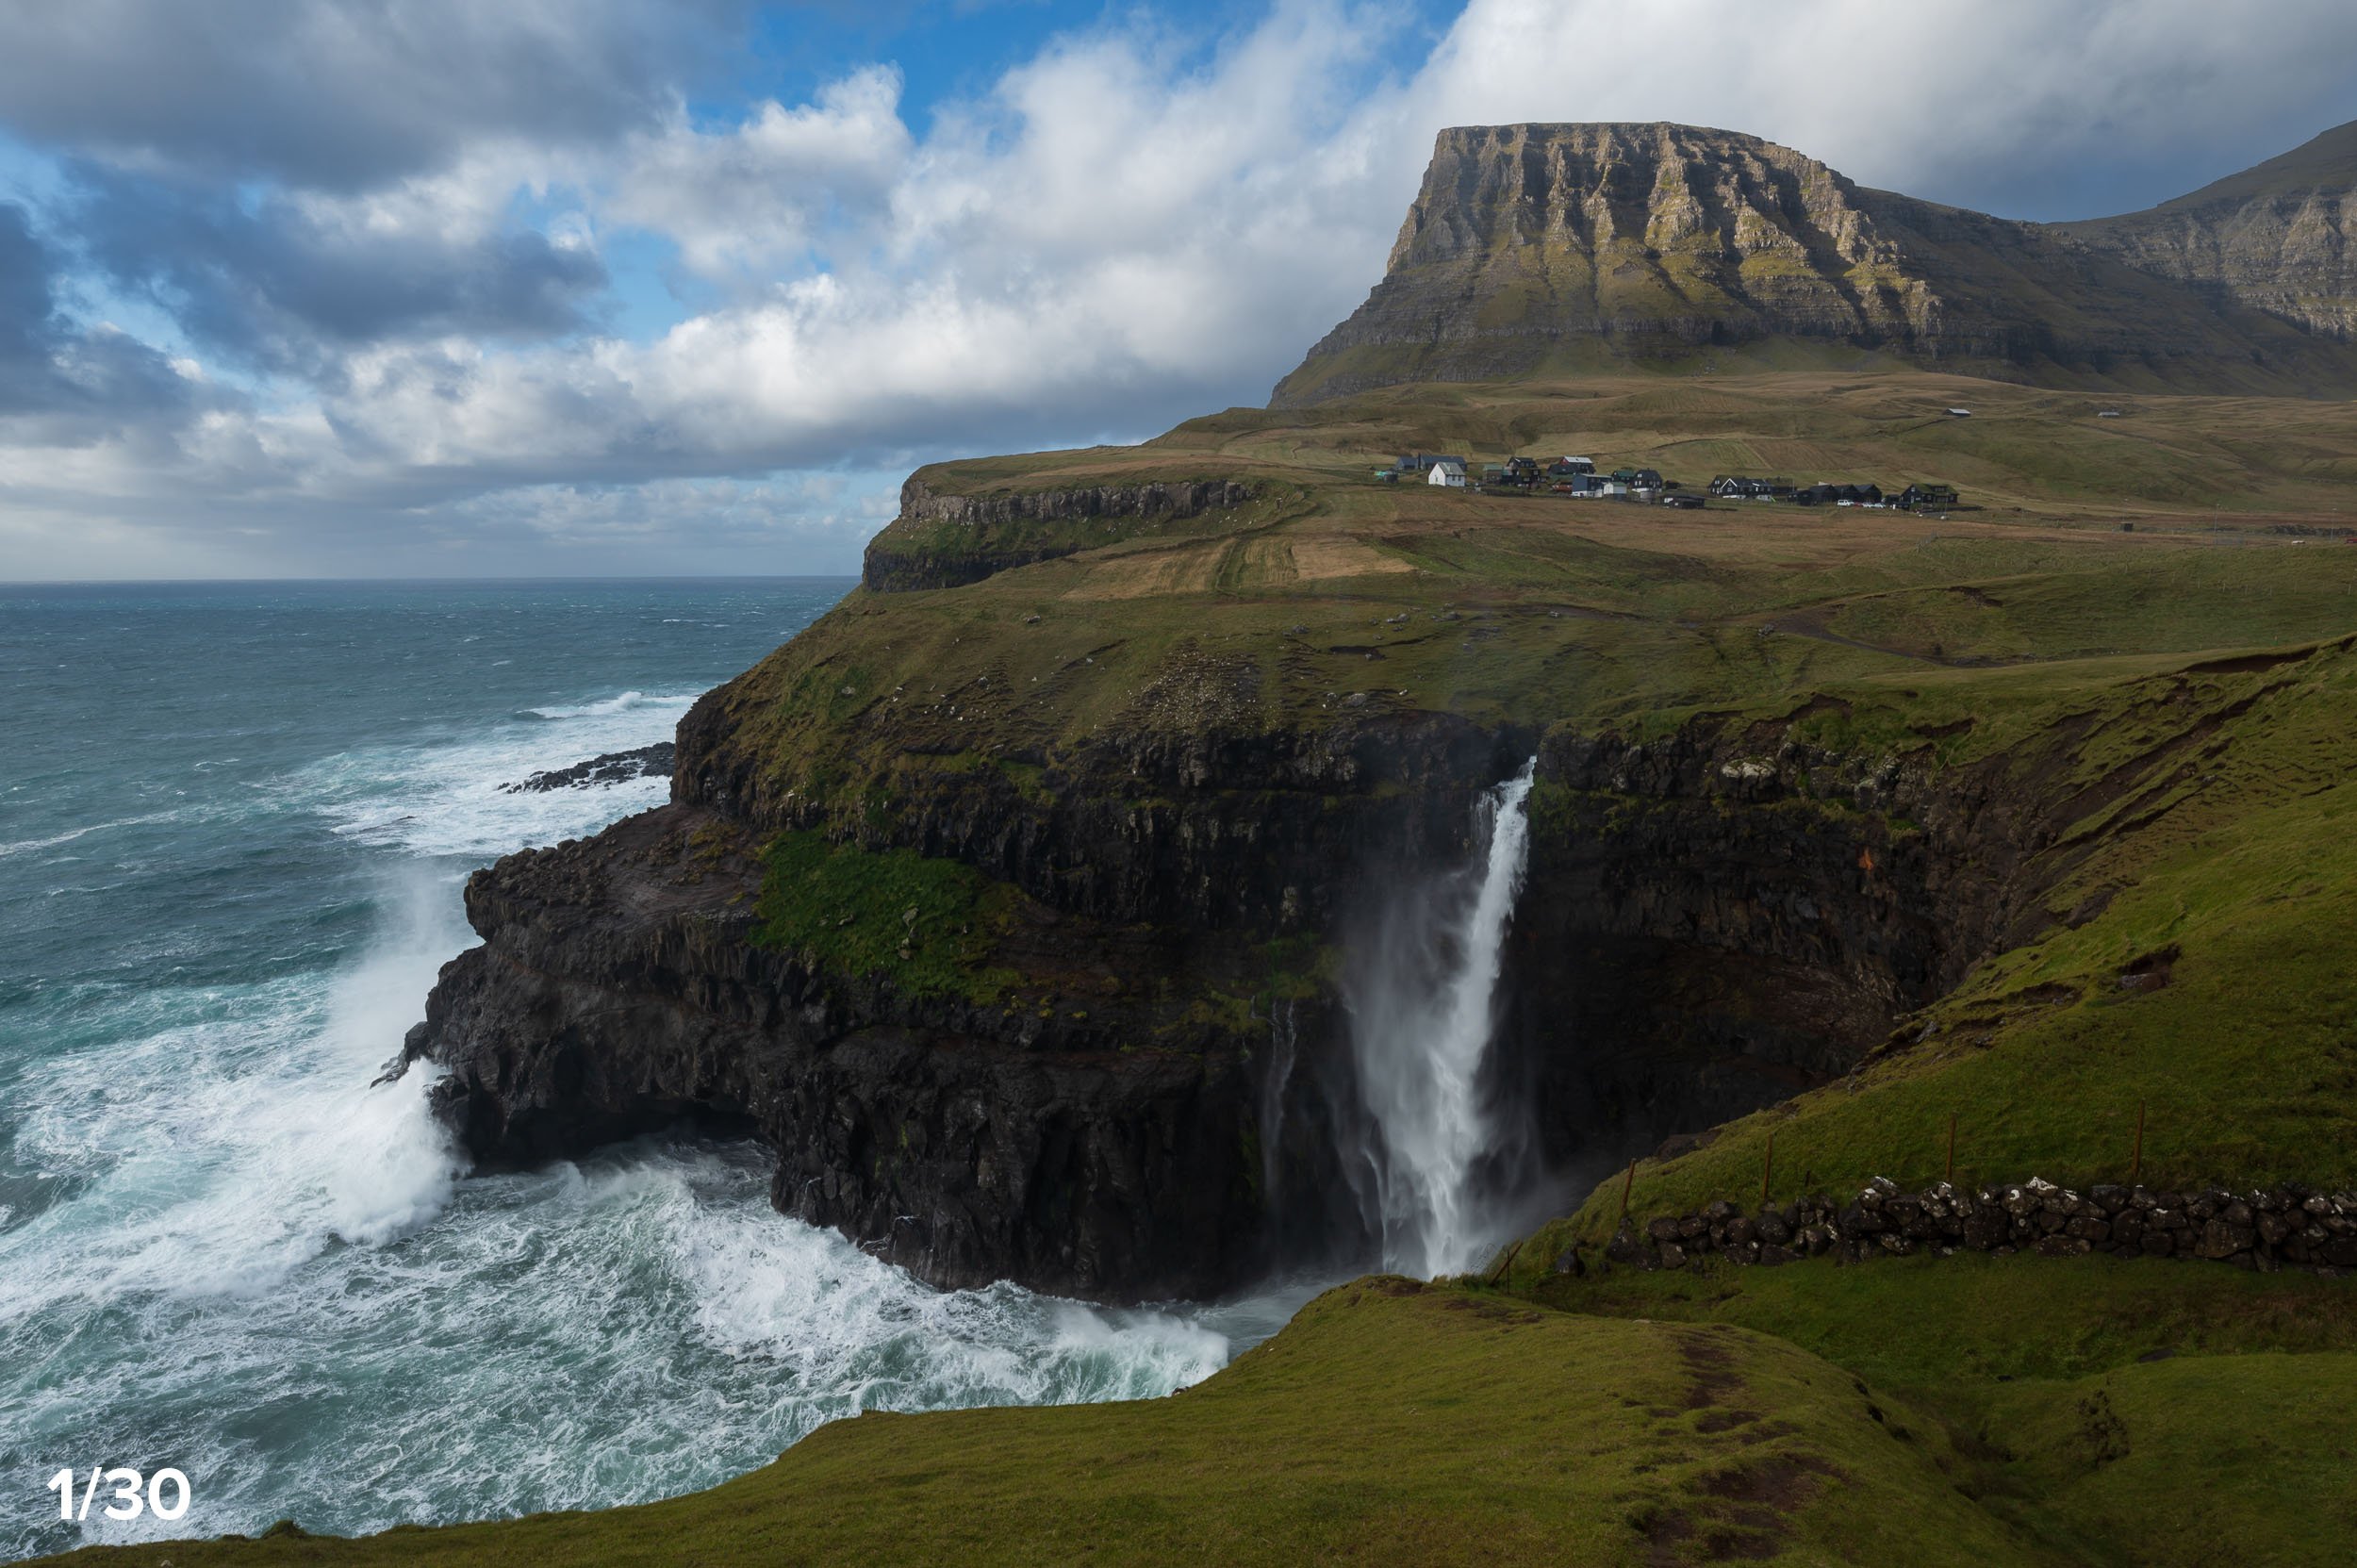
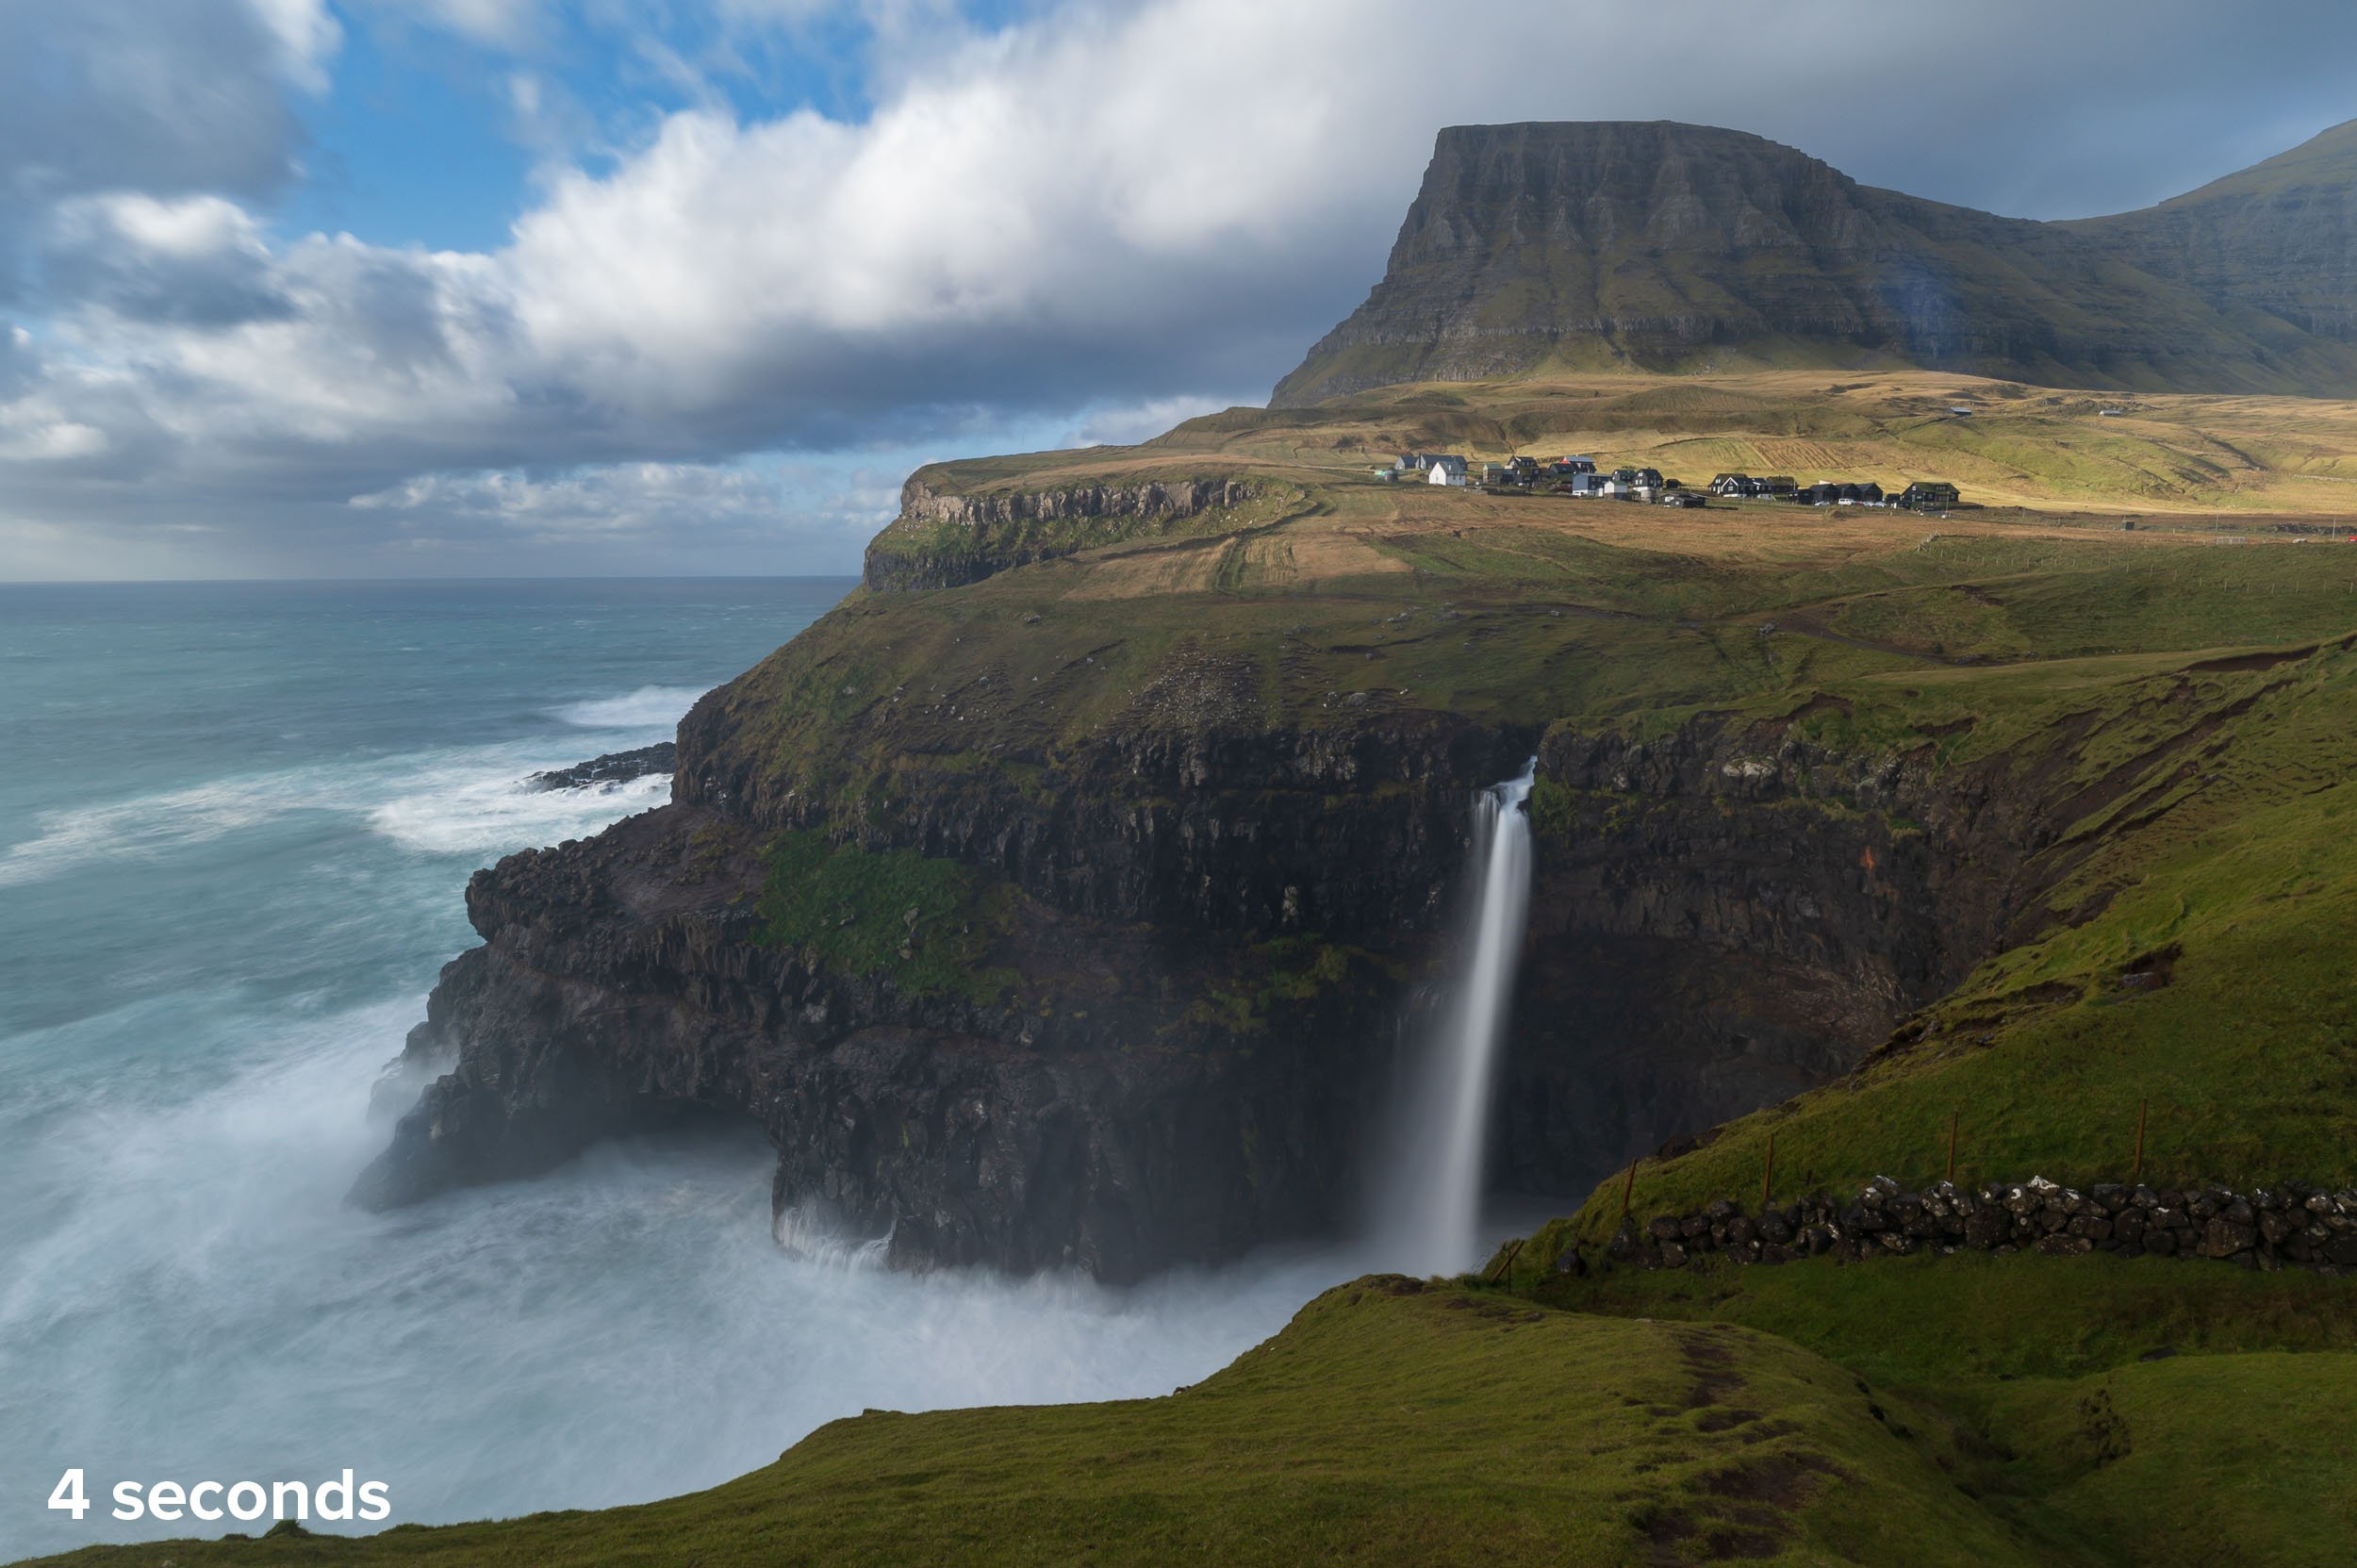
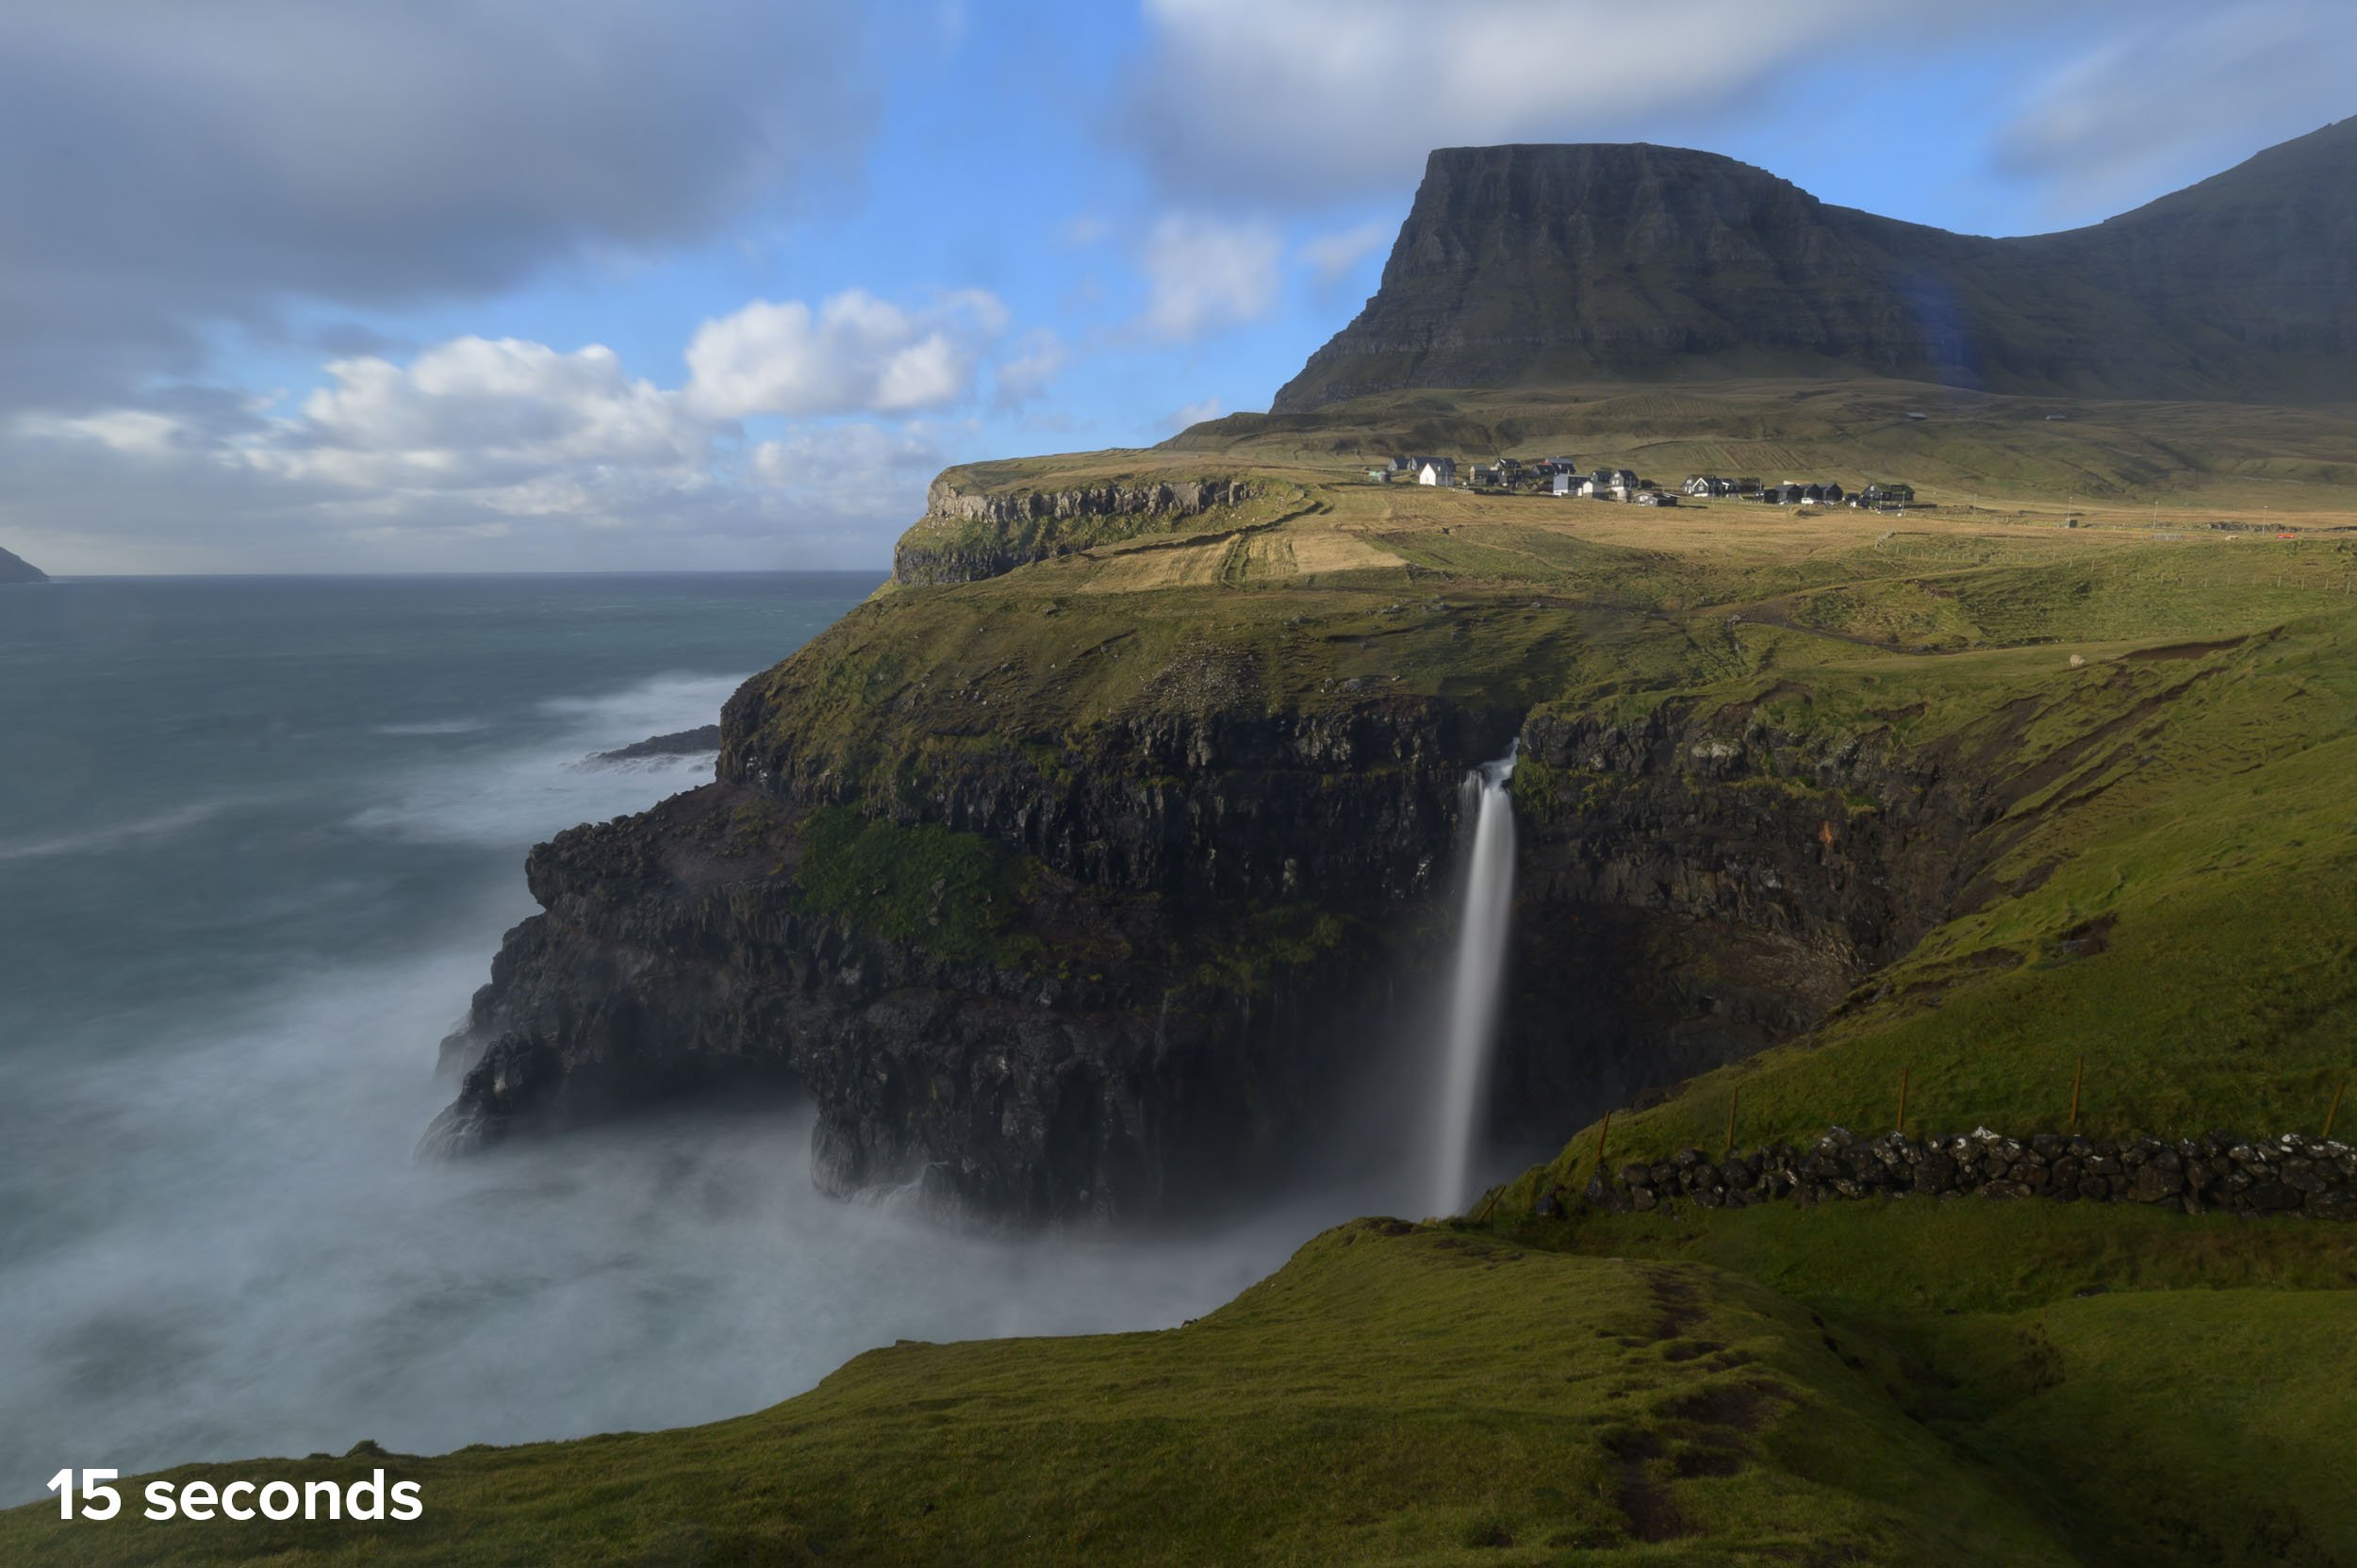
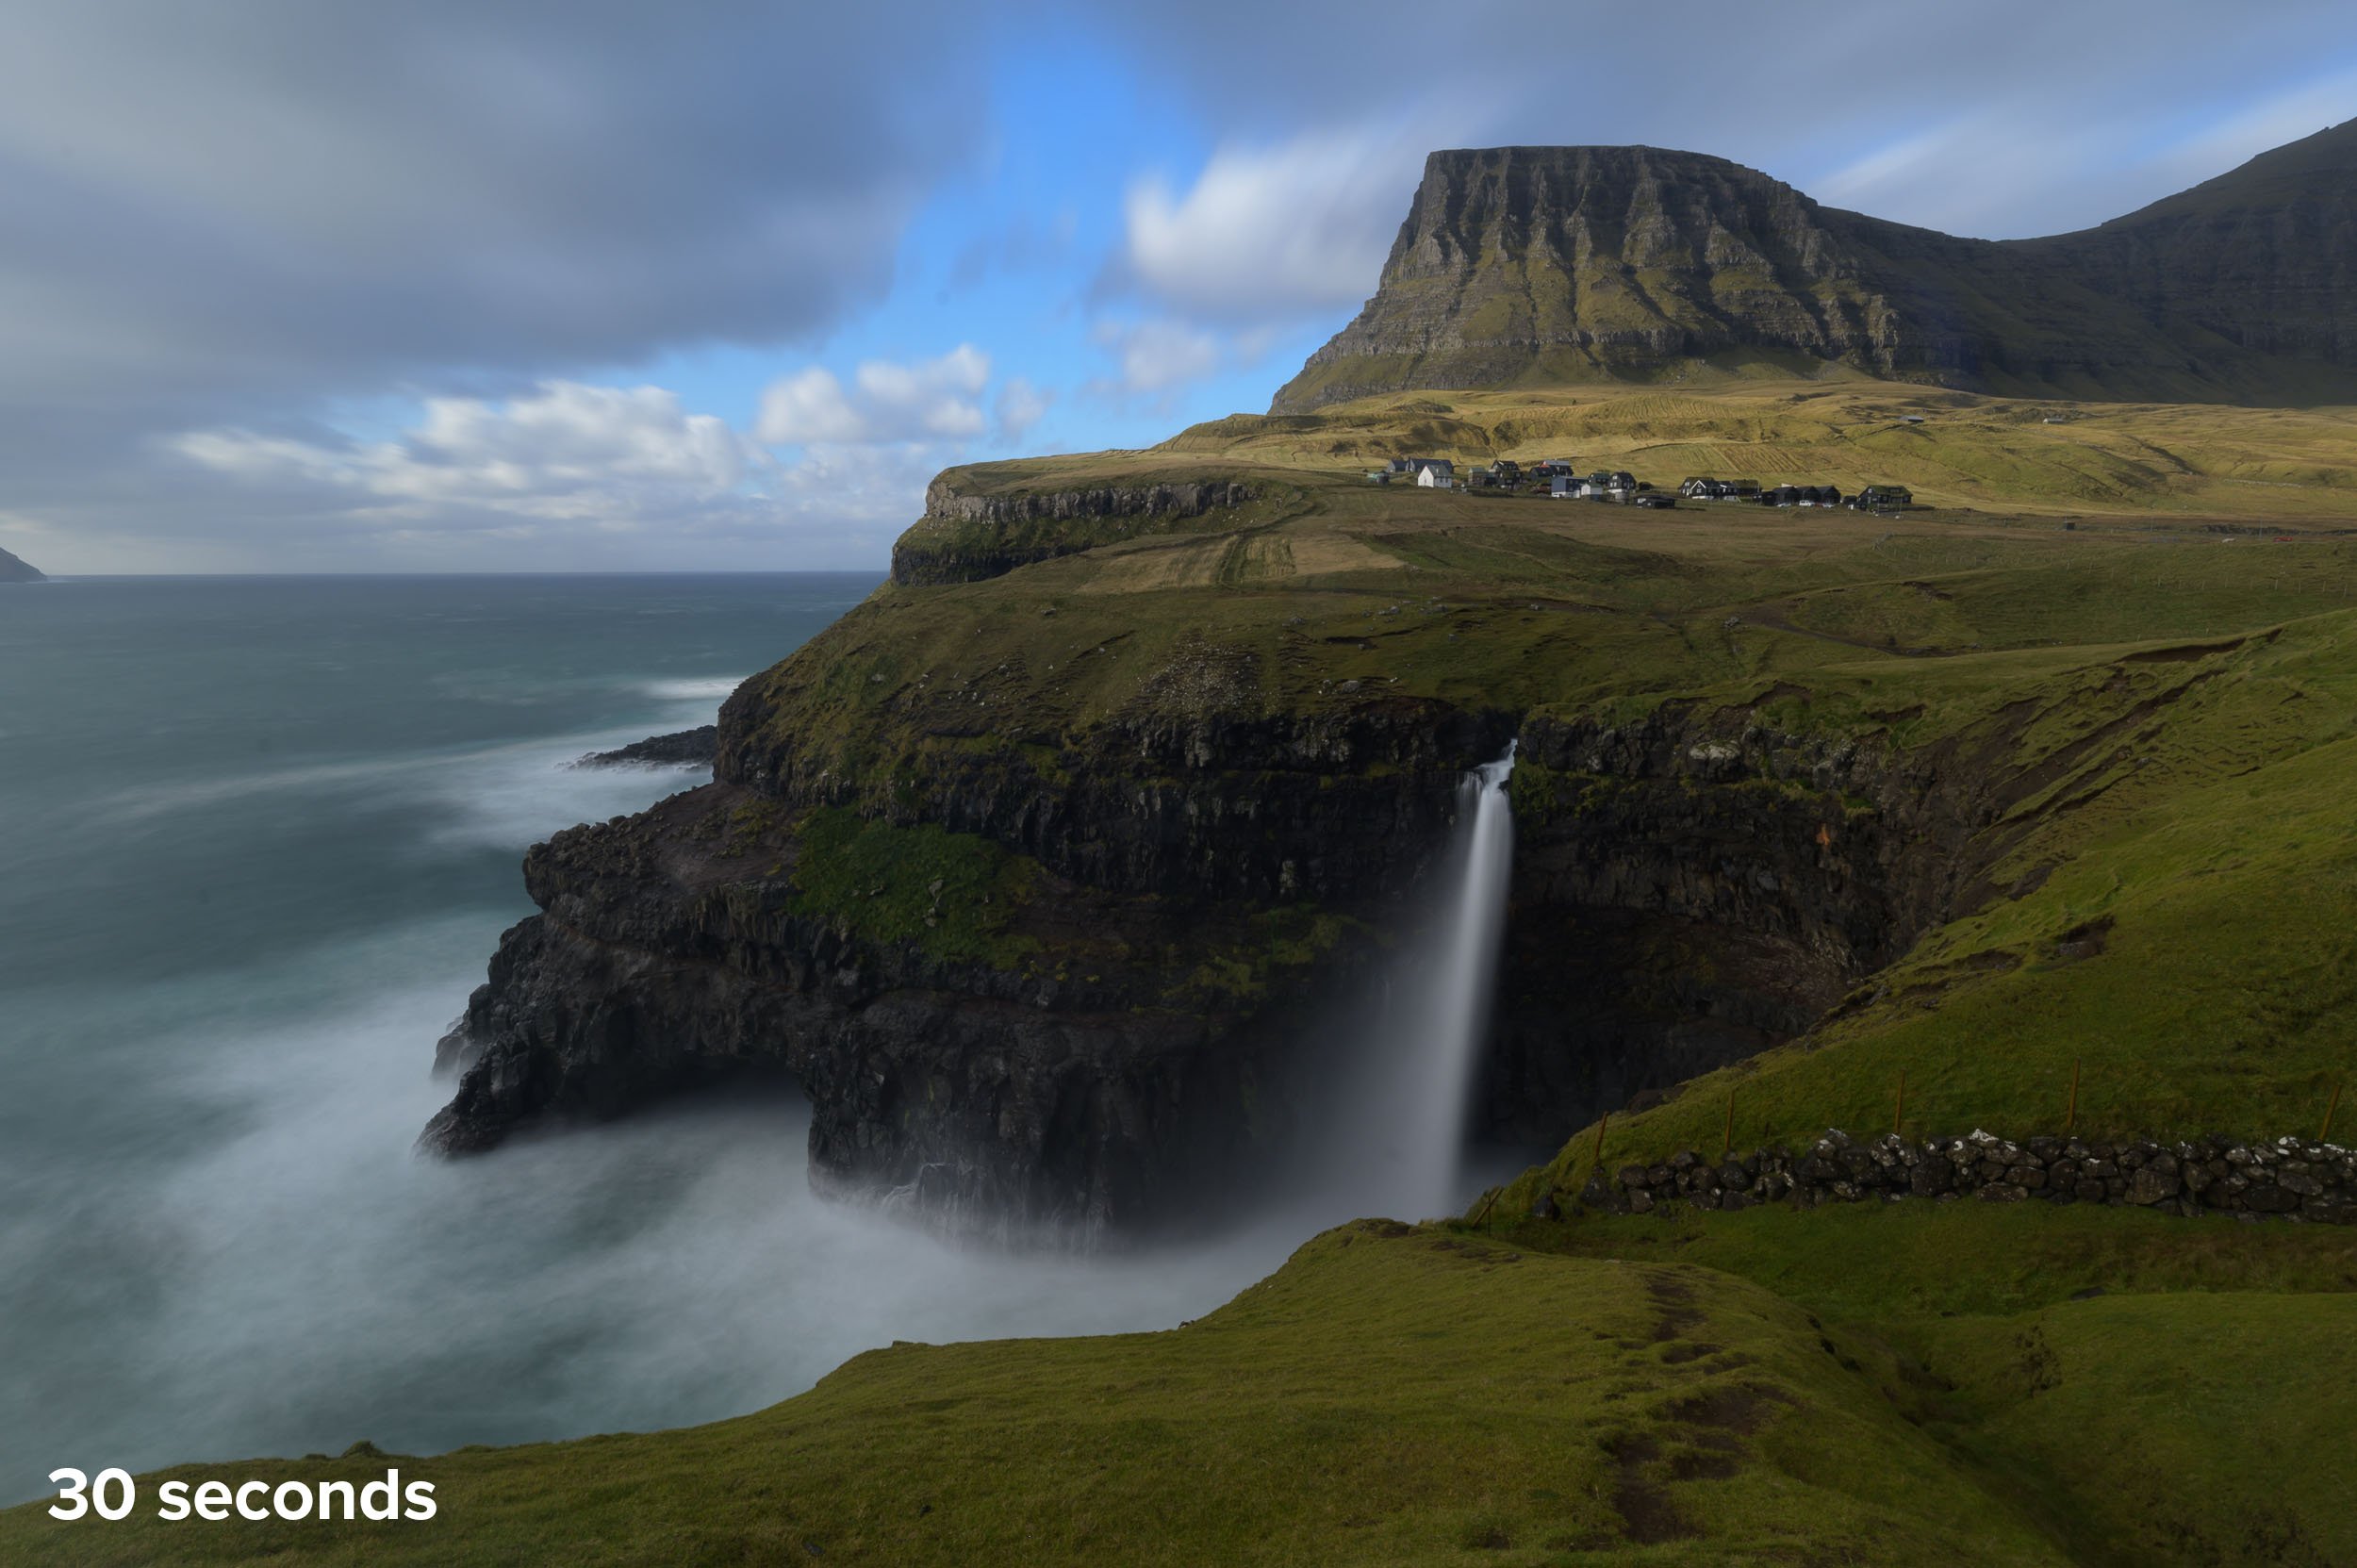
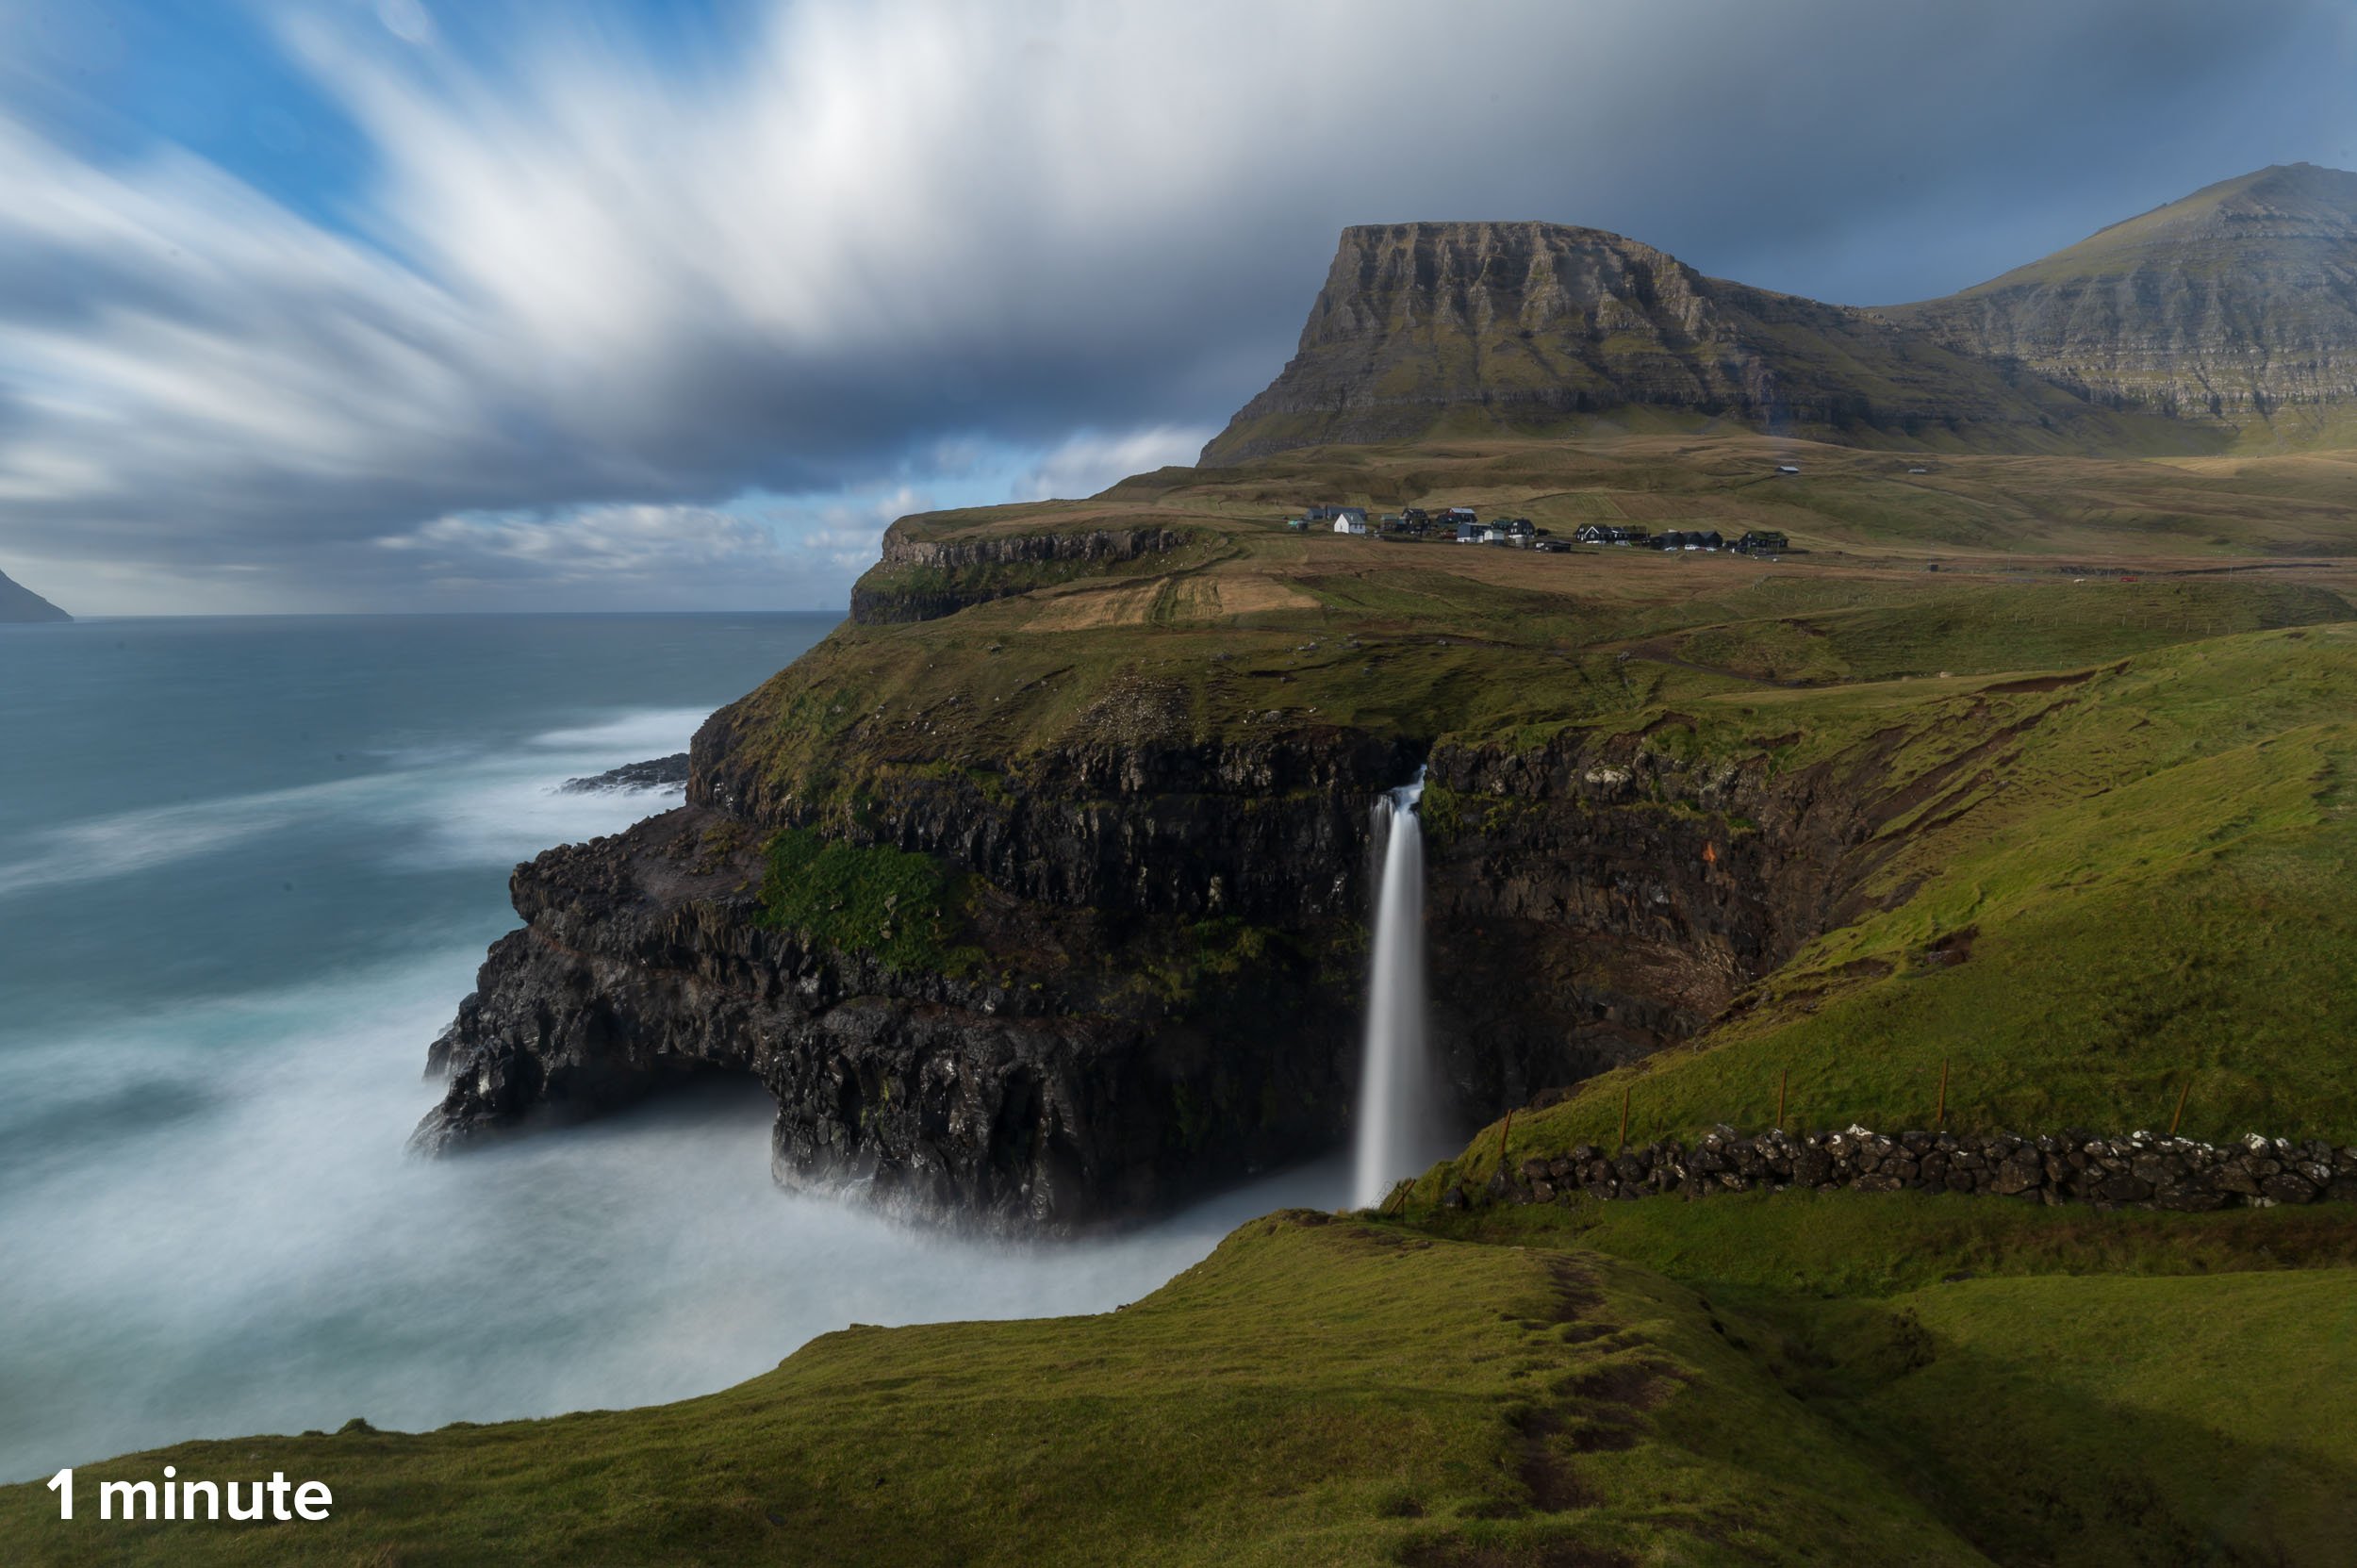
Múlafossur Falls, Faroe Islands. Nikon Z 6II with a Nikon 14-24mm f/2.8 lens at 18mm. f/14, ISO 50.
Since we are more concerned with the look of the clouds as opposed to getting pinpoint stars, we have more leeway in our exposure times.
For example, many folks think that night skies should be captured only at either a relatively short shutter speed (8-15 seconds) to render the stars as points or a very long shutter speed (15 minutes or more) to render them as long trails. While this is sound practice for clear skies, the presence of clouds allows for more flexibility. The main consideration here is the look of the clouds rather than the length of the star trails. Even a shorter speed of 2 minutes renders the stars as small streaks and is enough to let the viewer know the image was made at night.
Faroe Islands. Short exposures of 6, 8 or 10 seconds typically render the clouds as an awkward blur. The stars may be points, but the blur of the clouds is not enough to render a surreal quality. This exposure appears to be a mistake as the clouds are not sharp enough or blurry enough. Nikon Z 6II with a Nikon 24-70mm f/2 lens at 27mm. 6 seconds, f/2.8, ISO 6400.
A 1- minute exposure gives the clouds enough time to streak across the sky. Nikon Z 6II with a Nikon 24-70mm f/2.8 lens at 27mm. 1 minute, f/4, ISO 400.
Clouds as a Compositional Element
Once we begin to add clouds into our photographs (day or night), we need to start thinking about them as an important compositional element. Their structure and placement within the frame are important. The cloud streaks will read as lines, and therefore we consider them just as we would any other lines in a photograph.
Horizontal lines crossing the frame from left to right or right to left tend to have more of a calming effect. They seem to be more at rest. Since these types of lines don’t add a lot of energy, they require a dominant foreground as a contrast, or you could further the calm mood by choosing a more subtle foreground.
Horizontal lines tend to have a calming effect as they streak over dynamic Miami. Nikon D4S with a Nikon 70-200mm f/2.8 lens at 70mm. 30 seconds, f/10, ISO 800 (foreground) and 3 minutes, f/10, ISO 160 (sky), blended in Adobe Photoshop.
Diagonal lines and converging lines have much more visual energy. They are caused when clouds are moving directly at us (converging) or just off to our right or left (diagonal). This type of cloud movement can become very dramatic elements in our compositions. The use of wide- and superwide-angle lenses helps accentuate these lines.
Clouds moving from the lower left of the frame to the upper right create diagonal lines over the Chisos Basin in Big Bend National Park. Nikon Z 6 with a Nikon 24-70mm f/2.8 lens at 24mm. 2 minutes, f/11, ISO 800.
Converging lines are created when the clouds are moving directly at you as in this scene from Glacier National Park. Nikon Z 6 with a Nikon 24-70mm f/2.8 lens at 24mm. 3 minutes, f/4, ISO 200.
Bettering Your Odds
Since our clouds will play such an important role in our final composition and it’s nearly impossible to predict the final look of an exposure, it’s important to shoot lots of frames.
I begin by experimenting with shutter speed. Once I find a shutter speed that renders the clouds in a manner I find complementary to the rest of the scene, it’s time to shoot that same shutter speed over and over again. Each frame will capture the clouds in a different position, so by shooting more frames, we increase the chance of getting a pleasing position for the clouds.
I shot the following photos at the same exposure. Notice how the clouds complement the scene more in some frames than in others.
Nikon Z 6II with a Nikon 24-70mm f/2.8 lens at 33mm. 30 seconds, f/20, ISO 50.
Cloud Height and Moon
Another consideration when creating cloud streaks is the moon phase and location. Clouds in the night sky will be greatly enhanced with some moonlight. If there is no moon or city lights to illuminate them, the clouds will be far less visible and tend to simply obscure our sky rather than add an interesting element. A quarter to full moon is a good time to capture cloud trails over the landscape.
The full moon to camera left illuminated the clouds as well as Going to the Sun Mountain in Glacier National Park. Nikon D850 with a Nikon 14-24mm f/2.8 lens at 21mm. 6 minutes, f/4, ISO 100.
Shooting straight into the full moon over Lady Boot Arch in the Alabama Hills of California. Nikon D4S with a Nikon 14-24mm f/2.8 lens at 14mm. 4 minutes, f/5.6, ISO 200.
Cloud type and height can vary dramatically, as will the effect in the resulting photographs. Lower-elevation clouds have a much stronger impact on the composition than higher-elevation clouds. The higher clouds tend to become more transparent during long exposures. This type of cloud can be a subtle element in your final frame.
High clouds can be a subtle element when long exposures render them as more transparent, as seen in this photo from Zion National Park. Nikon D4 with a Nikon 24mm f/2.8 lens. 4 minutes, f/5.6, ISO 200.
Where to Find the ‘Best’ Clouds
Where can you find clouds? Anywhere, really. But those dramatic low clouds are more common the closer you get to the poles—that is, generally regions closer to the Arctic and Antarctic tend to have more low clouds, and the regions closer to the tropics tend to have more high clouds.
You’ll also find more low clouds around the ocean. This is why I love doing cloud photography in places like the Faroe Islands, where we’re running a workshop this coming May. Not only is Faroe close to the ocean (being a remote island, after all), but it’s also at a relatively northern latitude. That combination can make for nights filled with dramatic low clouds racing across the beautiful landscapes. You can see that in many of the photos accompanying this post.
High clouds are fun to work with too, so if you like that effect, know that you’re more likely to see them as you get to locations either closer to the equator or more inland from the ocean.
And of course you’re more likely to see low clouds in the mountains—because you’re at a higher elevation, closer to the clouds!
Post-Processing
Simply capturing the clouds may not be the end of the process. Often we’ll need to enhance them in Lightroom to bring out their true drama.
A common technique is to create a mask for the sky and increase Dehaze. This will add the needed overall contrast to the sky that brings out the structure of the clouds. However, along with this contrast comes a deeper saturation and darkening of the whole sky. The simple fix is when increasing the Dehaze slider, follow up with decreasing Saturation and increasing Exposure.
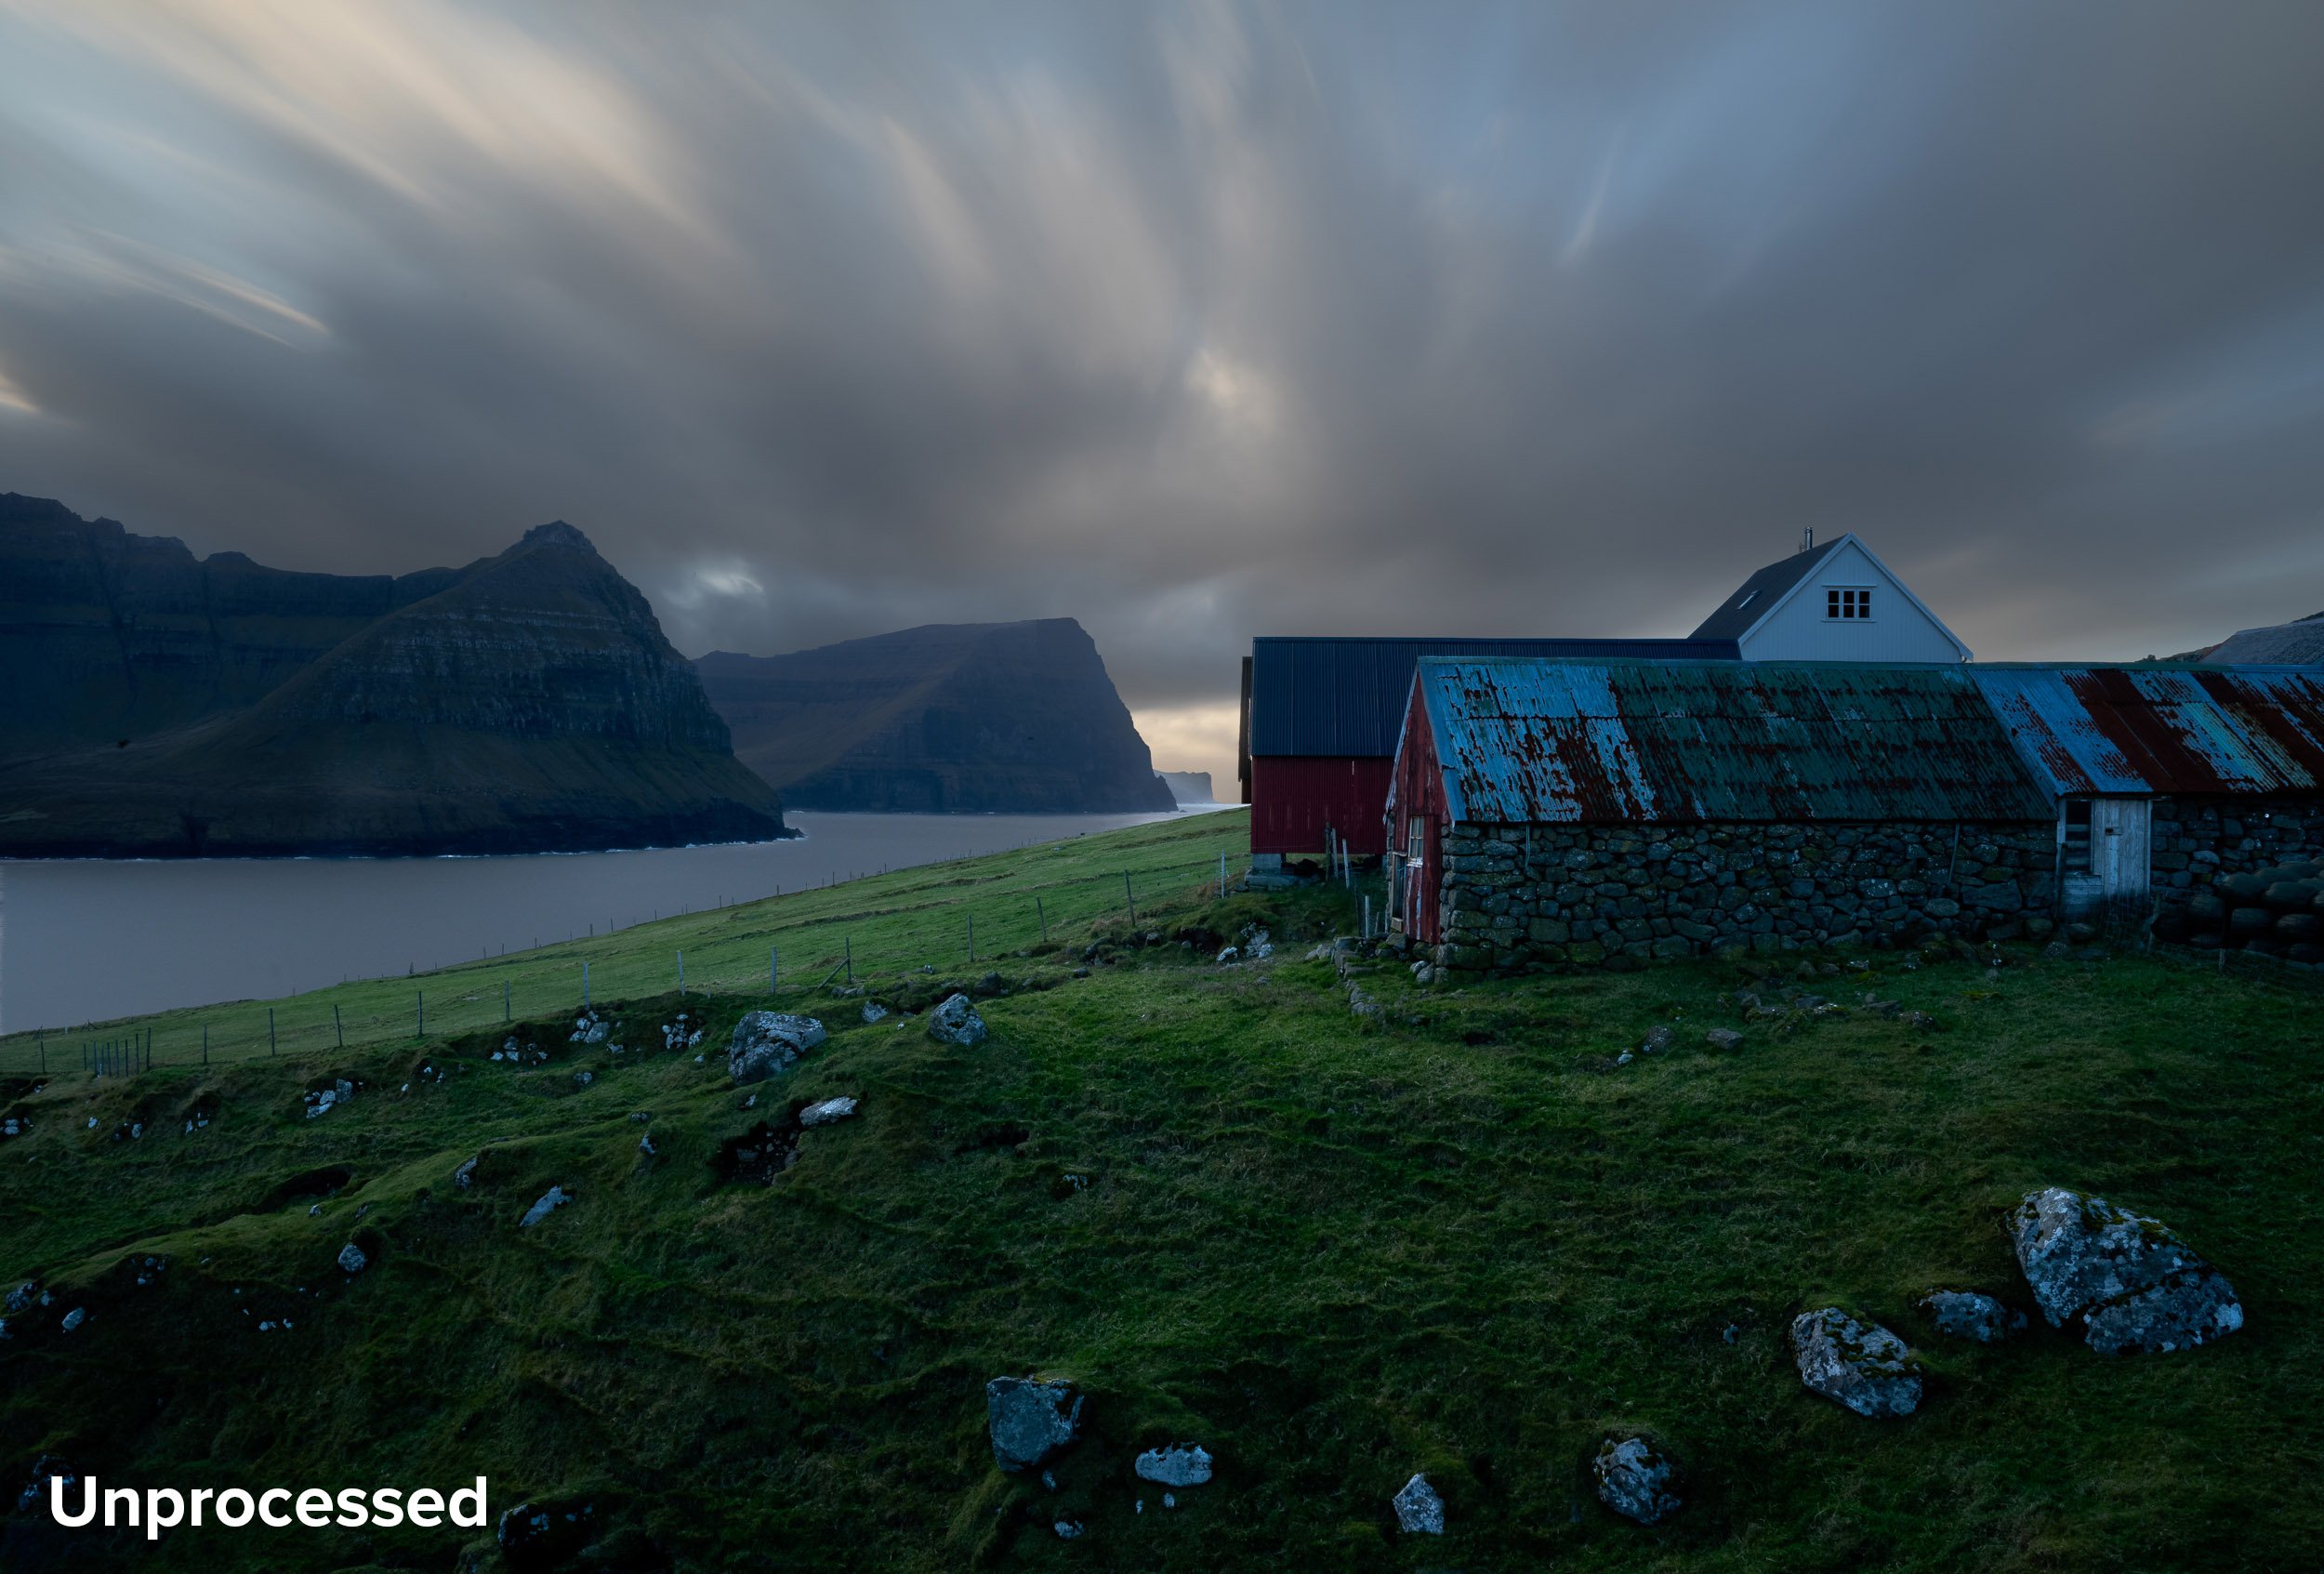
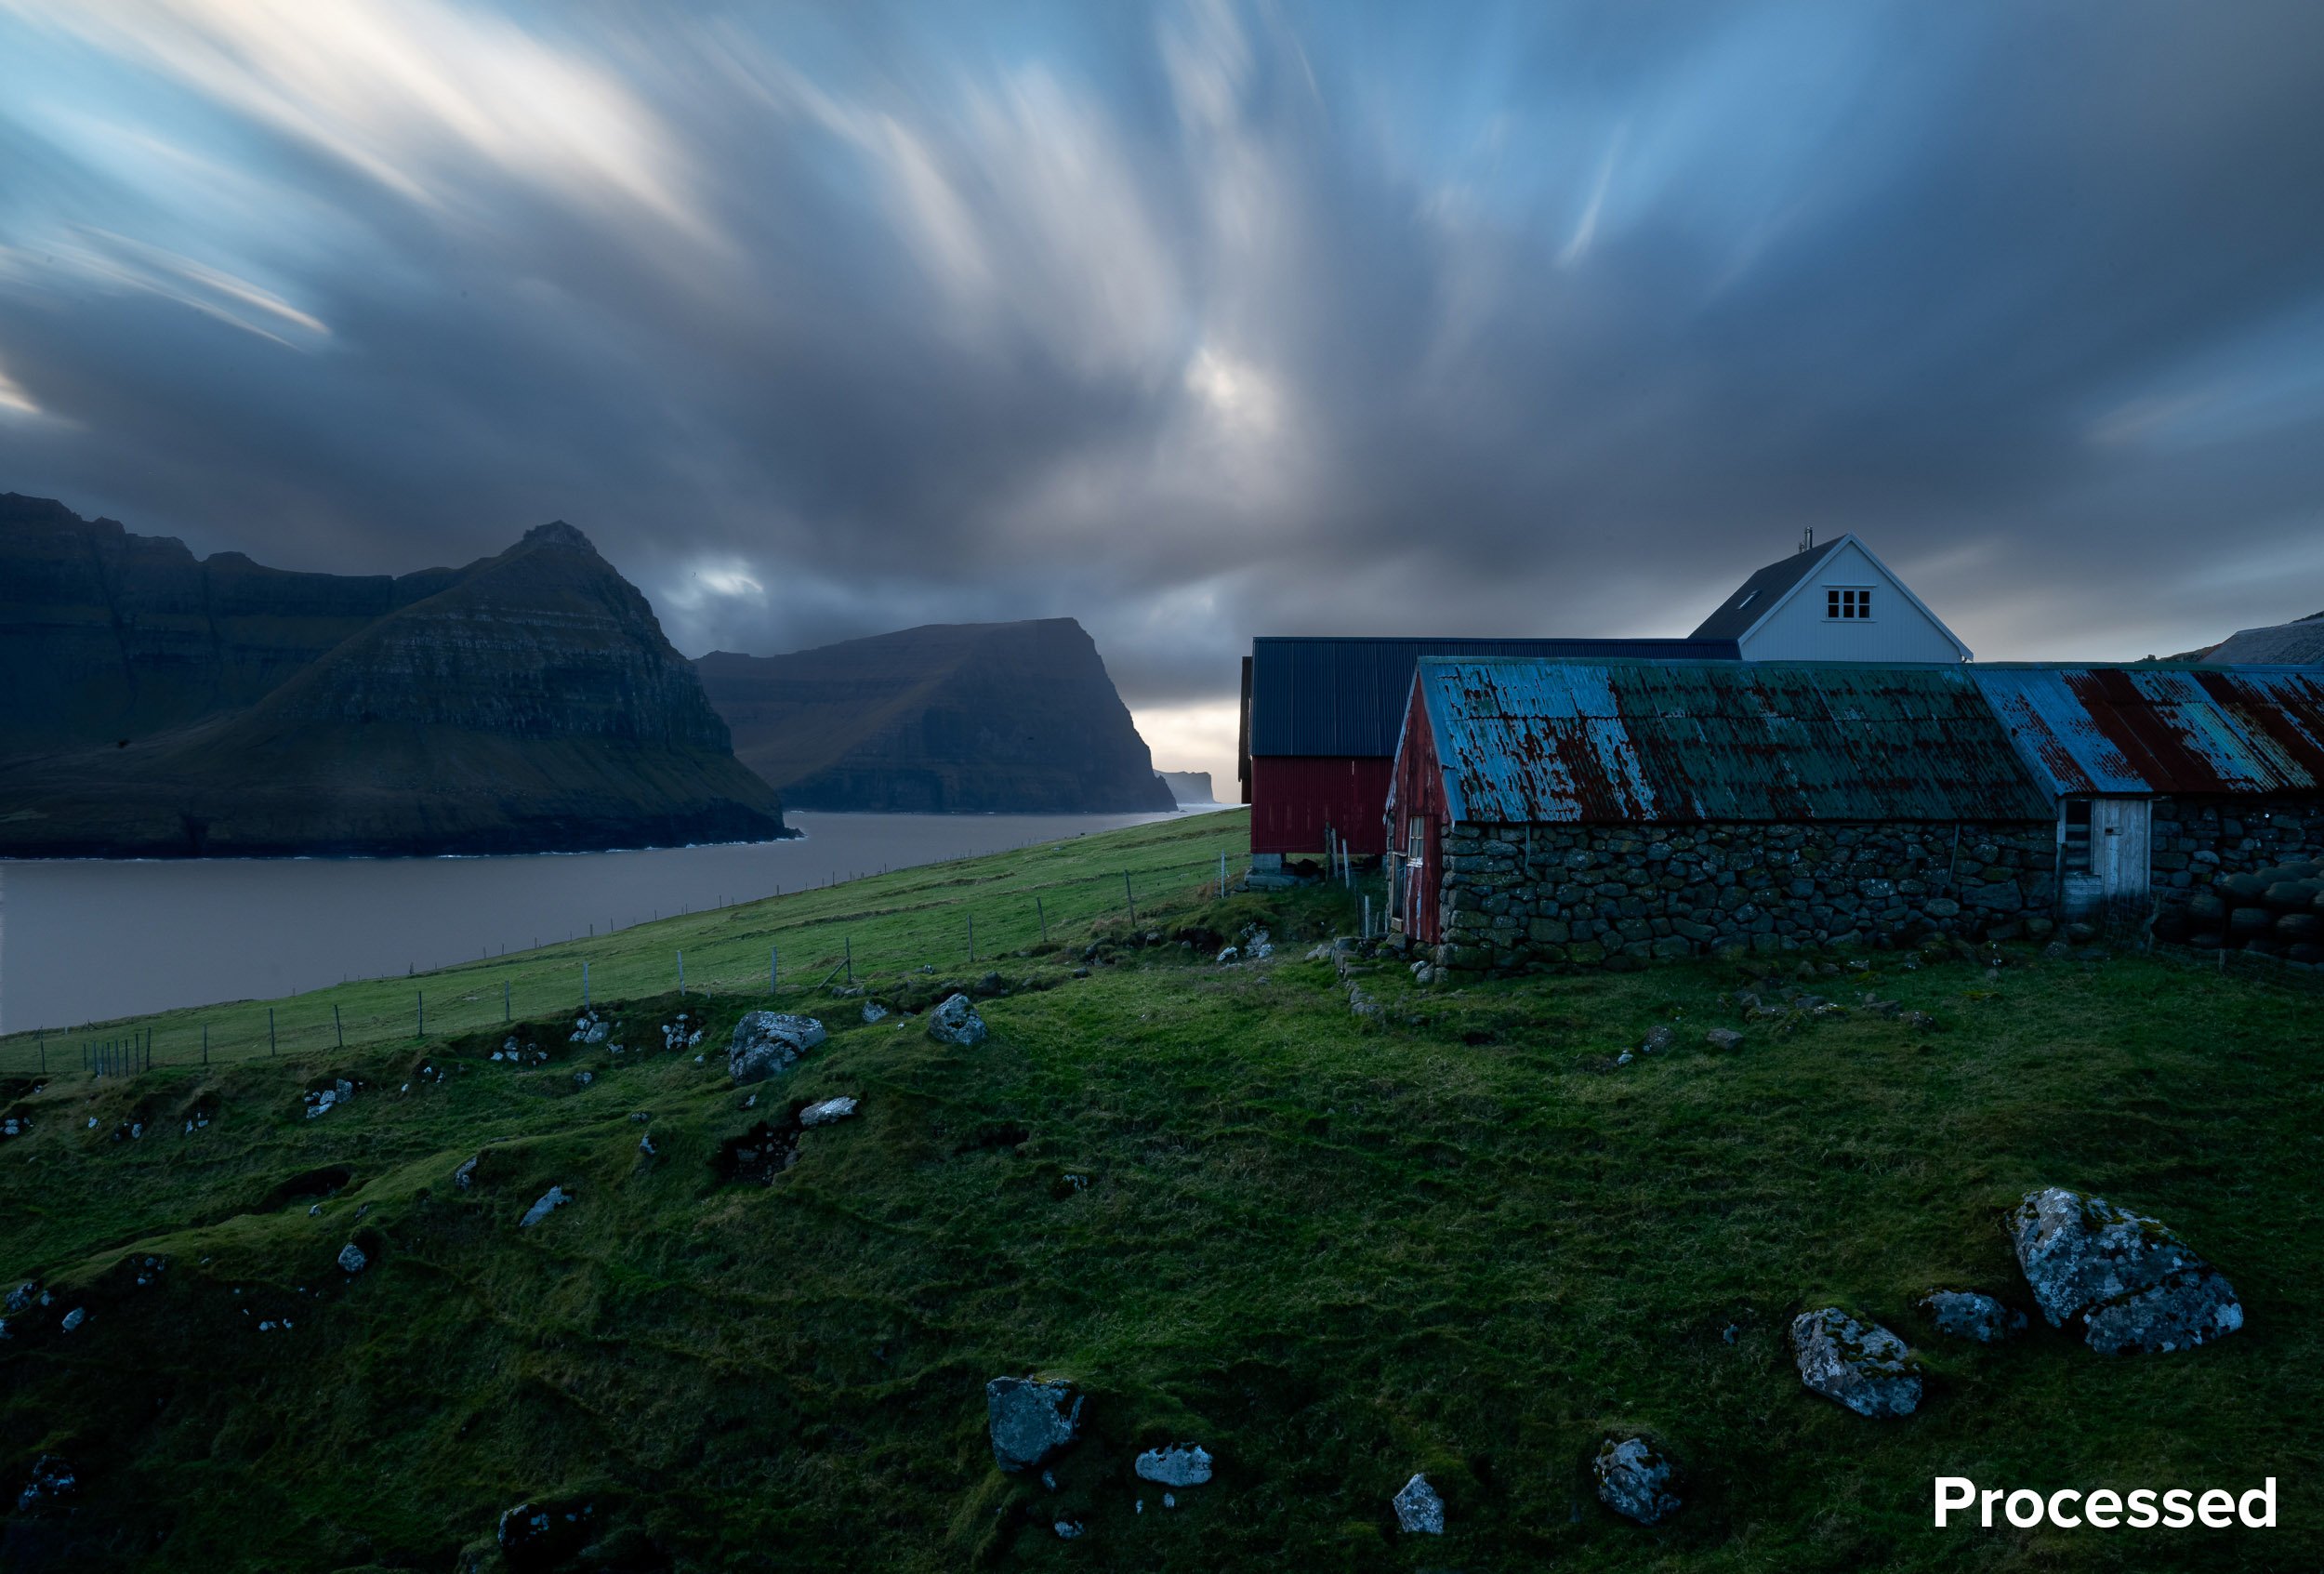
For this image from Faroe Islands, I created a sky mask in Lightroom and increased Dehaze to +55. This oversatured the blues and darkened the entire sky, so, still within the sky mask, I increased Exposure to +1.00 and decreased Saturation to -25.
Wrapping Up
I hope this gives you some motivation to stay out even when the sky isn’t clear. Don’t pack it up and go home when the clouds roll in. Embrace them! Experiment with different shutter speeds and lots of frames to create those beautiful cloud streaks across your night skies.
If this inspires you to shoot clouds at night (or if you’re already doing it), then we’d love to see the results! Share in the comments below, or on our Facebook page, or on Instagram (tag us @nationalparksatnight #nationalparksatnight #seizethenight).