How We Got the Shot: Teamwork at Desert Queen Ranch in Joshua Tree NP

Desert Queen Ranch panorama, as team-photographed by our workshop, April 25, 2017. Photograph by Deane Hall, Jeannine Henebry, Romit Maity, Kurt O’Hare, Priscilla Spencer, Lance Keimig and Chris Nicholson.

If you’ve read our blog in the past, you may have seen our series “How I Got the Shot.” This time we’re doing something similar, but a little different: How We Got the Shot. It’s about how a group of workshop students came together to collaborate on a night image that took a lot of planning, communication and teamwork.

The Location

This week we completed our first workshop of 2017, at California’s Joshua Tree National Park. On the last night of the workshop, we were granted special access to Desert Queen Ranch (otherwise known as Keys Ranch), a spot that’s usually locked off from park visitors. The only way to see the site is to attend a group tour. Night access is rare, but we were able to bring our workshop photographers to the ranch through a partnership with Desert Institute, the educational outreach program at Joshua Tree.

Desert Queen Ranch is a goldmine for photographers ...

The ranch sits in a rocky canyon in the Mojave Desert. From 1910 to 1969 it was home to Bill Keys, who, along with his wife Frances, raised a family there and lived off the scarce resources of the environment.

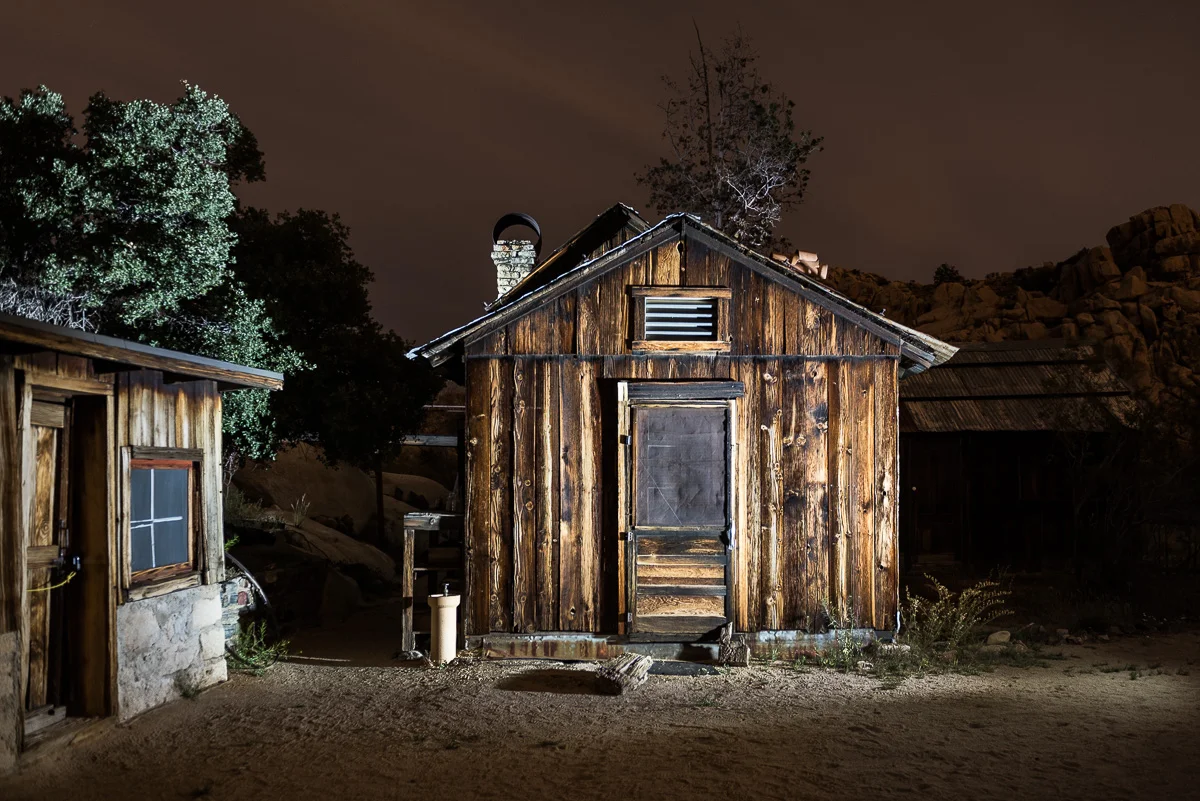
Today the ranch is preserved as a National Historic Register Site. It’s a goldmine for photographers, offering subjects such as the small-frame clapboard buildings, old cars in disrepair, mining and ranching equipment, hand-hewn wood fencing, and more. There’s also the same subjects you find in the rest of the park, including rock formations, lizards and snakes, cacti, and Joshua trees and other yuccas.

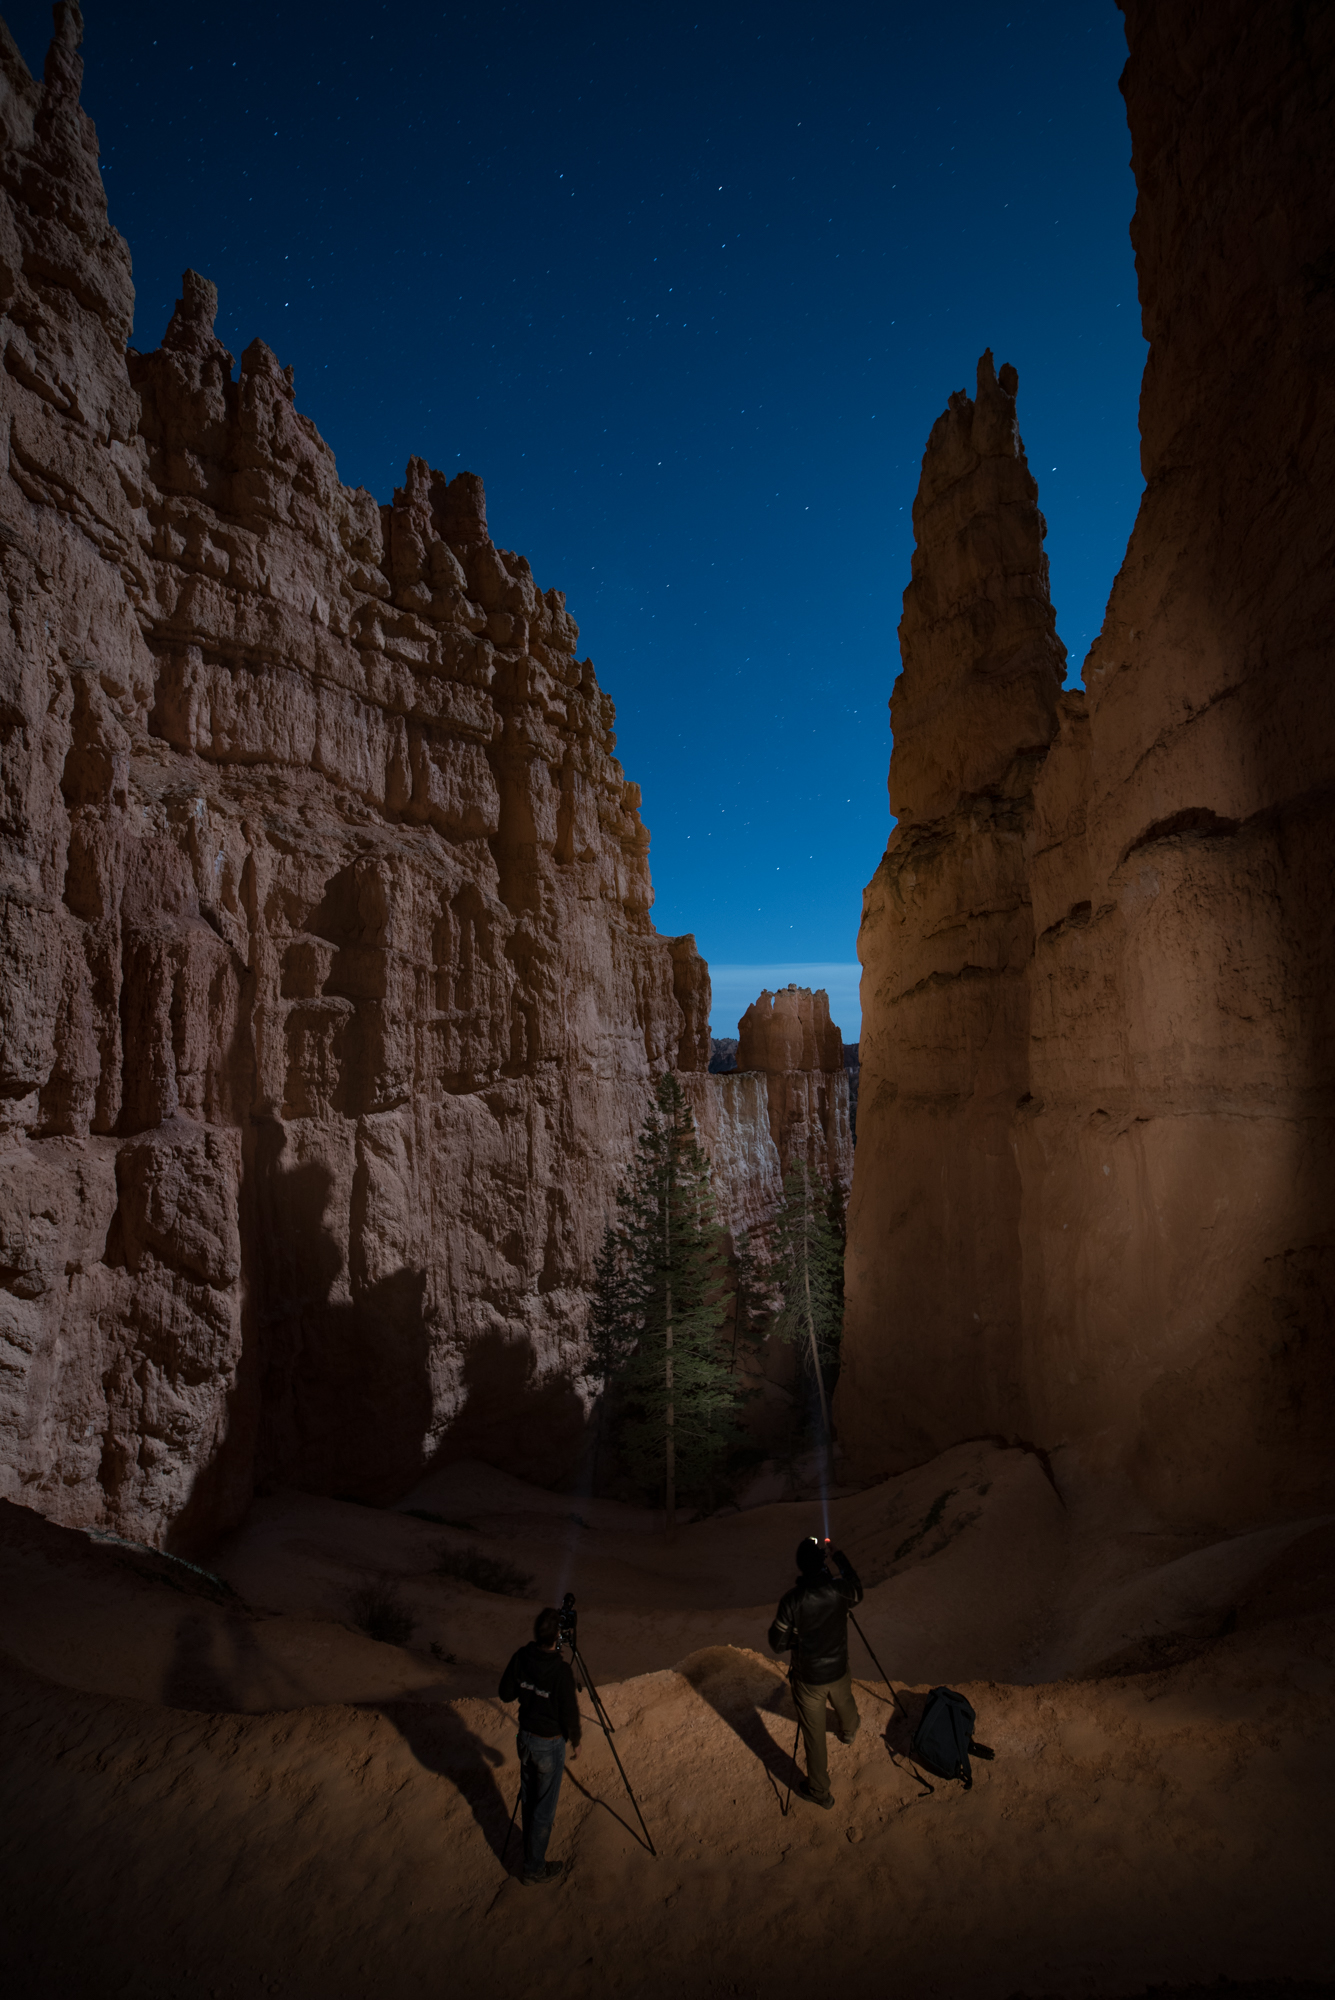
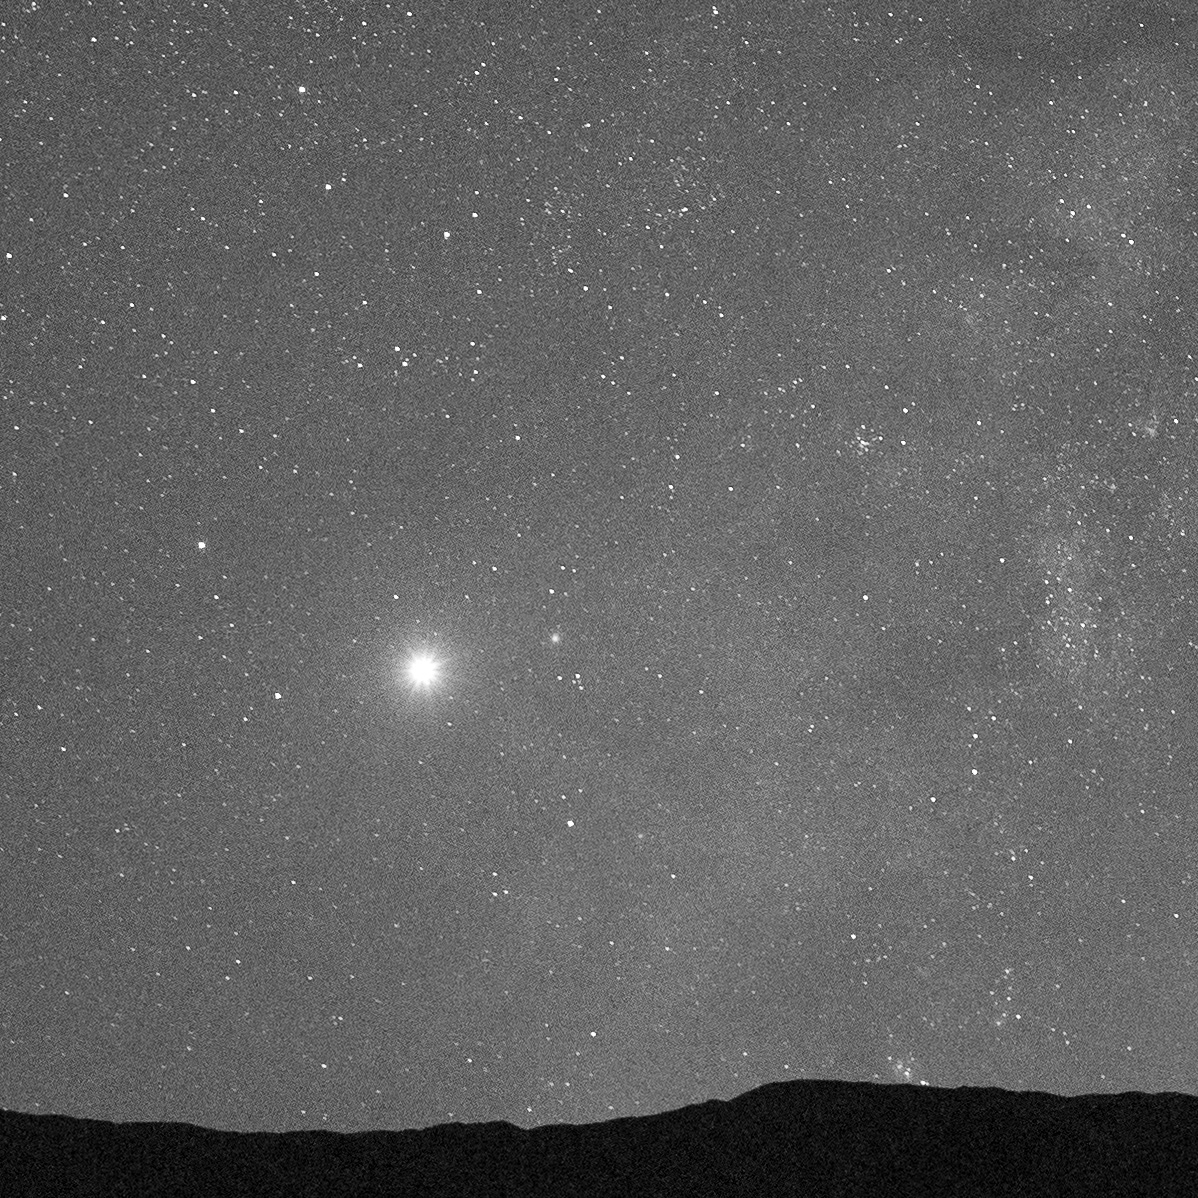
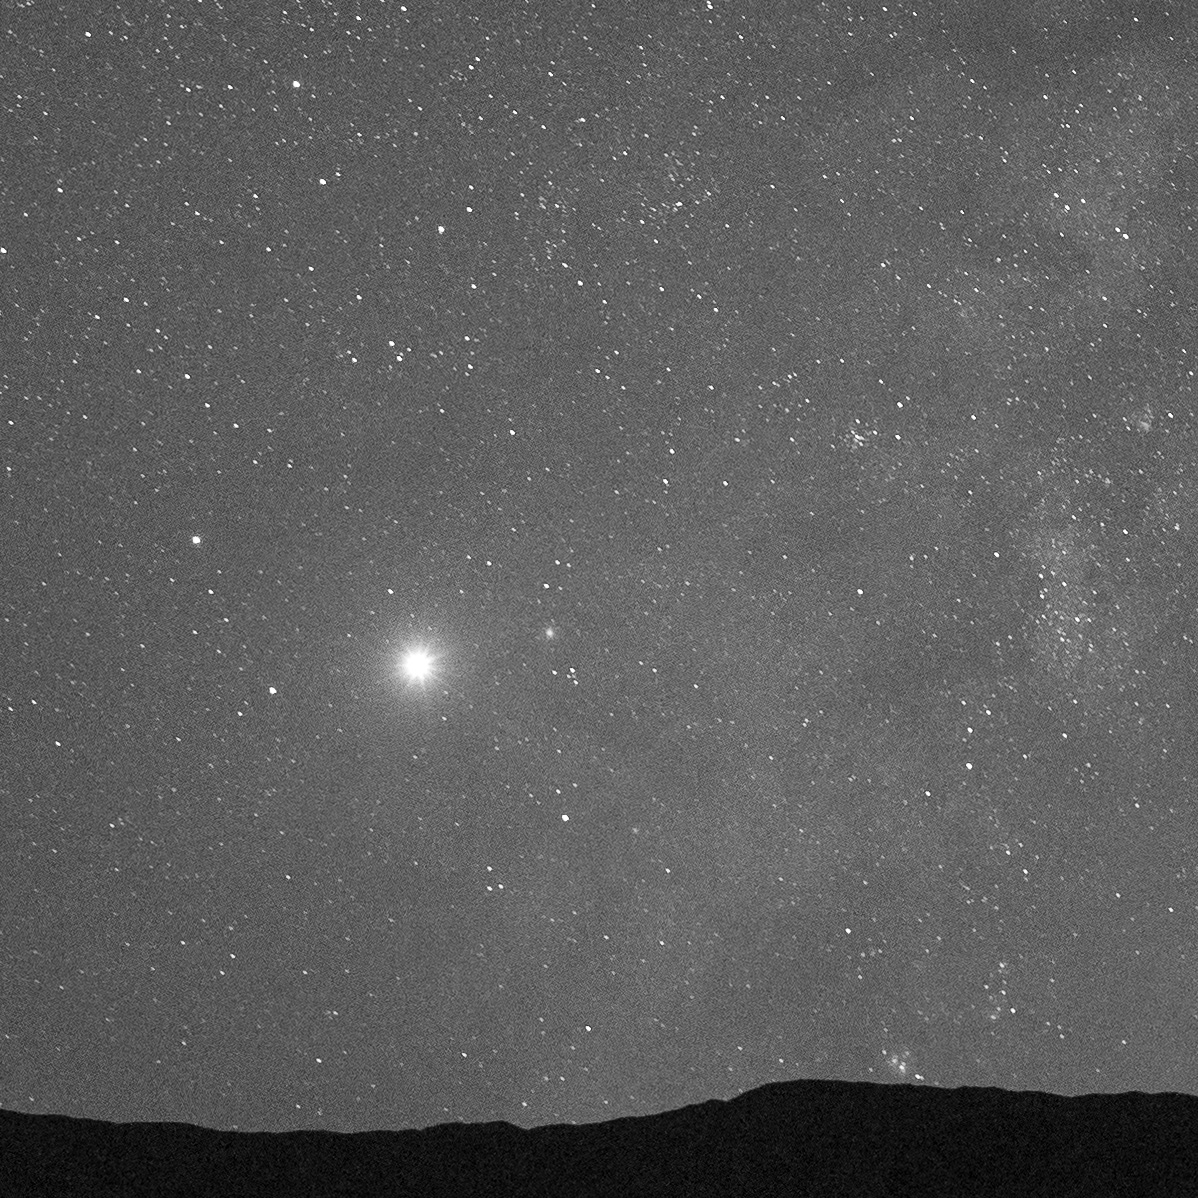
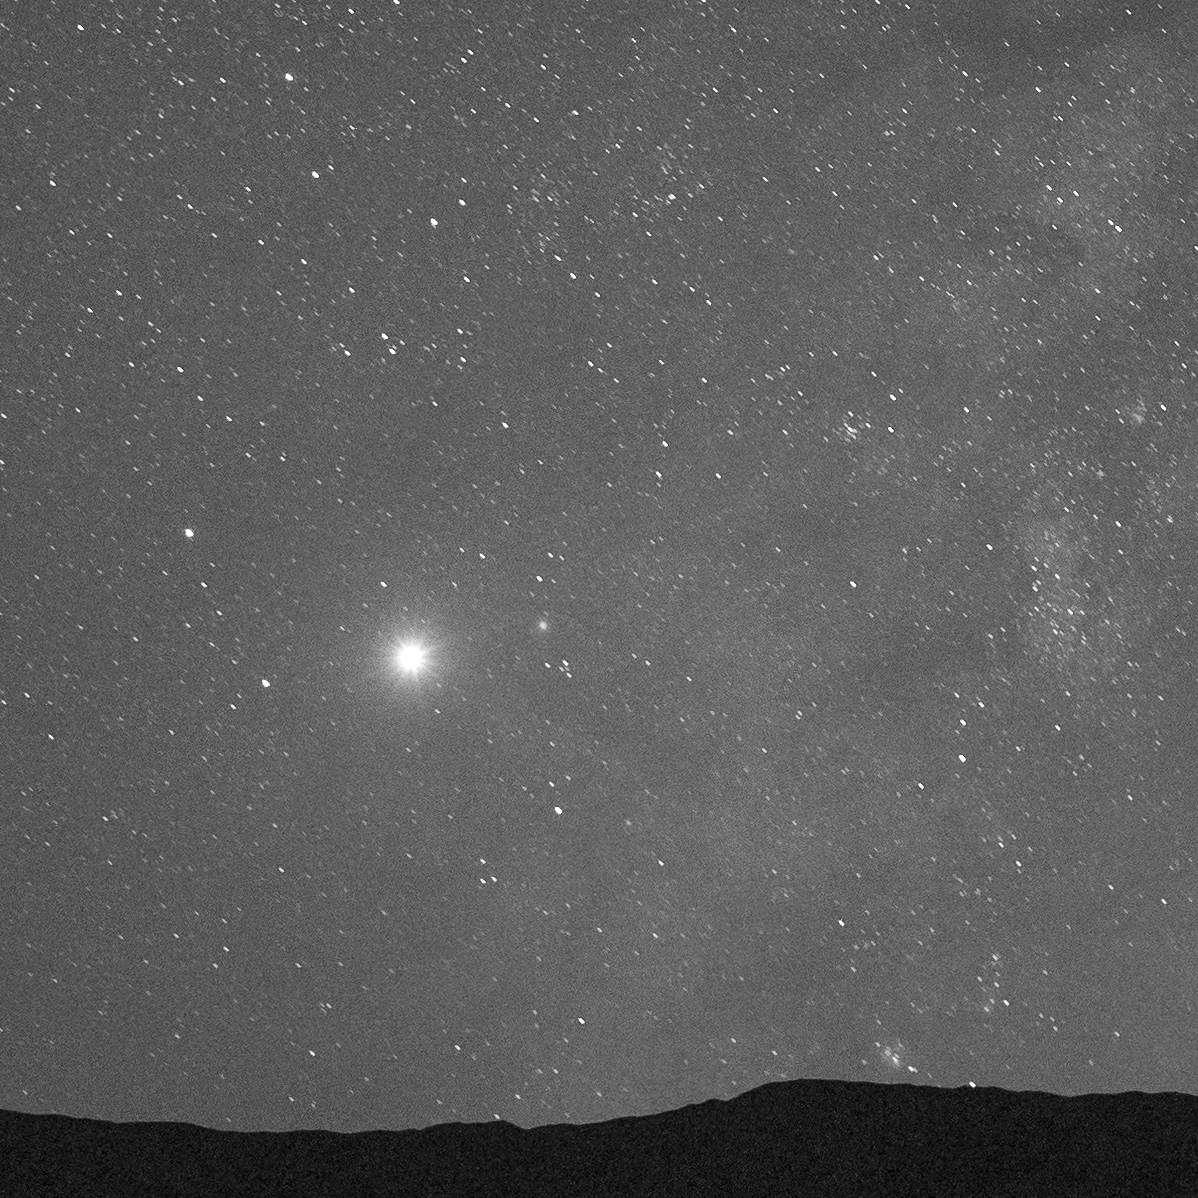
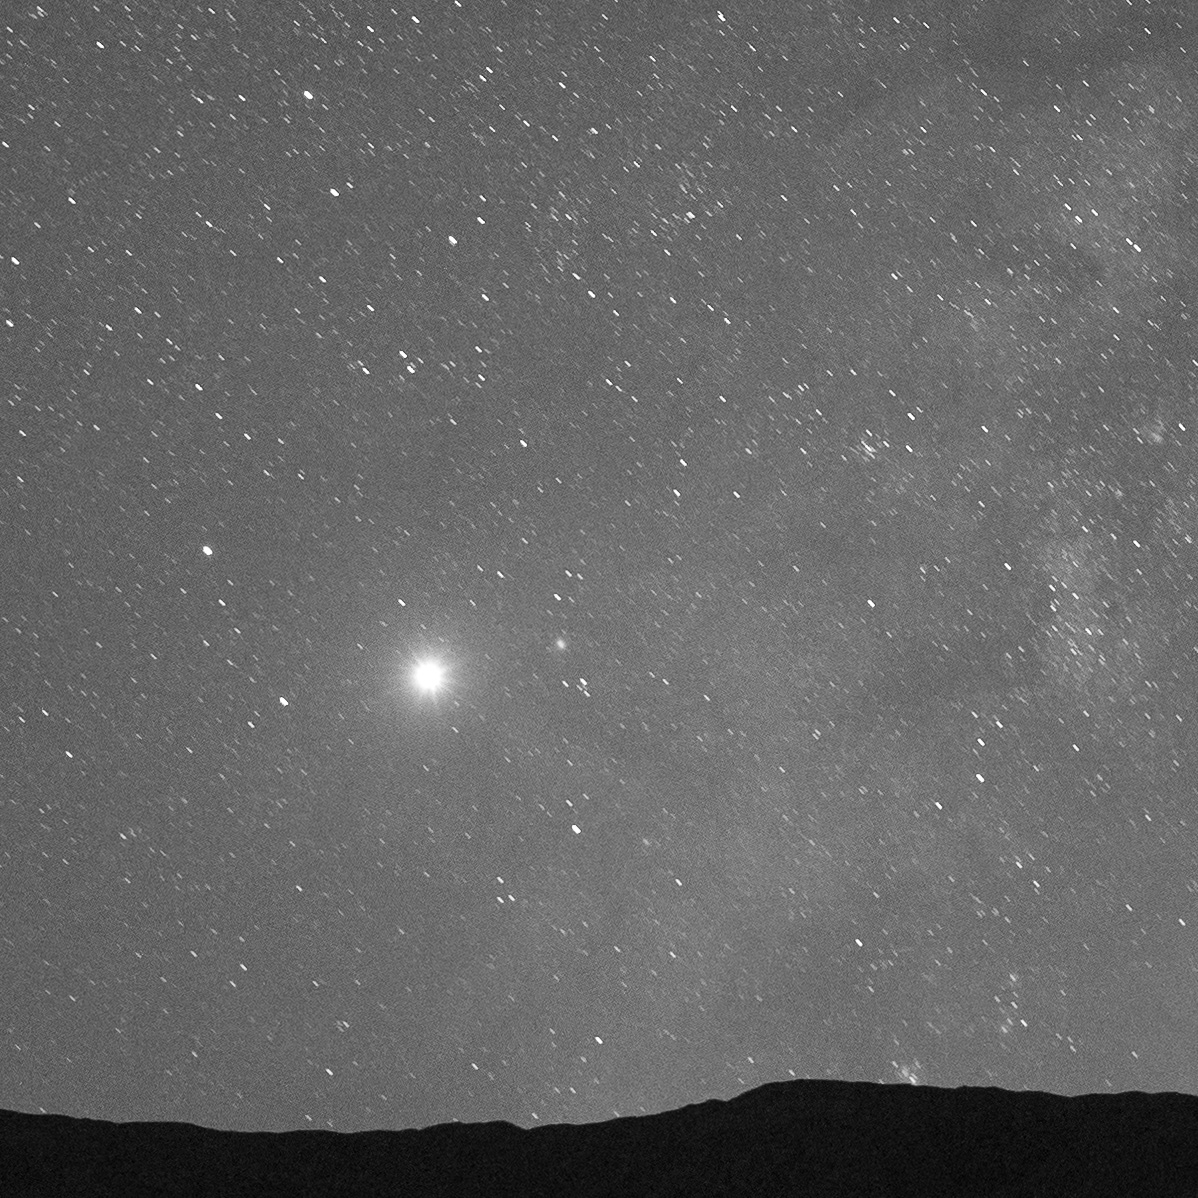
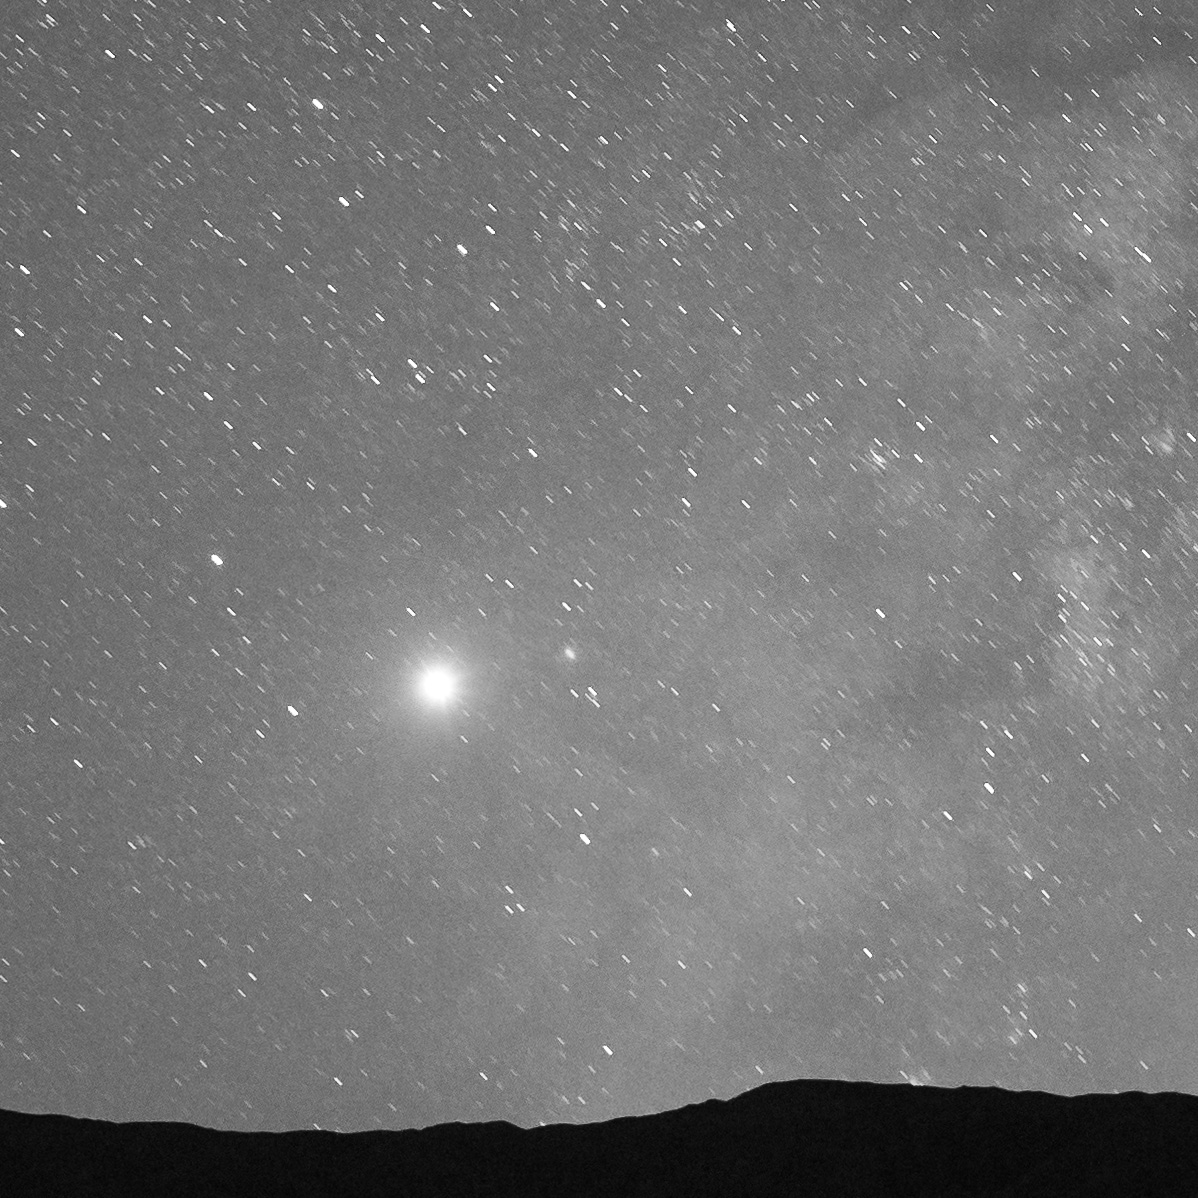
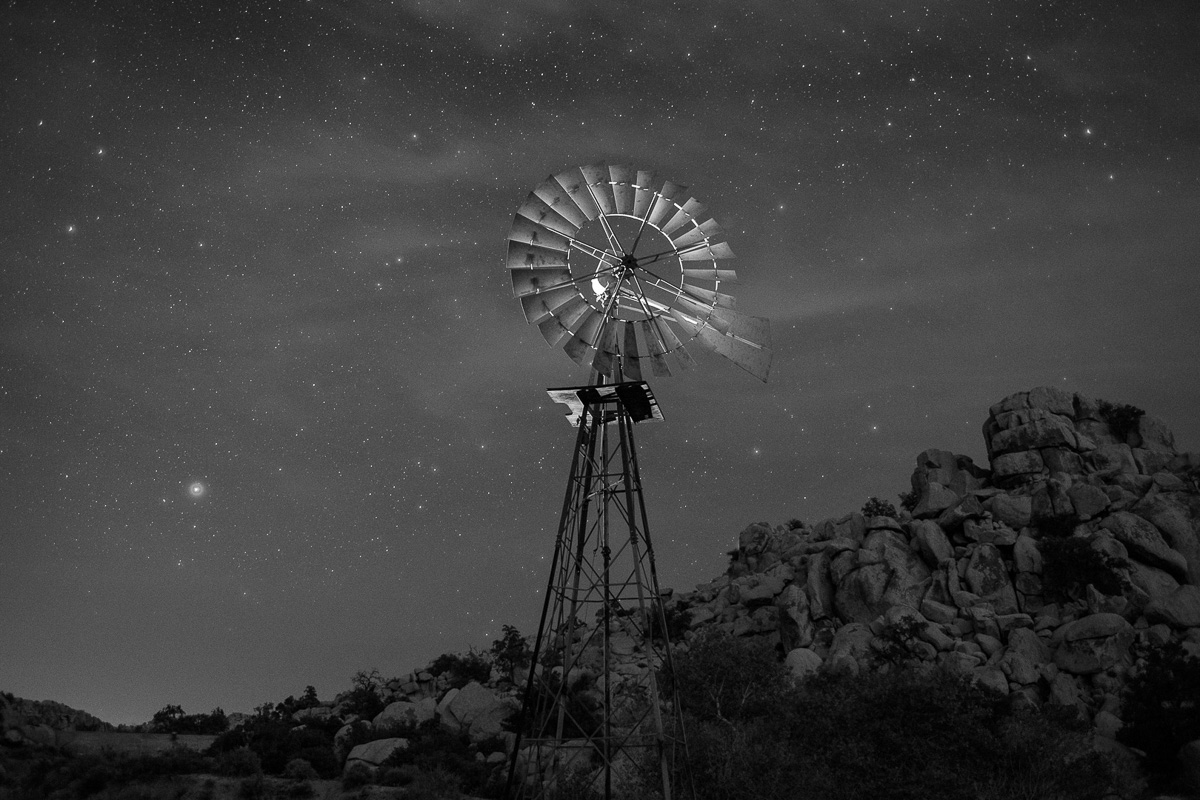
To give you a sense of the photography opportunities at the ranch, here are some other images by our group from that evening:

The Photographers

Seven photographers at our Joshua Tree workshop (five attendees and two instructors) contributed to making the final image:

The Planning

We arrived at Keys Ranch with our Desert Institute guides shortly before sunset, which gave our photographers time to scout ideas for compositions. One of the more popular subjects was an old, rusting Jeep in the center of the site. As dusk began to darken into night, we noticed that by standing to the west of the Jeep, you get a nice side-to-side view of the ranch structures, including the house, old store, Jeep, windmill, water tank and workshop building.

We immediately knew the scene would make a great panorama, but would be quite a project that could be accomplished only by a good number of us pulling together to contribute. About two-thirds of the workshop was excited by the idea, so we regathered at 11 p.m. to see if we could pull it off—hopefully with the Milky Way rising over the ridge that flanked the eastern edge of the ranch.

Because we didn’t have time for every photographer participating to shoot their own frames, we decided we would do one setup and execution, and we’d all share the RAW files to edit in our own ways. To provide the best image quality for everyone to start with, we chose to use a Nikon D5.

When the time came to start working on the photo, we carefully staked a spot for the tripod. We opted to use my Gitzo 3541LS, as it’s strong and steady, and we could rely on it to stay put during all the movements we’d be putting the ball head through. Using the bubble level on the tripod, followed by using the bubble level on the ball head, we were able to perfectly level the setup within a couple of minutes.

The scene stretched from left to right by about 160 degrees from the tripod mark. (In Figure 1, you can see how wide an area we needed to cover.) We couldn’t back up much because of a fence behind us, so we needed to use a wide angle lens—specifically, the Nikon 14-24mm f/2.8, one of the sharpest tools in the night-photography shed.

Figure 1. Satellite image of our pano subjects at Desert Queen Ranch, showing how wide the scene is from camera position. Map data © Google.

Figure 1. Satellite image of our pano subjects at Desert Queen Ranch, showing how wide the scene is from camera position. Map data © Google.

Setting the zoom for 24mm framed the scene segments perfectly, but gave us an exposure problem: If we wanted to keep the stars as points, rather than having them begin to trail, then we would be limited to a shutter speed of 15 seconds.

We agreed that a 20-second exposure would be better because it would give us 33 percent more time to light-paint, and would give us one-third of a stop more light to help fill in foreground detail. Using the 400 Rule, we knew that maintaining star points during 20-second exposures would require a focal length of 20mm or wider.

So we set the zoom at 20mm and mounted the camera vertically (which is best for most pano-stitching applications). This setup offered approximately a 60-degree horizontal angle of view within each vertical frame.

The next step was figuring out how much to overlap the frames. The more you overlap, the more information you have for the pano-stitching software to do its job well—overlapping by at least one-third is recommended. We prudently decided to overlap by half, which gave us a 30-degree horizontal change between frames. By using the degree marks on the base of the ball head, we panned the camera in 30-degree increments and determined we would need to shoot five frames to cover the scene from left to right.

The Lighting

We could have photographed the ranch without lighting it, but what fun would that have been? Besides, the low light on the foreground would have obscured the detail of all the interesting objects in front of us. So we decided to light-paint what we believed were the most important and interesting elements: the store, the house, the tree behind the house, the Jeep, the windmill, the water tower and the workshop building—all with 20-second exposures.

Teamwork was clearly required to pull this off.

Priscilla has a film-lighting background, and she shared that expertise to help place two panel lights on the largest subjects: the store and house (Figure 2), and the workshop (Figure 3). For the former we used Priscilla’s Vidpro LED Light Kit, and for the latter we used NPAN’s brand new Luxli Viola 5" Multi-Color LED light panel (which we used for different setups all week, and we loved it!).

Priscilla also stood by the panel on the far left of the image, because she needed to redirect its light mid-exposure. We used in-camera dodging by moving blackwrap in and out of the light to soften the shadow, thereby reducing the illumination on the ground during the exposure.

Figure 2. Vidpro LED Light Kit illuminating the house and store at the far left of our intended pano. This is the setup that Priscilla adeptly modified by moving blackwrap mid-exposure. We weren't concerned about hiding this light source (you can see it in Figures 5 and 8), because we knew it would be cropped out of the final stitched image.

Figure 3. The Luxli Viola LED panel light placed on the far right of the image is perched on a fence post. The only part of it visible to the camera is an LED on the back, which Lance covered with a piece of black gaffer tape so it wouldn't show in the final photograph. So even though the panel is technically in-frame, it disappears into the shadows.

Jeannine and Romit stood to camera-right, about 20 and 30 feet away, respectively. Jeannine light-painted the water tower, while Romit light-painted the Jeep.

Deane and Kurt worked in the background, in-frame, but behind objects so the camera couldn’t see their flashlights. Deane was positioned about center-frame, behind a bush, while light-painting the side of the house. Kurt was positioned toward frame-right, between some tall bushes, light-painting the windmill.

Everyone used incandescent flashlights to provide warm light to the warm-toned subjects. And because the final image would be composed of five stitched frames with overlapping elements, everyone had to repeat the light painting the same way multiple times.

As for the ambient illumination on the ridge, that was thoughtfully provided by clouds diffracting light pollution from Palm Springs. The clouds in the east weren’t as helpful, as they blocked our view of the Milky Way (though you can still discern it if you look closely at the final image). On the other hand, thin and broken clouds can add a good deal of visual interest to a starry sky, and they did exactly that for our composition.

The Shoot

When we were finally ready to execute, we all got into position for our roles. Lance observed the light painting from near the camera to watch for any mistakes that needed to be fixed. (There weren’t any—go team!) I operated the camera, using a Vello FreeWave wireless remote shutter release; I didn’t want to have to touch or even approach the tripod unnecessarily, to avoid the possibility of bumping it in the dark, which would have required us to re-set everything we’d done to that point.

We began by shooting from the right, primarily because that’s the direction the camera was pointing when we were ready to start. I fired the remote release, waited to hear the click of the shutter opening, then called out for the others to begin light-painting. When each 20-second exposure ended, I rotated the camera 30 degrees to the left (again using the markings on the ball head), then repeated the process four times. You can see the resulting images in Figure 5.

Figure 5. The five frames, before processing. All exposed at 20 seconds, f/3.2, ISO 6400. Nikon D5 with a Nikon 14-24mm f/2.8.

We reviewed the photos and everything looked exactly as we’d hoped. But we always say: Once you get the shot right, shoot another just in case. So we re-shot all five frames, and then wrapped the production.

Post-Processing

Back at the hotel at 2:30 a.m., we imported all the images into Lightroom. We made minor adjustments to one frame, then synced the edits to the other four frames so that each had the same adjustments applied.

Perhaps the most important edit we made in Lightroom is a necessity any time you’re stitching a pano: In the Lens Corrections panel, we selected “Enable Profile Corrections.” This removed lens vignetting and corrected barrel distortion (see Figure 6), both of which make it much easier for the software to stitch the images together, and also make for a better final image.

Figure 6. Before applying lens profile corrections (left) and after (right).

We then selected all five frames in Lightroom and clicked PhotoPhotomergePanorama. Lightroom usually does an amazing job with stitching a pano, but in this case we thought the results looked a little too distorted.

Photoshop’s Photomerge feature has a few more options, so we decided to try that instead. Again with the five frames selected, we clicked PhotoEdit InMerge to Panorama in Photoshop. We tried the Perspective, Cylindrical and Spherical options, but weren’t thrilled with those results either (particularly Perspective—see Figure 7).

Figure 7. Not the result we were looking for. Sometimes pano-stitch settings fail, and we just have to start over, making new choices.

Figure 7. Not the result we were looking for. Sometimes pano-stitch settings fail, and we just have to start over, making new choices.

What did succeed was Photoshop’s Auto option for merging, which is what ultimately produced a result we could work with (Figure 8). This proves the theory that software is pretty smart these days, so always consider trying “auto” first.

Figure 8. The uncropped stitched pano, right out of Photoshop.

Back in Lightroom, we made a few more edits. We cropped out the waste (this is expected—it’s why you should always shoot a pano with extra room on all sides, knowing that you’ll need to crop off artifacts). We brought the Whites up a bit to fill out the histogram. Then we nudged down the Blacks and nudged up the Shadows, which is a nice trick to make an image pop. We increased Clarity a little, and Vibrance a tad.

Those were all the global adjustments we made, which resulted in the image in Figure 9. It was looking pretty good, but there was still more work to do.

Figure 9. Minor global adjustments improved the overall image.

To begin the local adjustments, we immediately cloned out the plane near the center. (No need for editorial integrity—we just pretend that we shot the sequence two minutes earlier.)

To improve the sky, we added a Graduated Filter to the top of the frame, then used the Brush to mask around the ridge. We reduced the Exposure of the sky just a smidgen, and brought up Highlights and Clarity a touch to make the stars shine a little brighter (Figure 10).

Figure 10. The sky pops a little more after making some tweaks with the Graduated Filter tool.

We made some more local adjustments to even out the exposure, reducing the brightness and highlights of the workshop building at the right of the frame, reducing the brightness of the panel-lit ground on the left, and increasing the brightness and saturation (just a bit) of the Jeep (Figure 11).

Figure 11. Local adjustments to slightly darken the ground at left and the structure and ground at right, and to lighten the Jeep in center.

Finally, we pursued the curiosity of one workshop attendee who wondered what the photo would look like if we made adjustments to create more of a “nighttime feel.” To achieve that effect we dropped the White Balance temperature more toward blue, lowered Exposure by one-quarter of a stop, reduced Shadows, and dropped Saturation to -30. You can see the result in Figure 12.

Figure 12. A more night-feel approach to the editing.

The night approach looked great, but we decided that we liked our original take better. So we reverted to the first approach, which really shows the light painting that emphasizes the important elements of the composition. Figure 13 is the final version.

Figure 13. The final image.

Final Notes

Though we all made the photo together, the edited final version in this blog post is from my computer. There are many, many ways to edit digital images, dependent on different artistic preferences. I very much hope that Deane, Jeannine, Romit, Kurt and Priscilla will edit the RAW files as they like and post their final results in the Comments section.

Also, none of this would have been possible if the Desert Institute hadn’t partnered with our workshop and arranged for the special access to this very special space. With heartfelt thanks, we recognize Kevin Wong for his assistance at every stage of planning, and Julianne Koza and Lew Kingman for guiding us to and around Keys Ranch that magical evening.

Chris Nicholson, author of Photographing National Parks (Sidelight Books, 2015), is a partner and workshop leader with National Parks at Night. Learn more about national parks as photography destinations, subscribe to Chris' free e-newsletter, and more at www.PhotographingNationalParks.com.

UPCOMING WORKSHOPS FROM NATIONAL PARKS AT NIGHT

How I Got the Shot: Bryce Canyon National Park with Chris and Gabe

Light painting on the Navajo Loop Trail in Bryce Canyon National Park. 30 seconds, f/4, ISO 400. Nikon D750 with a Zeiss Distagon 15mm f/2.8 lens.

While shooting in Utah during National Parks Week in 2016, I made this image in cooperation with Gabe Biderman and Chris Nicholson. Wanna learn how? Read on.

The Location

First off, let’s establish that Bryce Canyon is beautiful. The hoodoos rock me. It’s also at a pretty high altitude. Consider that if you hike down into the canyon—you must also hike back up!

Top that off with something unique to our visit: One small leg of the loop trail was not open, forcing us to go the long way around to get to the hoodoos. Of course that meant we had to go all the way back around to get back up. Talk about a workout carrying 35 pounds of photo gear on my back. I’m savage with myself that way—I never want to miss a shot because I left something in the car. (Hint: Do what I say and not what I do if you value your enjoyment.)

Anyway, on to how I “made the sausage.”

Working the Scene

The final image, above, is a combination of ambient illumination by a full moon in a clear sky, complemented by light painting by Gabe and Chris within the lens frame, and light painting by me to camera-right.

I saw the photo as I was gasping my way up the canyon. (I am not as fit as I could be 😊). To compensate, I was playing a game with myself: Walk until completely out of breath, plant the tripod and take a photo on the spot, no matter the view. It kept my mind off my physical condition … for 30 to 120 seconds at a time, anyway.

Figure 1 is an example of one of those shots. Meh. So is Figure 2. Less meh.

Figure 1. 30 seconds, f/4, ISO 400. Nikon D750 with a Zeiss Distagon 15mm f/2.8 lens.

Figure 1. 30 seconds, f/4, ISO 400. Nikon D750 with a Zeiss Distagon 15mm f/2.8 lens.

Figure 2. 30 seconds, f/4, ISO 400. Nikon D750 with a Zeiss Distagon 15mm f/2.8 lens.

Figure 2. 30 seconds, f/4, ISO 400. Nikon D750 with a Zeiss Distagon 15mm f/2.8 lens.

But when I stopped to make a photo of Chris making a photo (how meta), I started to think about how I love making night portraits. This photo is Figure 3, in which you can also see Gabe’s flashlight in the distance. He was working on a masterpiece of light painting.

Figure 3. 30 seconds, f/4, ISO 400. Nikon D750 with a Zeiss Distagon 15mm f/2.8 lens.

Figure 3. 30 seconds, f/4, ISO 400. Nikon D750 with a Zeiss Distagon 15mm f/2.8 lens.

As it happened, I had a burst of energy and my next pit stop to breathe was above Gabe’s position. See Figure 4.

Figure 4. 30 seconds, f/4, ISO 400. Nikon D750 with a Zeiss Distagon 15mm f/2.8 lens.

Figure 4. 30 seconds, f/4, ISO 400. Nikon D750 with a Zeiss Distagon 15mm f/2.8 lens.

As I observed Gabe light-painting and working on his image, I was struck with the thought, “This is the moment. People in a place I love doing the thing I love. Perfect moment for a portrait.”

I asked Gabe and Chris if they would indulge me, and somehow they seemed more than happy to stop climbing out of the canyon for a few minutes. We nailed it on the first shot, because Gabe had already been practicing for his photo, painting to the right. So I piggybacked on his hard work a bit. I asked Chris to paint the trees, and added my own twist by running to camera right and light-painting Gabe and Chris with short bursts of my flashlight (Figure 5). I took care not to sweep my flashlight, because I wanted a pool of light in the middle, with dark edges to the illumination.

Figure 5. Chris (left) is lighting the tree, and the arrows show where Gabe and I are light-painting.

Figure 5. Chris (left) is lighting the tree, and the arrows show where Gabe and I are light-painting.

Mission accomplished!

Figure 6, the final photo. 30 seconds, f/4, ISO 400. Nikon D750 with a Zeiss Distagon 15mm f/2.8 lens.

Figure 6, the final photo. 30 seconds, f/4, ISO 400. Nikon D750 with a Zeiss Distagon 15mm f/2.8 lens.

Details

Here are some more before/after details to spot how we added to the scene:

Figure 7. Painting distant hoodoo.

Figure 8. Light-painting trees takes more time since they are not reflective, but rather dark to begin with.

Figure 9. Gabe’s gentle painting of the canyon wall to his right.

Figure 10. Detail with and without Chris in frame.

Matt Hill is a partner and workshop leader with National Parks at Night. See more about his photography, art, workshops and writing at MattHillArt.com. Follow Matt on Twitter Instagram Facebook.

UPCOMING WORKSHOPS FROM NATIONAL PARKS AT NIGHT

What’s the Longest Usable Shutter Speed for Astro-landscape? (Part II)

In Part I of this article I wrote about the subtleties of managing different variables to determine the best exposure for maintaining star points in astro-landscape photographs. We learned that determining the longest usable shutter speed based on sensor size, focal length and cardinal direction was the starting point for all astro-landscape photograph images.

Additionally, considerations for depth of field and image quality needed to be taken into account. When an image contains a nearby foreground element, a smaller aperture is required to increase depth of field. When an image will be printed to a high degree of magnification, the ISO must be kept as low as possible to maintain image quality. Either choosing a small aperture or a low ISO will require a longer shutter speed, increasing the probability of the stars being rendered as trails or lines in the sky. This is something we try to avoid as much as possible, so finding just the right compromise of these three exposure variables is key to successful astro-landscape photographs.

Under the Milky Way. 20 seconds, f/2.8, ISO. 20mm lens.

Under the Milky Way. 20 seconds, f/2.8, ISO. 20mm lens.

400 vs. 500

In Part I of this article, the concept of the 500 Rule was briefly mentioned without explanation. In this second part, I will explain what it is and how to use it.

An internet search of the 500 Rule turns up a lot of information, much of it contradictory. I have been unable to find a clear answer as to when, how or by whom it was created. It is a fairly crude tool to help with determining the longest usable shutter speed for star points. Simply stated, if you divide 500 by the focal length of your lens, the result is the maximum number of seconds you can expose without star trails with a full-frame DSLR camera. The 500 Rule does not take print size or camera orientation into account, nor does it accommodate APS-C or smaller sensors.

If you delve into those search results, you’ll find a variety of highly technical alternatives and variations to the 500 Rule. If you are as much into mathematics as photography, check out TL-Photography or Greg Boratyn’s sites. My goal is to keep things simple and convenient.

The 400 Rule results in shorter shutter speeds, and greater likeliness of sharp stars.

The 500 Rule often yields unsatisfactory results. This is in part due to modern cameras having higher resolution than those available when the rule was first used, and in part because it doesn’t account for camera orientation or the possibility of large-format prints. Therefore, instead of the 500 Rule, I propose using the 400 Rule (divide 400 by the focal length of your lens to reveal the maximum number of seconds before star trails begin to appear). The 400 Rule results in shorter shutter speeds, and greater likeliness of sharp stars.

For APS-C cameras, the 250 Rule yields approximately equivalent results. Another way to determine shutter speeds for APS-C cameras is to use the 400 Rule and then divide the result by the crop factor, which is 1.5 for Nikon and Sony cameras, and 1.6 for Canon cameras. Since our goal is to keep things simple, I suggest using the 250 Rule, which yields almost identical results.

Below you can see the results of test photos shot with a 24mm lens on a full-frame camera, shot at shutter speeds ranging from 8 seconds (very sharp stars) to 30 seconds (very apparent motion).

8 seconds

10 seconds

15 seconds

20 seconds

30 seconds

All of these images were shot with a 24mm lens. Above, see the transition of how much apparent motion is visible at different shutter speeds. Below, click/tap each to view at full size.

Putting This Into Practice

Let’s look at some examples.

For a 20mm lens on a full-frame camera, using the 500 Rule results in a maximum shutter speed of 25 seconds (500 / 20 = 25).

With the same 20mm lens and full-frame camera, the 400 Rule yields a maximum shutter speed of 20 seconds (400 / 20 = 20).

If you use that same 20mm lens on an APS-C camera, you end up with only 10 seconds as your longest usable shutter speed (250 / 20 = 12.5). If you instead use the 400 Rule and then divide by the crop factor, you get 13 seconds for a Nikon APS-C camera, (400 / 20 = 20, 20 / 1.5 = 13) and 12.5 seconds for a Canon APS-C camera (400 / 20 = 20, 20 / 1.6 = 12.5).

If your head is swimming with all of these calculations, remember that the results are constant for each focal length. This means that you can precalculate the longest usable shutter speed for each focal length lens in your bag, and make a cheat sheet to carry with you. This modified rule still does not account for camera orientation, but because you are starting with shorter maximum shutter speeds, it’s more likely that you will end up with star points rather than star trails.

Workshop attendees on the salt flats of Death Valley National Park.

Workshop attendees on the salt flats of Death Valley National Park.

The way to make sure you are using the best shutter speed for the situation is to review your images in camera at full magnification, and adjust the time accordingly. Bear in mind that you should check all sky areas in the frame, because the stars closer to north may be sharp while those farther away are not––even in the same image!

You’ll need to consider the various factors—star sharpness, depth of field and focus, and image quality—and make the best exposure decision you can based on prioritizing those factors. It’s a combination of science, art and simply what feels right for the image. Getting to the place where you have a strong sense of when it feels right is simply a matter of practice, so get out there under the stars and photograph.

Lance Keimig is a partner and workshop leader with National Parks at Night. He has been photographing at night for 30 years, and is the author of Night Photography and Light Painting: Finding Your Way in the Dark (Focal Press, 2015). Learn more about his images and workshops at www.thenightskye.com.

UPCOMING WORKSHOPS FROM NATIONAL PARKS AT NIGHT

The Right Angle: Creating Texture and Shape When Light Painting

The word photography means to draw or paint with light. When I first began studying photography, I was told that along with composition, the study of light would be a lifelong endeavor. Over the years, I’ve found this to be an absolute truth.

The master painters knew light intimately. They were genius at using light to define, shape and illuminate their subjects. This skill came from careful attention to the way light wrapped around their subjects. The way it reflected off them. The awareness of color in the shadows and the recognition of specular highlights.

We can learn from them. We can learn from paying careful attention to light and the way it plays on our subjects.

One factor crucial to painting in your own light is the angle of the beam. This is critical in bringing out texture and creating depth in your images (Figures 1 and 2). Painting your subject from the position of your camera will result in the least flattering light. Painting it from the side will produce the most texture and dimension.

Figure 1. Painting at the same angle as the camera will produce the least-interesting version of your scene.

Figure 2. Painting the subject from the side will result in the most texture and dimension.

The two images of the star (Figures 3 and 4) show the difference between a subject painted straight on and one painted from the side. The star in Figure 3 was painted while I stood right at the camera, which was about 8 feet from the subject. Notice how flat the image is; it displays very little depth. The photography term for this is “front-lit.”

The star in Figure 4 was created by standing to the side of the star while painting, very close to the fence, and again about 8 feet away. Everything in the scene begins to show more texture. The star becomes much more three-dimensional.

Figure 3. Created under city lights using an exposure of 30 seconds, f/8, ISO 200, and lit from the front.

Figure 4. Same ambient light and exposure, but lit from the side. Notice how the shadows add texture to the image. (Click/tap either image for larger view.)

An abandoned gas station (Figure 5) made another good subject for showing the difference between a front-lit subject and one that is side-lit. The image was created by simply standing right next to the camera while illuminating the scene.

Whereas I created the image in Figure 6 by painting from many different angles. I divided the painting of the walls into two sections. For the left wall, I stood off to the left but close to the wall and then painted inward. I did the same for the right wall. This left the chair and ground very dark. Placing my flashlight about 8 inches from the ground, I painted across the scene to give the litter-covered concrete lots of texture. I painted the chair last by getting about 5 feet from it and painting downward.

Figure 5. This old gas station in rural Arizona was illuminated using only a flashlight. There were no city lights to influence the overall exposure, but the moonlight was moderate, so I used an exposure of 2 minutes, f/11 to keep the ambient light low. In this image, I light painted from the front ...

Figure 6.  ... whereas in this frame I light painted from the side in multiple locations. (Click/tap either image for larger view.)

This light-painted old building (Figure 7) was a typical situation of establishing the ambient exposure for the night sky and then light painting the buildings. The ambient exposure was 4 minutes, f/8, ISO 200. This exposure left the building quite dark. Using my 65-lumen flashlight, I began by painting the building from the right for about 1 minute, moving further to the right as I painted. Noting the shadows of the porch posts on the building will give you an idea of my angle while painting.

Next I moved onto the porch and stood in front of the far-right window. Hiding the front of my flashlight from the lens, I swung the flashlight from right to left for about 30 seconds as I pointed toward the ground in front of the porch. This caused the light and shadow in front of the house. Keeping my flashlight in one position kept the shadows on the ground sharp. If I had physically moved the flashlight from right to left, rather than swung it from a single position, the shadows would have become softer and less defined. Because I was much closer, the ground is lighter than the building. I then repeated this process standing in front of the far-left window.

To complete the effect, a student popped a flash in the window on the right side of the building and then again on the left side of the building. This gave the impression of interior lights being on.

Figure 7. I love to visit Grafton ghost town during workshops in Zion National Park. On this occasion, I was teaching a night photography workshop with Gabriel Biderman. Our group was focused on shooting the night sky while light painting the various buildings.

In Figure 8, the only moonlight striking the scene is on the ground in front of the truck. The ambient exposure of 2 minutes, f/8, ISO 100 kept the moonlight foreground somewhat dark. Using my 65-lumen flashlight, I started by painting the back wall from the camera’s far left. This distance created a broader beam, which covered most of the wall at once.

Next, I moved close to the truck and somewhat behind it. From this vantage point I painted the grill, fenders and windshield. This gives the truck a heavy side-lit, almost back-lit feel.

At this point I moved around to the right of the camera and painted the truck from that side. I spent less time painting here, so it wasn’t as bright as the other side. Filling in some light from this side helped give the truck dimension and kept it from being pure black in the final image. I created highlights in the scene by moving very close (1 foot) to the headlamps and painting each one for a couple of seconds. To finish the image off, I painted the inside of the cab for a couple of seconds from each window.

Figure 8. I photographed this old truck at Nelson ghost town in Nevada. Our workshop group was photographing under a full moon, but most of this truck was in the shade of the building.

Paying careful attention to the way light wraps around and reflects off of your subject is a great learning experience. Notice light while you’re looking at magazines, watching TV or walking down the street. Take into account the angle, color and quality of the light. When it comes time to supply your own light, remember these lessons. Experiment with different vantage points and keep your flashlight at a severe angle to your camera.

Never paint from behind the camera!

Note: This article is adapted from an excerpt of Tim’s ebook The Magic Light Painting (Peachpit).

Tim Cooper is a partner and workshop leader with National Parks at Night. Learn more techniques from his book The Magic of Light Painting, available from Peachpit.

UPCOMING WORKSHOPS FROM NATIONAL PARKS AT NIGHT

Expose to the Left: How to Really Maximize Image Quality at Night

Note: It has come to our attention that some readers are not seeing the photos in this post as intended. Please know you are not alone, that others have reported the same. See the Comments section below for more information.


We hear everyone in the photography industry talking about image quality, image quality, image quality. We especially hear about this in any circle of people chatting (or writing) about night photography. Conversations (and books, articles and blog posts) are rife with opinions and advice about how to push the limits of our cameras and lenses in order to get the best image quality in low-light situations.

But at what cost? We get so caught up in capturing all this dim light that we don’t notice that we’re making decisions that in every other photography situation are actually detrimental to image quality:

  • opening the aperture as wide as it will go
  • leaving the shutter open for long periods of time
  • jacking up the ISO to numbers far beyond what the photographers of yesteryear would even believe as factual

Ideally, night photographers need to be thinking the other way around: How do we improve our low-light photos in a way that capitalizes on everything we know about shooting in daylight? The answer is straightforward, and it all boils down to shooting with this philosophy, with this technique: Expose To The Left, otherwise known as ETTL.

What is ETTL?

Like its fraternal twin ETTR (Expose To The Right), ETTL is a way to maximize image quality, except while ETTR is used in daylight, ETTL is used at night.

How does it work? It’s simple. With your camera set to Matrix metering, shoot a test exposure that’s probably a couple of stops darker than the meter reading. You can just guess—accuracy doesn’t matter, kind of like with print film. Looking at your histogram, adjust the exposure downward and keep firing test frames until all the data is crammed up against the left side, or the “shady side,” of the graph. We push that histogram over by using a smaller aperture, a faster shutter speed, a lower ISO.

A perfect example is a photo I made in Gates of the Arctic National Park, of the wingless bats that live in Inverted Canyon. I was shooting under a new moon. My first-guess exposure was 20 seconds, f/2.8, ISO 6400, which resulted in a rather “traditional” histogram, as seen in Figure 1.

Figure 1. Initial, best-guess test exposure.

Figure 1. Initial, best-guess test exposure.

But I didn’t want traditional—I wanted ETTL and all the advantages that come with it. So I closed down the aperture to f/5.6 and dropped the ISO to 1600. That gave me a better ETTL histogram (Figure 2), but still not good enough.

Figure 2. The histogram of the same scene, stopped down quite a bit.

Figure 2. The histogram of the same scene, stopped down quite a bit.

So I cut another two stops of light by dropping my ISO again, to 800, and increasing the shutter speed to 10 seconds. The resulting histogram (Figure 3) was certainly close—close enough to be effective, in fact. But it resulted in what I call a “Thick Shady” histogram, wherein you can see that all the image data is pushed to the left, but you can still make out a slope of data curving up on that left side. By increasing my shutter speed to 2 seconds, I was able to narrow that to a slim line of histogram data (Figure 4)—or what’s known as “Slim Shady.”

Figure 3. My third exposure—not a bad one for ETTL, but we can get it even better. …

Figure 3. My third exposure—not a bad one for ETTL, but we can get it even better. …

Figure 4. Histogram of my final “Slim Shady” exposure. Perfect ETTL.

Figure 4. Histogram of my final “Slim Shady” exposure. Perfect ETTL.

What did I gain by doing this? Consider my initial, traditional-histogram exposure of 20 seconds, f/2.8, ISO 6400:

  • That 20 seconds introduced long-exposure noise.
  • That f/2.8 gave me paper-thin depth of field.
  • That ISO gave me high ISO noise.

All of which are bad for image quality.

However, my ETTL exposure was 2 seconds, f/5.6, ISO 800, which fixed every one of the dire consequences of that first exposure. You can see how sharp the final image is in Figure 5; no long-exposure noise, adequate depth of field, no high ISO noise. Moreover, f/5.6 is the sharpest aperture for the Nikon lens I was using, which further improved the final image. Click/tap to see the photo at full size. Not a blurry pixel in sight. Not a spot of noise. The image quality is perfect.

Figure 5. Wingless bats in Inverted Canyon, Gates of the Arctic National Park. 2 seconds, f/5.6, ISO 800. (Click/tap for larger view.)

Ancillary Advantages of ETTL

In addition to image quality, ETTL has other advantages.

As crazy as it sounds, you can “freeze” action even in the dark. Because you’re not worried about all the tedious challenges of maintaining highlights, midtones and shadow details, you can manipulate your shutter speed to almost anything you want. For example, while doing a night shoot at Upward Falls in North Cascades National Park, I didn’t want motion blur in the water. But because I was using ETTL, I was able to shoot at 1/60, f/4.5, ISO 2000. Subsequently, I got great image quality while freezing the action of the falls (Figure 6) despite the low light.

Figure 6. Upward Falls, North Cascades National Park. 1/60, f/4.5, ISO 2000. (Click/tap for larger view.)

Another side benefit of ETTL is that you can hand-hold your camera when making night images. Even under the new moon! Because you can shoot at those higher shutter speeds, you don’t really need to carry a tripod into the field with you. However, all five of us at National Parks at Night are Manfrotto Ambassadors, so we avidly recommend that you carry one anyway.

Drawbacks of ETTL

As great as ETTL is for improving image quality in night photography, there are some obstacles to work around.

For one, this exposure technique gets trickier when you’re light painting. It’s especially troubleshome when you’re using a sunbeam-like flashlight such as the Coast HP7R, because it completely ruins your hard-achieved left-biased exposure. How? By adding light. But don’t fretthere’s an easy solution.

Figure 7. Coast HP7R flashlight with snoot by Light Painting Brushes, modified for ETTL light painting.

Figure 7. Coast HP7R flashlight with snoot by Light Painting Brushes, modified for ETTL light painting.

If you’re using ETTL to determine exposure for a scene you need to light-paint, then get a snoot that fits onto the end of your flashlight, such as the Universal Connector made by Light Painting Brushes. Cover the far opening of your flashlight with a thick and subsequently expensive layering of gaffer’s tape (Figure 7, above). With this modified snoot on your flashlight, you won’t impair your ETTL exposure. This is exactly what I did to light-paint a night wildlife scene in Voyageurs National Park (Figure 8).

Figure 8. In Voyageurs National Park I got an opportunity to photograph these greater horned marmots. Unfortunately the moon was new, and it was winter in northern latitudes, so I needed to light-paint my subject—obviously quite cautiously. The need for light painting introduced a further obstacle to achieving a good ETTL exposure, which I circumvented by using the snoot method described above. (Click/tap for larger view.)

Another option is to apply a thick layer of black paint over the front of the flashlight lens. Just be sure to use removable paint, so you can peel it off, lest you have to head back down the trail in the dark. 

Along the same lines, a strobe is even more detrimental to ETTL, because even though that light burst comes and goes in a flash, it’s really bright. For this situation, I suggest foraging your closet for the case your strobe came in when you bought it. Then put the strobe in that case before firing it. Even better, see if you can buy an extra case and put the flash in both. Extras are pretty easy to find on eBay. (Well, maybe not now that I’m sharing this tip.)

Lastly, pixel-peepers will notice that the ETTL approach diminishes highlights a bit. But don’t worry about it. Just like Meghan Trainor sings in her catchy pop song—“It’s all about that bass, about that bass, no treble”—it’s similar for night photography. It’s all about the shadows, about the shadows, no highlights. After all, night photography is all about photographing within the biggest shadow in the whole world. Seize the shadow.

A Final Note on ETTL

Some photographers accomplish the ETTL effect solely in post-production. In other words, they photograph the scene with a “traditional” exposure. Then they import the photo to Lightroom, pull the Exposure slider all the way to the left, and then reduce the Shadows setting a tad. But the effect just isn’t the same. Get it right in-camera.

I suspect that the ETTL technique will be new to many people reading this, but I promise two things: 1) It will result in better image quality in your night photos. 2) It’s easy to learn, and fun!

If you decide to experiment with ETTL, please do come back and share your results in the Comments section.

Note: It has come to our attention that some readers are not seeing the photos in this post as intended. Please know you are not alone, that others have reported the same. See the Comments section below for more information.

Chris Nicholson is the author of Photographing National Parks (Sidelight Books, 2015). Learn more about national parks as photography destinations, subscribe to Chris' free e-newsletter, and more at www.PhotographingNationalParks.com.

UPCOMING WORKSHOPS FROM NATIONAL PARKS AT NIGHT