If you’re any kind of national park fan, you have almost certainly seen the work of Jacob W. Frank. It is ubiquitous—and excellent.
Part of Jacob’s not-so-secret approach is that he has one of the best tools a photographer can possess: constant access. His intimate knowledge of his subject comes from having what many of us would consider a dream job—he’s a photographer who works as a park ranger, currently at Montana's Glacier National Park.
Moreover, some of Jacob’s best-known photos were shot at night, including a superb series of work he created under the pristine skies of Arches National Park and other red-rock hot spots on the Colorado Plateau. Perhaps his most famous image is of Delicate Arch being lit by a headlamp under a stunning Milky Way sky, a photograph that exquisitely portrays the night experience of the western national parks.

Delicate Arch, Arches National Park. NPS Photo by Jacob W. Frank.
Jacob's photo work spans many gems of the park system, including Yellowstone, Yosemite, Grand Canyon, Bryce Canyon, Canyonlands, Death Valley, Carlsbad Caverns, Hawaii Volcanoes, Olympic, Kenai Fjords, Mesa Verde, Saguaro, Rocky Mountain, Black Canyon of the Gunnison ... and the list goes on, and on, and on.... Some of this work has been exhibited, most notably in the Smithsonian.
I spoke recently with Jacob about how he got his amazing job, his favorite photography gear, and his thoughts about doing night photography in our national parks.
Chris: How did you become a national park photographer?
Jacob: In college I got an internship at Grand Teton National Park. My mom was into photography, and she said, “If you’re going to live and work in a national park, you should probably have a camera to take pictures.”
I would get lots of visitor questions: “What is this thing that we’re looking at?”—“What is that bird?”—“What mountain is that?” I didn’t have any idea, so I would take a picture, figure out the answers and e-mail people—and that’s how I learned and what got me interested in nature.
Then after a while, I was thinking things like, “Oh, I already have a picture of that bird but I want to try to get a better one.” Once I started knowing what things were, I didn’t need to take pictures to figure them out, but rather I found myself trying to get better photos.
Now I really enjoy photography. It pushes me to go out sometimes when I wouldn’t otherwise. I’m not about hiking just for the fun of hiking—hiking is what you have to do to get good photos or to get to the top of the mountain. I just really love capturing photos. There’s an intrinsic value for me of just getting really good photos, and then it just happens to be that other people enjoy the work that I do.
Chris: What cameras do you use?
Jacob: I have a Canon 5D Mark III, which is pretty much my main camera now. I just recently got rid of a 7D that I had been using for wildlife photography.
Chris: What’s your favorite piece of non-camera photography gear?
Jacob: My Peak Design camera clip for my backpack has been a game-changer. Backpacking, hiking and climbing with a camera can be challenging. You want to have your camera accessible but putting a strap over your shoulder or neck isn’t comfortable or secure. Their Capture clip solved that problem. I find myself taking more photos and capturing better photos because I always have my camera at the ready.

Owachomo Bridge, Natural Bridges National Monument. NPS Photo by Jacob W. Frank.
Chris: What’s your favorite lens for night photography?
Jacob: I’ve used a variety of them. Right now I have the Rokinon 14mm f/2.8, and I mainly use that. Probably down the road I’ll get the 24mm f/1.4. I’ve used that one also and I really like it.
Also, I had the Canon 16-35mm f/2.8, and the Sigma 20mm f/1.4. I’ve gotten great photos from all of them, but when you’re doing night photography, I find my lens setup changes based on what park I’m in.
For some parks you need just a superwide angle, and don’t really need a lot of zoom. For example, in Glacier the 16-35mm was too wide for most times, unless you were on top of a mountain. Often I felt like I wanted a little bit more reach, so now I shoot with the 24-105mm a lot. But that’s not fast enough for night photography, so I sold my 16-35mm and got the Rokinon.
I try to not have specialty lenses, like a one-trick pony, but I really like that Rokinon for night photography, and the 14mm is super sharp.
Chris: What is it about a park that changes the type of lenses you’re using?
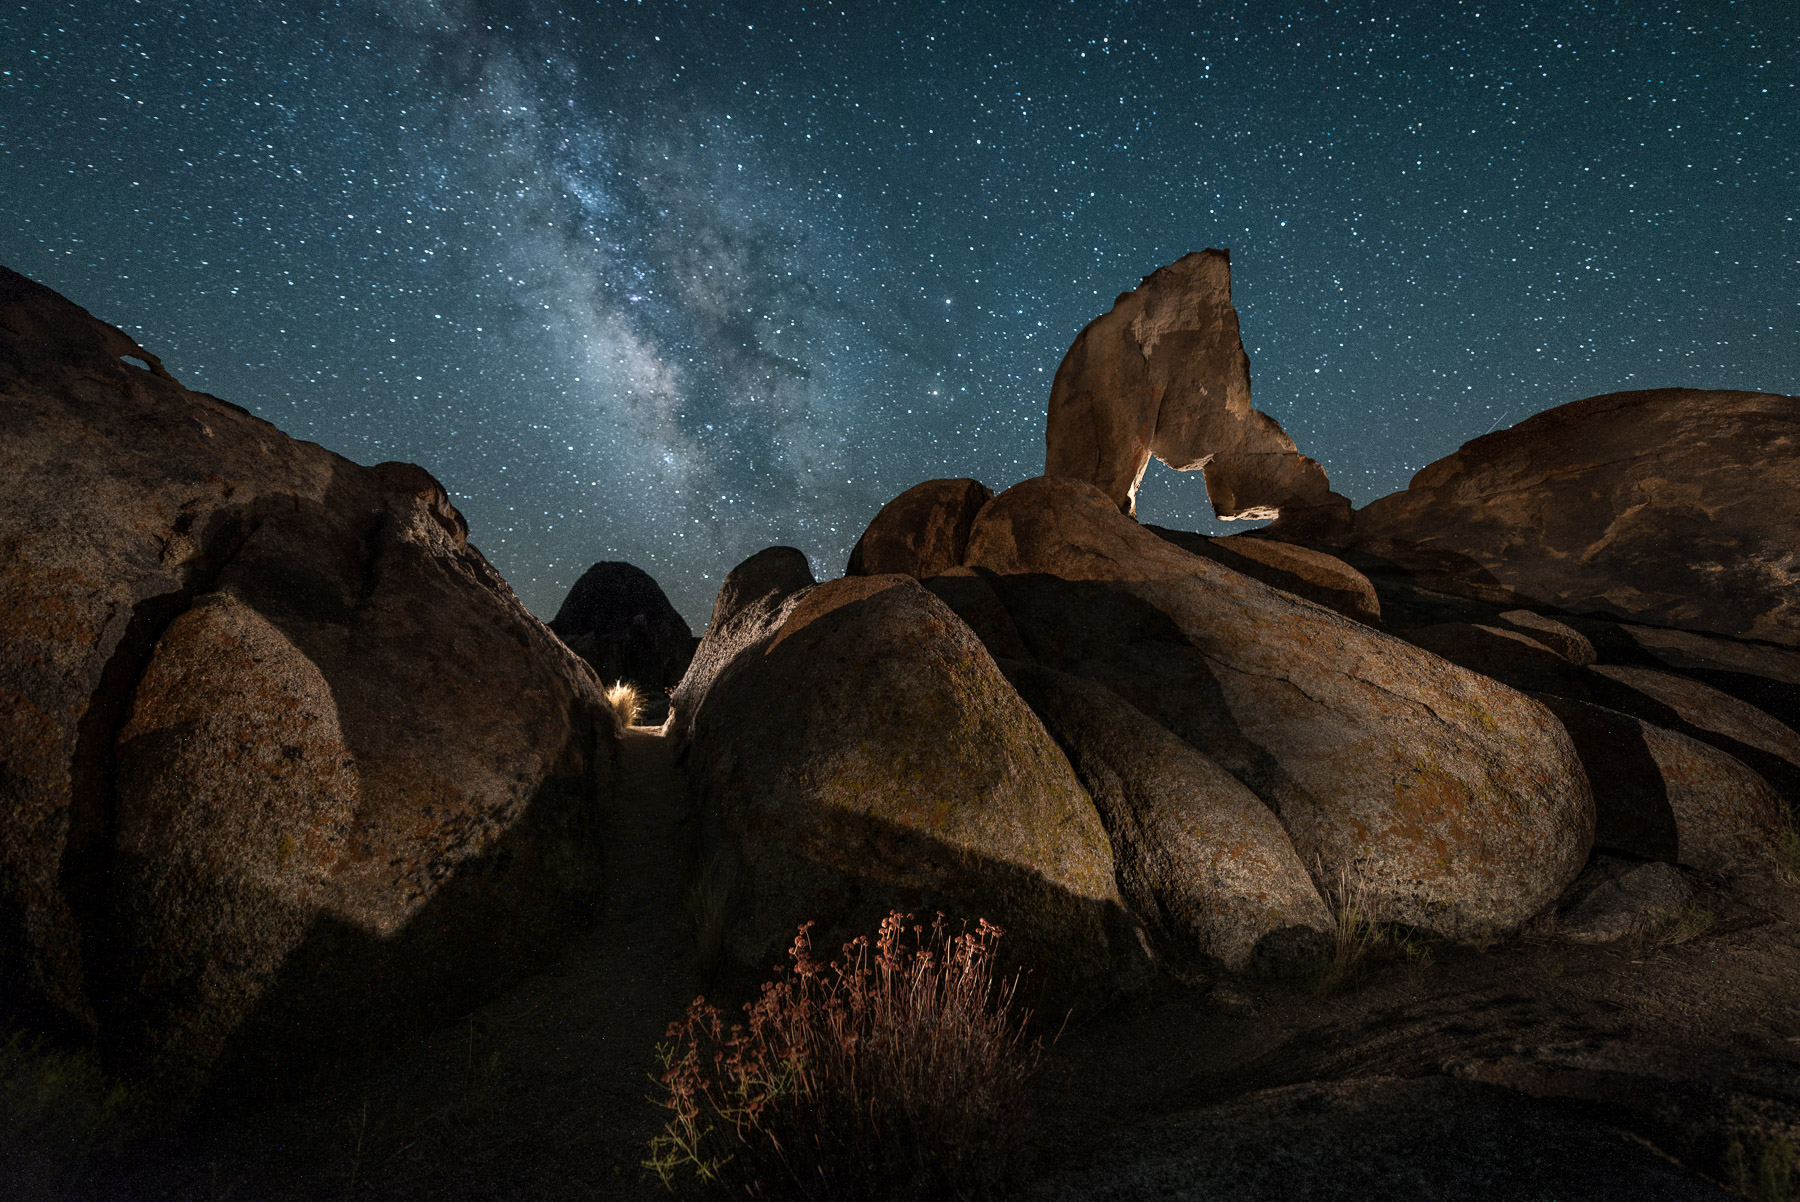
Jacob: In some parks, you’re really in the park. For instance, when you’re in Arches National Park, you’re in tight spots—you’re either inside an arch or the arch is really close to you. You’re maneuvering through a squeeze or you’re hiking on some sort of a slick rock. Whatever it is, you’re in the resource and the landscape almost becomes the foreground because you’re so close to it—you’re in it. So having a superwide angle is really helpful.

Turret Arch, Arches National Park. NPS Photo by Jacob W. Frank.
On the other hand, when you’re in a big mountain park, with huge mountains far away, you can be on the mountains but there’s still a lot to see for a long distance. Having too wide of an angle diminishes the grandeur of where you are; it doesn’t portray how big and how vast everything is. You can still get those shots—I still use a superwide angle—but a lot of times you need to zoom in and capture the detail of how big a park is. Telephoto is also good for when you’re hiking around on the trails, for having the ability to zoom in and add a person to give the photo some scale.
I decided to switch from the 16-36mm to the 24-105mm after I did a detail to Alaska last summer. I went to Wrangell St. Elias National Park, and that is the ultimate park of grandeur. Everything was so big and I found myself wanting to zoom in on details, but was unable to without having to have carry separate setup.
I really like the style and the ability to zoom in on particular mountains. I’ve been doing a portrait series of mountains this summer during sunrise or sunset. There are a lot of cool peaks that you can focus on using the 100mm and 150mm range. I’ve been calling it a “Mountain Portrait Project”—just taking lots of cool pictures of individual mountains in the portrait orientation. It’s been fun and people seem to like it.
Chris: Do you have a favorite night photography technique?
Jacob: I got into night photography because of the aurora in Alaska. When I lived up there I shot a ton of aurora. It’s the coolest natural phenomenon there is, no matter how many times you see it.
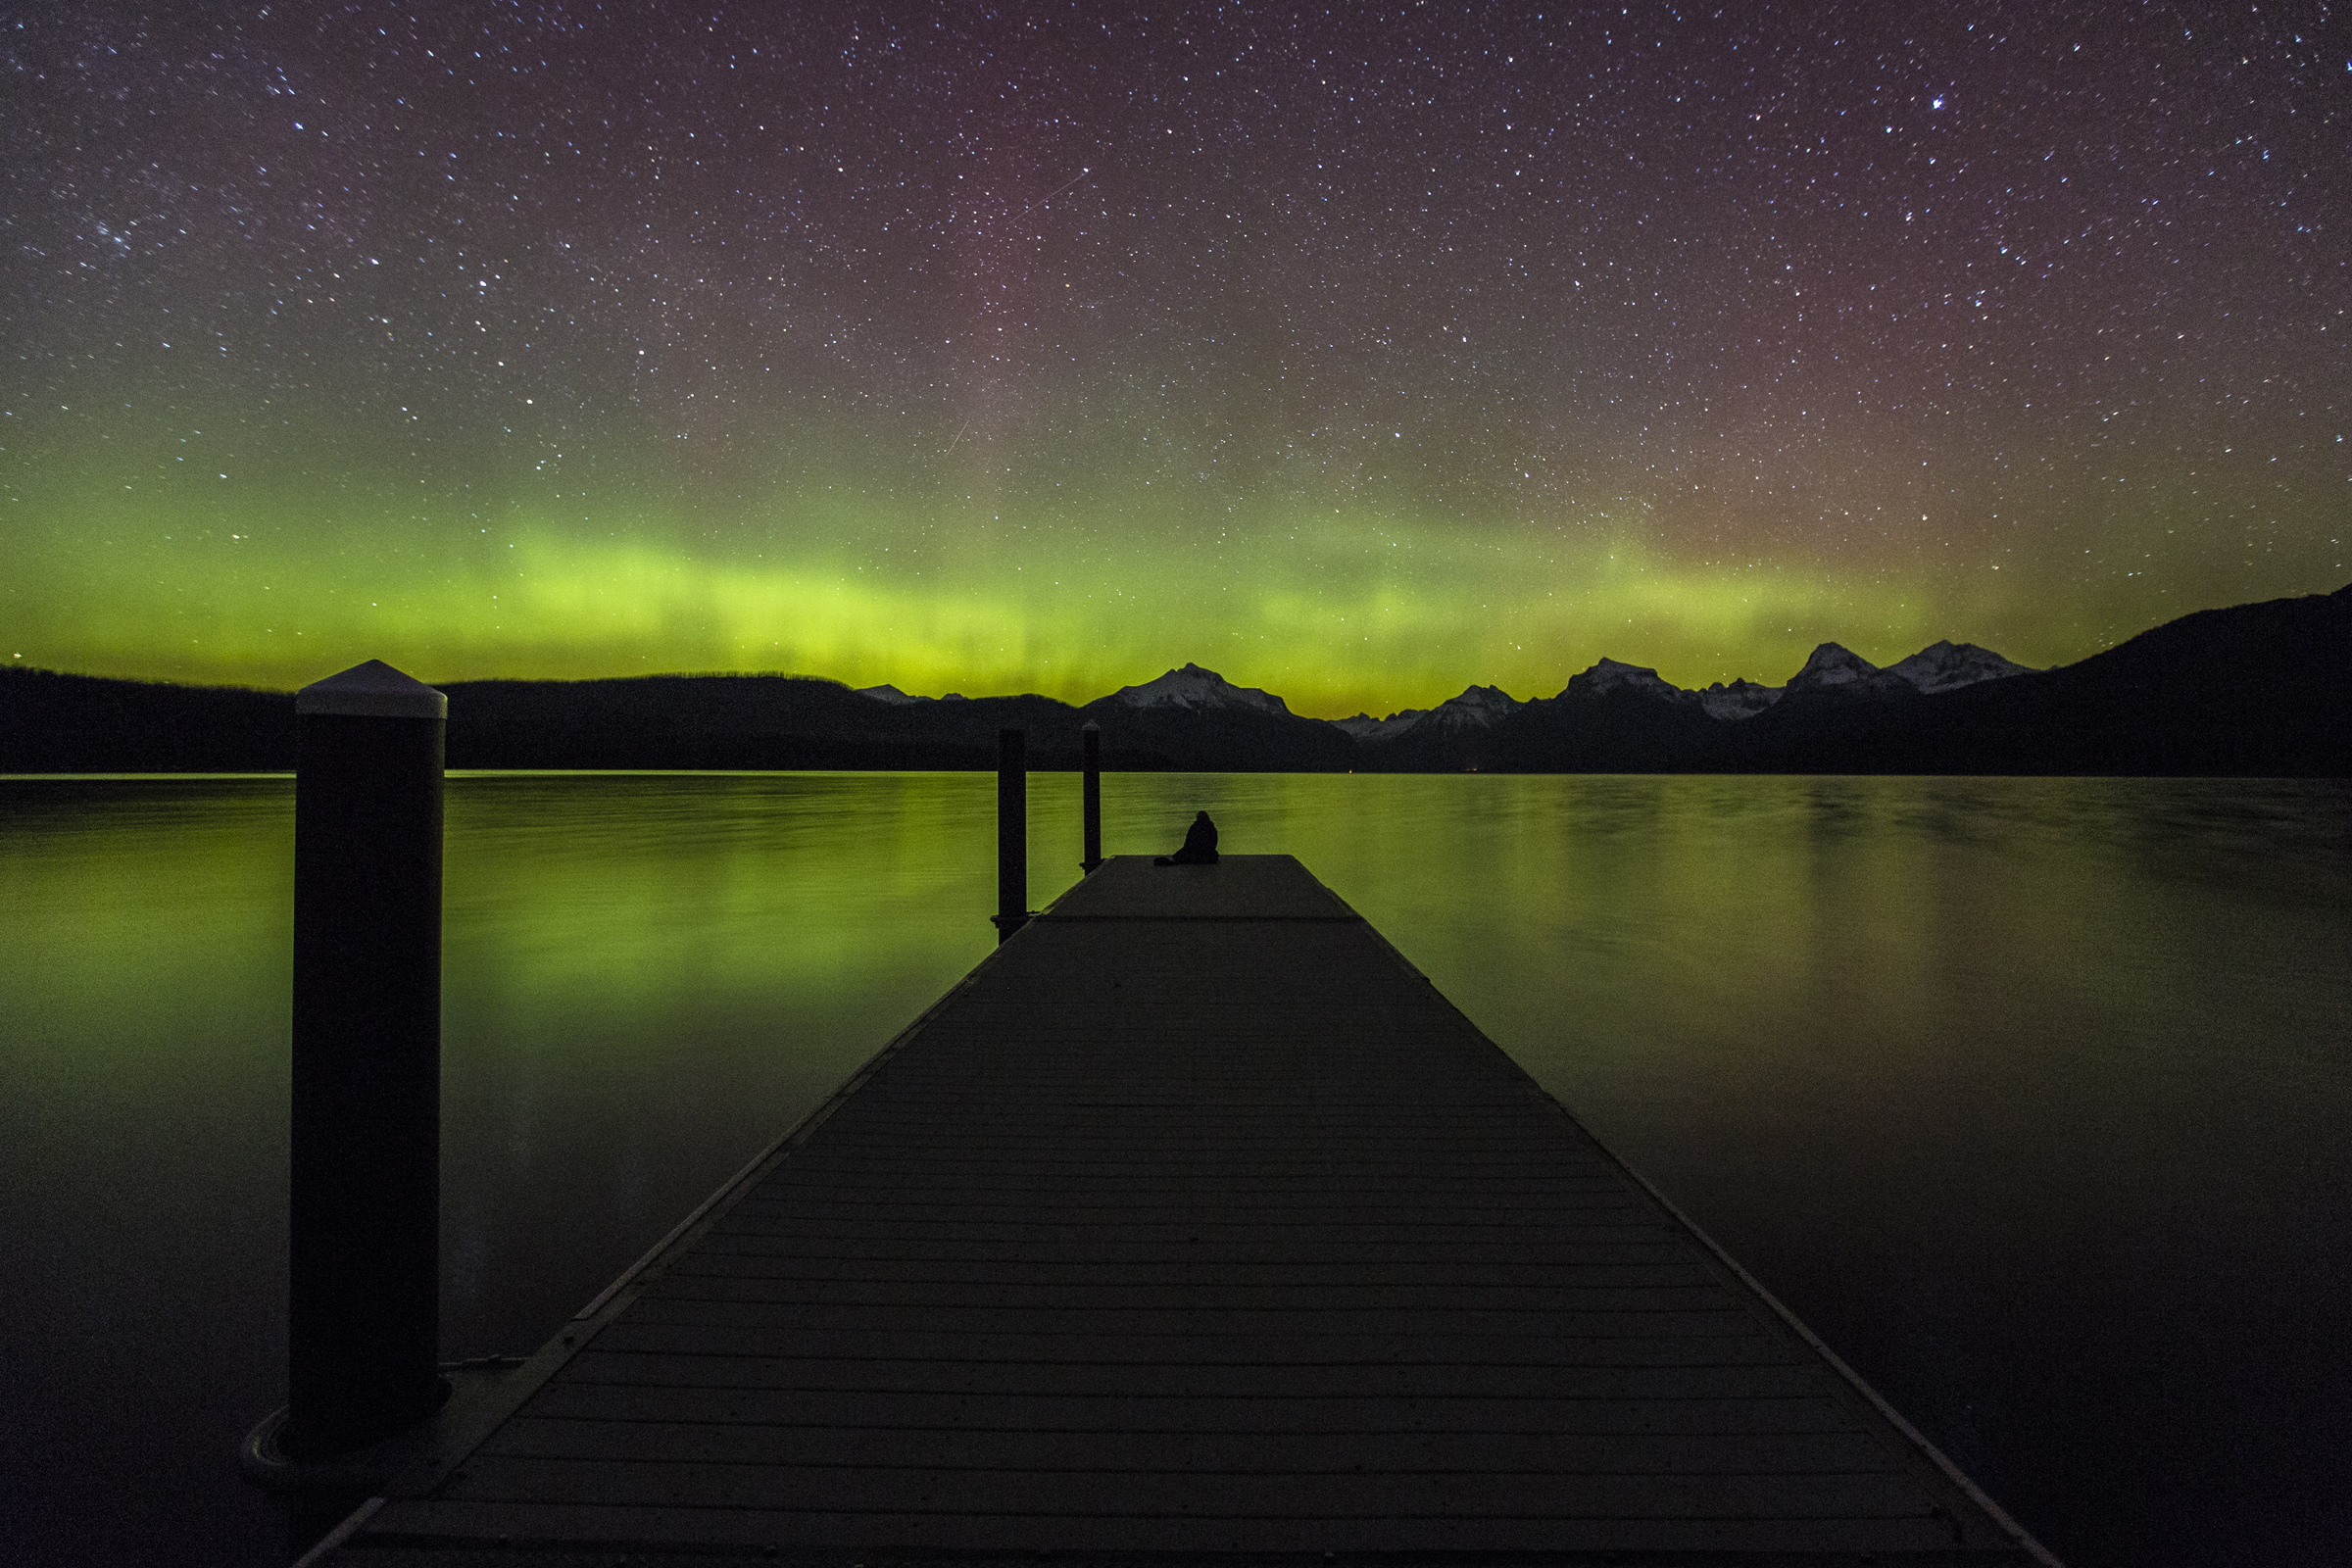
Aurora Borealis at Glacier National Park. NPS Photo by Jacob W. Frank.
The Milky Way is cool because you can see it with your eyes, and you can take a picture of it. You can do time lapses because it’s moving. But when you’re looking at the aurora, it makes me laugh out loud because it’s so amazing. People always ask me, “I heard that the aurora makes noise if it’s a really good storm.” And I have to say, “Maybe, but I don’t know because I’m too busy laughing the entire time.”
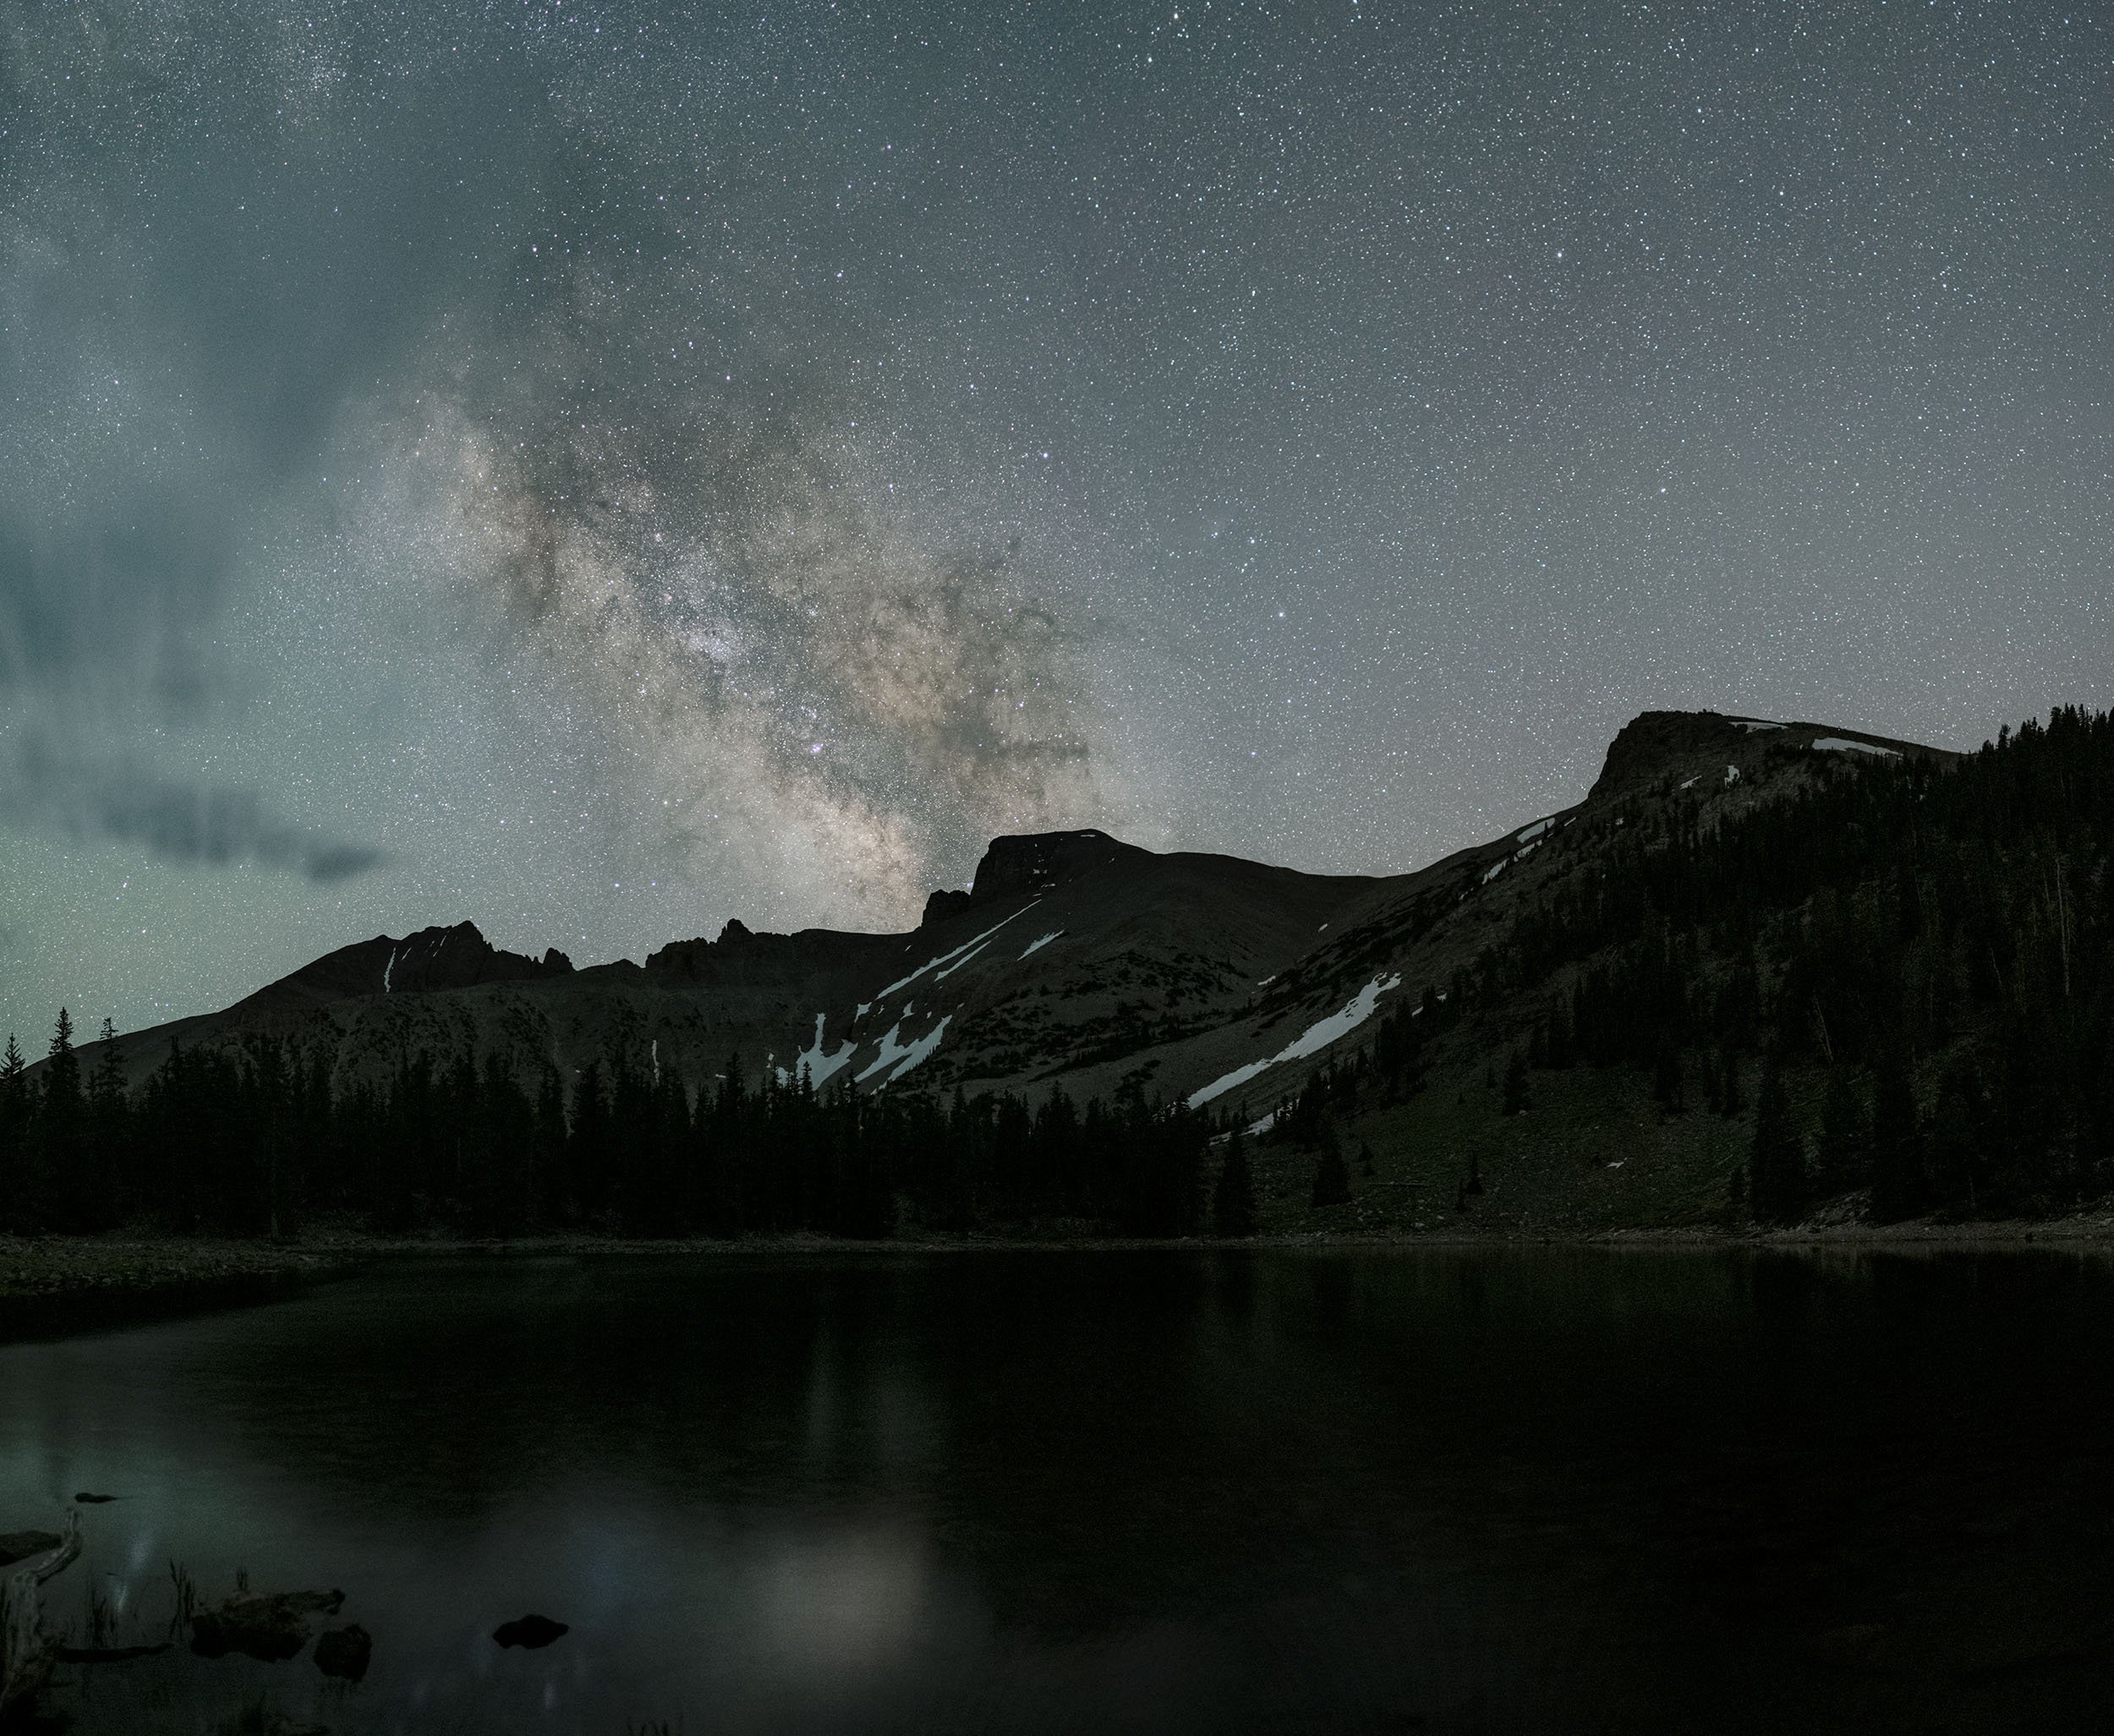
I got into Milky Way photography because of how much fun I had at night shooting the aurora. When I came down to the Lower 48, I moved to the Colorado Plateau, which is known for its night sky. I already knew how to shoot night stuff from Alaska, so it was a natural progression to start shooting the Milky Way.
I do like shooting the Milky Way, but a lot of it requires good camera technique. The majority of what people see nowadays aren’t even single images—they’re blended multiple images. Your average everyday person can’t take a photo like that without studying and really upping their post-processing skills.
Good aurora photos require the same technique, but the average everyday person can point their camera, push a button, the aurora is going to pop out and they are going to be amazed with it.
Chris: What are your favorite national parks for night photography?
Jacob: Alaska parks for aurora, but aurora works only in the spring, fall and winter. In the summertime, the sky doesn’t get dark enough.

Aurora, Denali National Park. NPS Photo by Jacob W. Frank.
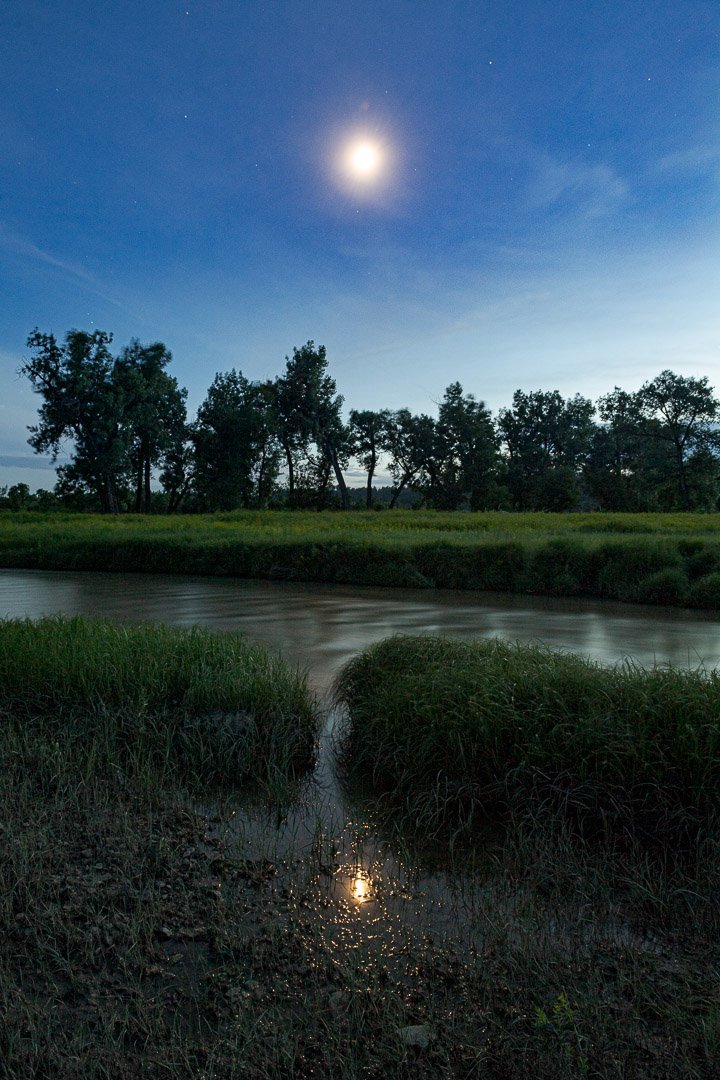
For dark sky parks for shooting the Milky Way, I’ve had a blast shooting in Arches, and I’ve had a blast shooting in Capitol Reef National Park and in Natural Bridges National Monument. Hovenweep National Monument and Dinosaur National Monument have really dark skies, as does Great Sand Dunes National Park. I actually I saw northern lights when I was in Great Sand Dunes. They have really cool dark night skies.
Chris: You saw northern lights that far south?
Jacob: In May 2013 we went out to shoot the Milky Way in the dunes at midnight. I was going to stack an image of the stars rotating over the Sangre de Cristo Mountains, so I was looking north. I had taken my first exposure and there was something like sky glow in the frame. I thought, “What happened to this being a dark sky park?”
Then I’m looking at the image and I said, “Wait a second, those mountains are 14,000 feet tall and I don’t think there’s anything north of them nearby."
I thought that was kind of weird, so I started time-lapsing and I noticed that the sky glow started moving and started getting pillars in it. I realized, “Oh, this is northern lights!” When we went back to the car, we got cell service and looked it up on Spaceweather.com—and it was a geomagnetic storm of like 7! So we were getting the southern end of the aurora storm.
Chris: What’s next for you? Are you working on any other specific projects?
Jacob: I had two photos in the Smithsonian’s “Wilderness Forever” exhibit that they put on for its 50th anniversary. They just took that exhibit out and are putting up a new one, and I have a couple of photos in there too. Also, my work will be one among the entrance photos for their new exhibit “100 Years of America’s National Park Service: Preserve, Enjoy, Inspire.”
In December, the plan is to go out and speak about the Centennial. Other than that, I’m just working in the park. Then when I’m not working, I’m traveling to other parks, just being outdoors.
To see more of Jacob's photography, and to read about his adventures photographing the national parks, visit www.jwfrank.com. He is also on Flickr and Instagram.
For more information about the gear mentioned in this post: