VIDEO: Night Visions of National Parks at OPTIC 2016 Imaging Conference

We're delighted to share this recording of our live presentation at the OPTIC 2016 Imaging Conference, hosted and put together by B&H Photo and Lindblad Expeditions. Join all five instructors—Matt, Chris, Lance, Tim and Gabe—as we share successes and challenges achieving our own night visions in national parks.

 
See more about Matt's photography, art, workshops and writing at MattHillArt.com. Follow Matt on Twitter Instagram Facebook.

Upcoming workshops from National Parks at Night

Revisiting Locations Can Lead to Seeing with New Eyes, Boosting Creativity

Over the years, I’ve had many opportunities to revisit some of the great locations I’ve photographed. There have been times when a photograph I had envisioned didn’t quite work out for one reason or another—an errant plane leaving a trail across the sky, the moon or the Milky Way being in the wrong part of the sky, or simply me not getting the lighting quite right, or the stars being just a little bit soft.

I count myself fortunate to have the chance to reshoot, but I have learned not to expect to be able to recreate the original image, because if one thing is certain, it's that nothing stays the same for long. It could be that the light has changed, a tree has fallen over, or a gate is locked where once it was open.

On other occasions, I’ve made a successful image and am simply hoping to make another. Because I teach workshops in national parks and monuments, my students and I are often photographing well-known views in popular locations, and it can be a challenge to make an original photograph. It’s a worthy endeavor to try to make a unique image of Yosemite Valley, the church at Bodie, or of Mobius Arch in the Alabama Hills. I push myself, and encourage my students, to come up with compositions that they have never seen before.

Mobius is typically photographed at sunrise, as the arch runs from north to south, and Mt. Whitney can be framed within the arch just as the sun’s first rays light up the Sierra to the west. The most obvious shot is a horizontal one, and that is what most people choose to do. There are plenty of nocturnal versions too, with low moonlight on the Sierra, and the arch in shadow, which provides a great opportunity for light painting.

I challenge myself to make at least one unique view of the famous Mobius Arch every time I visit the Alabama Hills, a rocky landscape in the foothills of the Eastern Sierra in California. It’s a way to refine my vision and to stay sharp, and to appreciate how fortunate I am to be able to visit these places on a semiregular basis.

If one thing is certain, it’s that nothing stays the same for long.
— Lance

In 2007, I was invited by the Texas Photo Society to teach a night photography workshop in Big Bend National Park. The landscape, culture, and geology were all new and exotic to me (coming from Massachusetts) and I was excited to explore.

One of the unexpected highlights of the workshop was a visit to Terlingua Ghost Town, a former cinnabar mining town just outside of the park. Mining is always a dangerous occupation, and smelting cinnabar to extract mercury made it doubly so. Terlingua’s miners were mostly Mexican, and many of them died there.

The cemetery in Terlingua is a fascinating place to explore, and we were lucky enough to visit during Dia de los Meurtos, when the graves are decorated with sugar skulls, fresh flowers and candles. I made the following image during that workshop, and it was my favorite from the trip.

Tres Cruces, Terlingua, 2007. ISO 200, 5 minutes, f/8. Canon 5D, Nikkor 28mm f/3.5 PC lens. Nearly full moon.

Tres Cruces, Terlingua, 2007. ISO 200, 5 minutes, f/8. Canon 5D, Nikkor 28mm f/3.5 PC lens. Nearly full moon.

This image was made with existing light, consisting of moonlight and the orange glow from a candle that was inside the fenced grave in the foreground. I positioned the camera so that the candle was hidden behind one of the fence posts which kept the highlights from being blown out. The candle glow contrasted nicely with the cool blue moonlight, and I felt like the image captured the spirit of the place.

I have just come back from another West Texas workshop, this one based entirely in Terlingua Ghost Town and the surrounding area, which is so rich with subject matter. I wanted to see how the graveyard had changed, thinking perhaps that one of the crosses might have fallen over, or at least be leaning over further than it was nine years ago.

Much to my surprise, very little had changed aside from the lack of Dia de los Meurtos paraphernalia. What was different was that I was there at the end of the lunar cycle, and the moon was below the horizon. The Big Bend region is the darkest area in the lower 48, so it was truly very dark.

One of the workshop students and I decided to do a reshoot of the photograph I had made in 2007. We worked together for about an hour and came up with a dramatic image of nearly the same composition. But the results were very different due to the lack of moonlight, to light painting, and to the partly cloudy sky.

I still like the original image, but very much enjoyed the opportunity to revise the location with different eyes.

Tres Cruces, Terlingua, 2016.  ISO 6400, 30 seconds, f/4.5. Nikon D750, Nikon 24-120mm f/4 lens at 24mm, Coast HP7 flashlight (back-lighting) and Coast HP3 flashlight (fence lighting). New moon.

Tres Cruces, Terlingua, 2016.  ISO 6400, 30 seconds, f/4.5. Nikon D750, Nikon 24-120mm f/4 lens at 24mm, Coast HP7 flashlight (back-lighting) and Coast HP3 flashlight (fence lighting). New moon.

For more information about the equipment mentioned in this post, see the Our Gear page and the following links:

Lance Keimig has been photographing at night for 30 years, and is the author of Night Photography and Light Painting: Finding Your Way in the Dark (Focal Press, 2015). Learn more about his images and workshops at www.thenightskye.com.

UPCOMING WORKSHOPS FROM NATIONAL PARKS AT NIGHT

A Guide to Getting Started With the Art of Light Painting — Part II

This is the second part of Tim Cooper’s primer on light painting. For the introductory materials for this topic, see “Part I.”

In my last post I talked about the basics of light painting. Now let’s dig a little deeper to see how we build an exposure for a light-painted photograph. This technique can be applied to many images, both simple (like the one in the examples later) and complex (like Figure 1).

Figure 1. ISO 100, f/8, 4 minutes. Nikon 14-24mm f/2.8 ED lens, Nikon D4, Coast HP5R flashlight.

Figure 1. ISO 100, f/8, 4 minutes. Nikon 14-24mm f/2.8 ED lens, Nikon D4, Coast HP5R flashlight.

This photo is a more complex light painting scenario that involved a lot of testing and different components of painting. But it started with the same concepts as below, and I worked out the final exposure in the exact same way.


Ambient Light and Test Exposures

For most light painting compositions, you’ll want an exposure between 30 seconds and 3 minutes to allow time to illuminate your subject. More complex scenes may require more time.

The first step is to establish your ambient exposure and composition using a high ISO. This will allow you to make test frames more quickly, because your shutter speeds will be in seconds rather than minutes. (To learn more about this, see Lance Keimig’s post from April, “Save Time by Using High ISO Testing to Set Up Your Night Shots.”

A great trick to use is often referred to as the Six Stop Rule, which says that when you close down your exposure by six stops, your original (test) shutter speed in seconds translates to the same shutter speed in minutes. For example, let’s assume you like an ambient-light test exposure that you made at ISO 6400 with a shutter speed of 1 second. You can then calculate your actual exposure—one long enough to allow for light painting—by closing down six stops of ISO and shooting for 1 minute rather than 1 second. Here are the steps, one stop at a time:

ISO 6400 for 1" equals
ISO 3200 for 2" =
ISO 1600 for 4" =
ISO 800 for 8" =
ISO 400 for 16" =
ISO 200 for 30" =
ISO 100 for 1 minute

The 1-minute exposure at ISO 100 now gives you time to illuminate your subject with your flashlight.

If you need even more time, remember that changing the aperture can also help. That 1-minute exposure could also be a 2-minute exposure if you close down your aperture by one stop (e.g., f/4 closes down to f/5.6, or f/5.6 closes down to f/8). Remember, though: Closing down your aperture makes the hole smaller, which in turn makes your flashlight “less efficient.” In cases where your flashlight is too bright, this will be to your advantage; in cases where your flashlight is barely bright enough, this will be a detriment.

Here is an example of how I used the Six Stop Rule to begin my light painting process.
I began by putting my camera into Manual exposure mode with Matrix metering. Next, I set my ISO to 6400 and my aperture to f/11. I pointed the camera to the sky and adjusted my shutter speed so that the indicated meter read -1 (Figure 2). This setting makes the sky appear darker than at midday, but not black.

Figure 2.

Figure 2.

The resulting image (Figure 3) shows how the sky has a night feel and the foreground is completely black. This exposure was 4 seconds at f/11 with an ISO of 6400. The -1 setting on the sky is typical for me when shooting around city light, but is certainly not mandatory. You can experiment with different brightness levels to suit your taste.

Figure 3. ISO 6400, f/11, 4 seconds. 24mm f/2.8D Nikon Lens, Nikon D4, Coast HP5R flashlight.

Figure 3. ISO 6400, f/11, 4 seconds. 24mm f/2.8D Nikon Lens, Nikon D4, Coast HP5R flashlight.

Next, I used the Six Stop Rule to calculate my final exposure. Again, the Six Stop Rule states that 1 second at ISO 6400 equals 1 minute at ISO 100. My test exposure was 4 seconds, so my final exposure was 4 minutes. Figure 4 shows the 4-minute exposure with my first attempts at painting the head stones.

Figure 4.

Figure 4.

Add in the Light Painting

At this point it’s not necessary for me to run the full exposure while I test for light painting. I know the sky will look right at the 4-minute exposure, so now I am just testing the light painting. In other words, I’m building the final exposure one piece at a time.

Figure 5 was my next test shot. I painted the front headstones for longer (about 2 seconds for each stone). The total exposure for this shot was only 46 seconds, which makes the sky look black. But again, I’m not concerned about the sky at this point—I am simply trying to get my painting right for the main subject.

Figure 5.

Figure 5.

After a couple of more light painting test shots, I learned that I needed to increase the time I spent painting the front headstones to about 3 seconds each. I then placed my flashlight at a low angle and painted the grass around the stones. Now I had all the information I needed to create the final image, as seen in Figure 6.

Figure 6.

Figure 6.

This was taken using the full exposure of 4 minutes. The full exposure also gave me time to walk back into the scene and paint a few more monuments. Using Photoshop, I cloned out some of the brighter city lights at the rear of the cemetery to make for a less distracting background.

For more information about the equipment mentioned in this post, see the Our Gear page and the following links:

Learn more techniques from Tim Cooper’s book The Magic of Light Painting, available from Peachpit.

Upcoming workshops from National Parks at Night

A Guide to Getting Started With the Art of Light Painting — Part I

The word photography means to draw or paint with light. When I first began studying photography, I was told that along with composition, the study of light would be a lifelong endeavor. Over the years, I’ve found this to be an absolute truth. I have also found that light painting is one of the more creative and magical ways to illuminate a scene.

In short, light painting is using a flashlight to illuminate your subject. Rather than depending on a typical light source for lighting, you use a flashlight to “paint” your subject. Standard photography involves the use of ambient light, meaning natural light provided by the sun, overcast days, the sky, indoor lighting, street lamps, etc. “Ambient” means “relating to the immediate surroundings,” so ambient light is that which surrounds us. The light that’s available.

Zion National Park. ISO 800, f/5, 60 seconds. 14-24mm 2.8 Nikon lens, Nikon D4, Coast flashlight.

Zion National Park. ISO 800, f/5, 60 seconds. 14-24mm 2.8 Nikon lens, Nikon D4, Coast flashlight.

Commonly, light painting takes place outside after dark, inside dark rooms, or in any other dimly lit situations.

This is not to say that complete darkness is necessary for light painting. It is possible and indeed fun to mix light painting and ambient light. One of my favorite times to paint with light is when the moon is full, as it is in the image above taken on our NPAN workshop in Zion National Park. The trick is to put yourself in situations where your shutter speed can be long enough to allow you time to paint your subject. If you are shooting a well-lit street scene, your shutter speed may be as fast as 4 or 8 seconds—which is just not enough time to effectively light-paint. A dark alley, however, may allow an exposure of 30 seconds, or a minute or two. These exposures are more conducive to creatively illuminating your subject with a flashlight.

The real beauty of light painting is in the crafting of the light. You are the artist. The conductor. Few forms of photography allow this level of creativity in shaping your subject. The flashlight becomes your brush and the scene your canvas. Imagination and experimentation become your workflow, resourcefulness and ingenuity your tools.

In this following image made in solitary confinement at Ohio's Mansfield Reformatory, I needed to add light to bring out the detail in the cell. In the first image we see how dark the cell was, with the ambient light reaching only so far down the hallway. Then in the second we see how the cell looked after I stood inside and painted outward with my flashlight to create the shadows of the bars on the floor.

While creating masterpieces takes some practice, the basic concept of light painting is little more than illuminating your subject with the flashlight while your camera’s shutter is open, a process that resulted in the following image of a structure in Meadowlark Gardens in Vienna, Virginia.

Adding light to the structure under a full moon. ISO 100, f/8, 4 minutes. 24mm 2.8 Nikon lens, Nikon D4, Coast flashlight.

Adding light to the structure under a full moon. ISO 100, f/8, 4 minutes. 24mm 2.8 Nikon lens, Nikon D4, Coast flashlight.

Over the next couple of months, I’ll build on this topic as I present more ideas and techniques. For now, here’s a little to get you going!


Starting the Process

When getting started with light painting you may feel a bit like a fish out of water. Where to begin? What to do first? It all starts with visualizing your composition. As you look at the scene imagine what it can be rather than what it is.

1. Decide what lens to use. This will determine much of what comes next.

2. Think about depth of field. Do you want your whole scene sharp (f/8 to f/22) or do you want only the main subject sharp (f/1.4 to f/4)? I tend to like maximum sharpness, so my default apertures are f/8 or f/11. Consider using only one or two apertures when your first start out. This consistency will help you learn how much painting is necessary for a good exposure.

3. Set your ISO to 6400. If you don’t have 6400, use 3200. Running test shots at high ISOs saves time and helps with fine-tuning your composition.

4. Set your camera to its multi-segment meter. The multi-segment meters (“Evaluative” for Canon, “Matrix” for Nikon) deliver decent initial exposures in scenes that have a mix of lights and darks. Some adjustments may be necessary after you review your test shots.

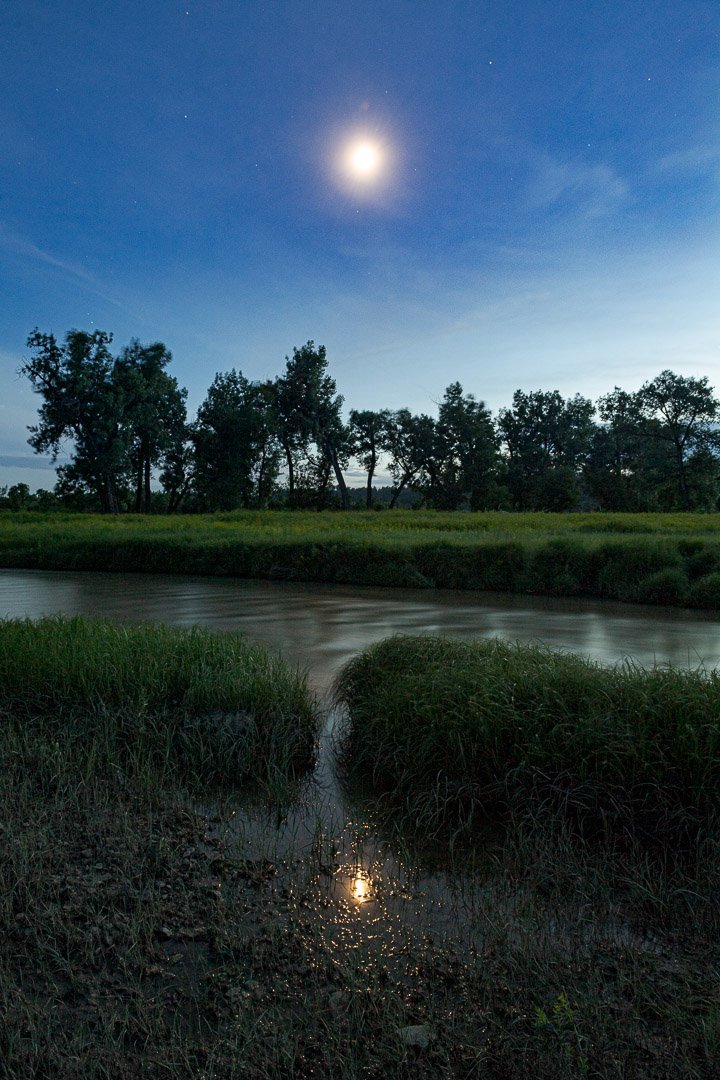
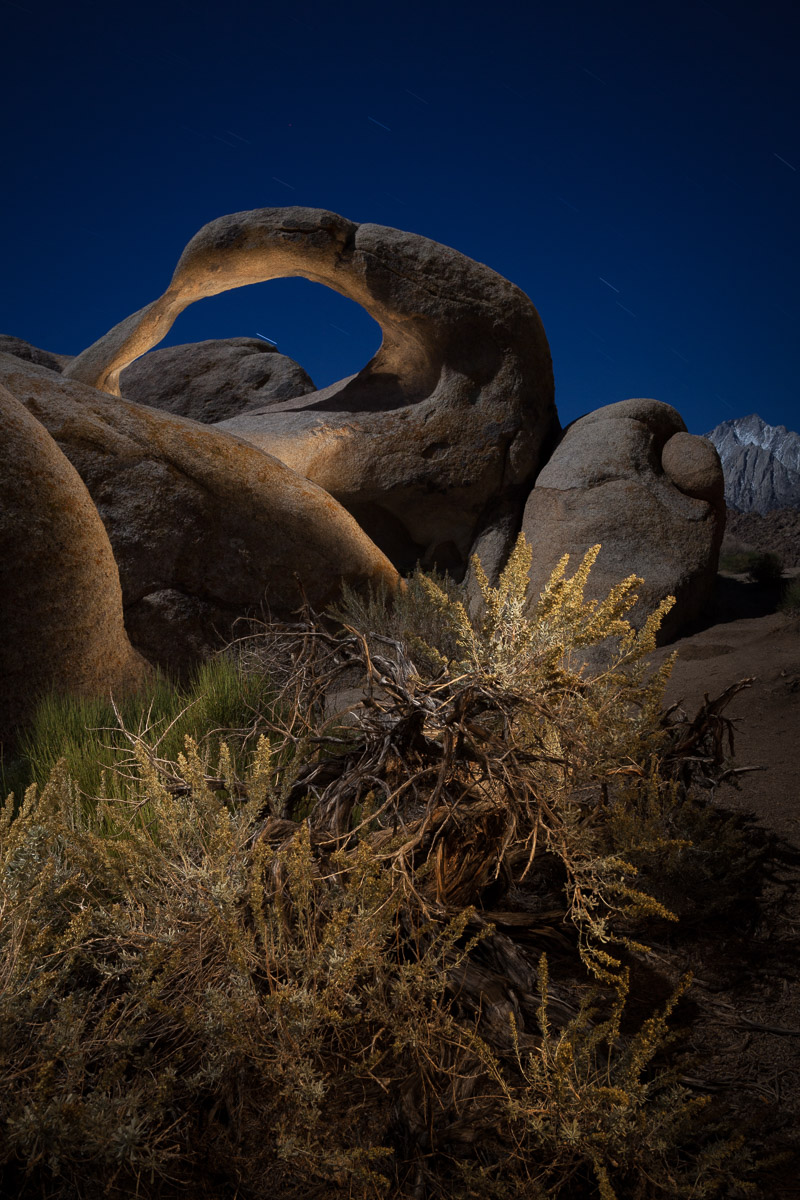
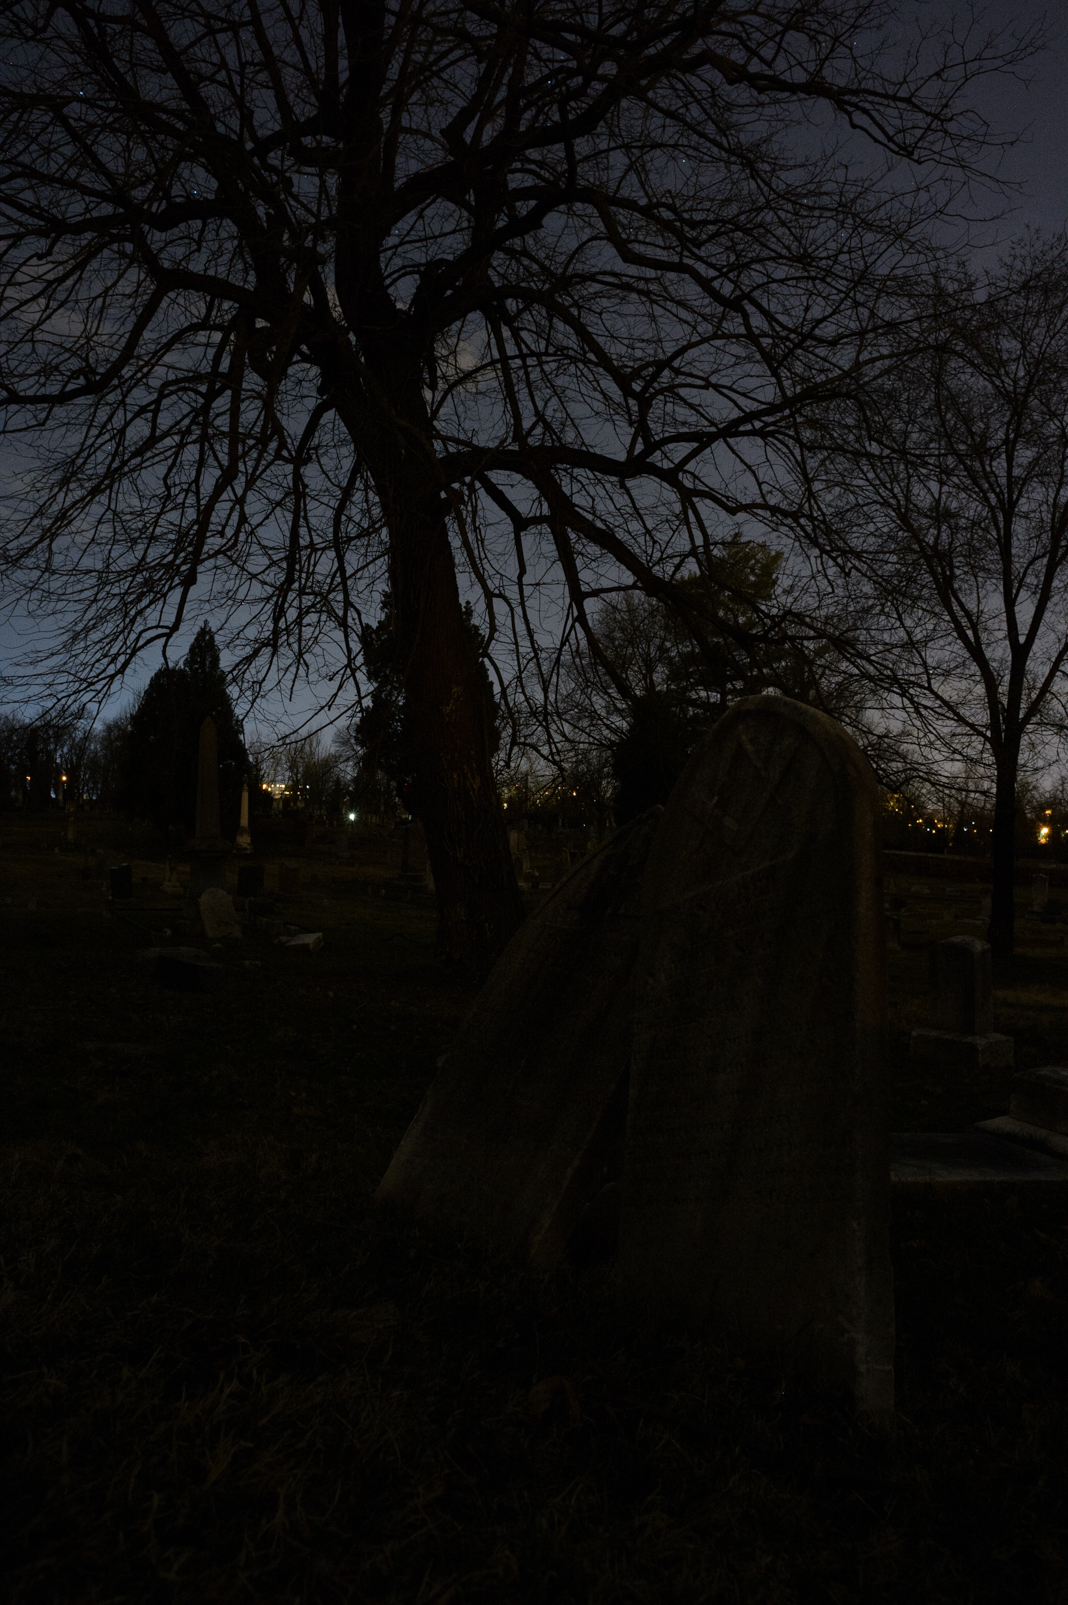
5. You can obtain good exposures under moonlit conditions by pointing your camera into the sky and putting the indicated meter at -1. This will leave your foreground black but your sky will have that nighttime feel.

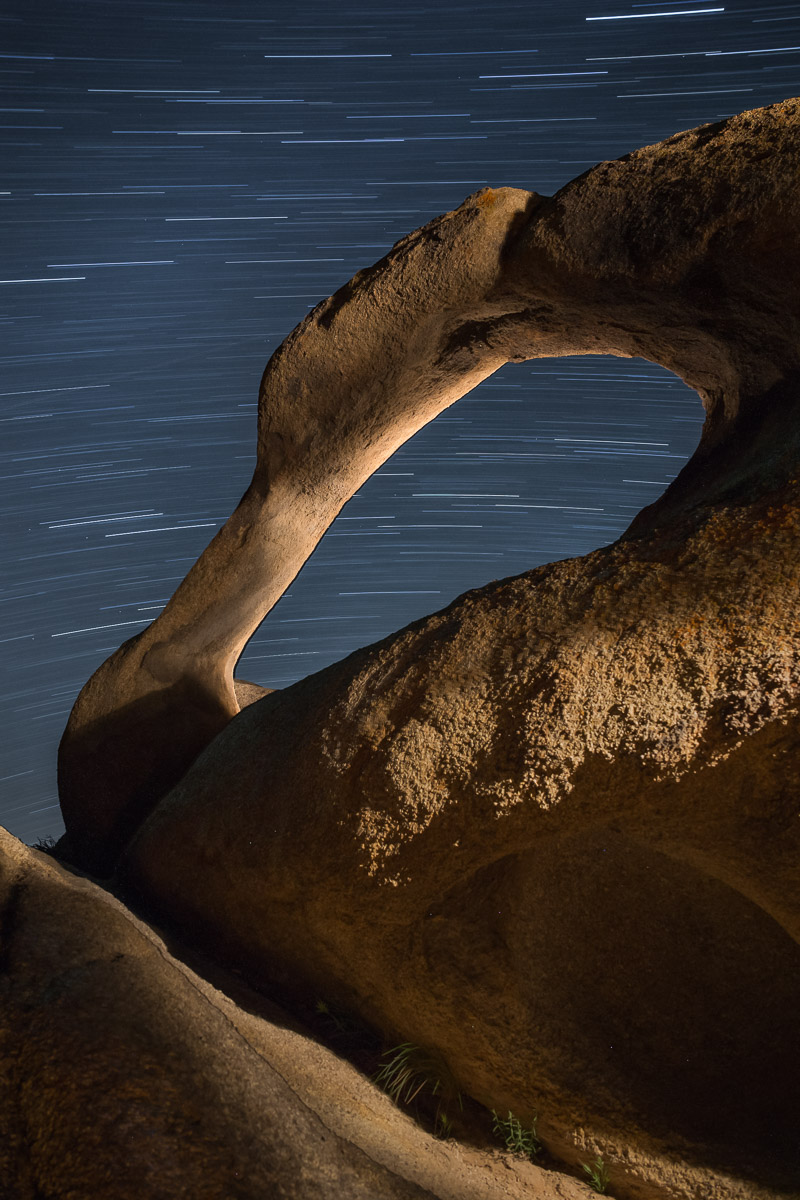
6.  For scenes without much ambient light, I typically shoot for 2 or 3 minutes at f/8 or f/11. I find these two apertures allow enough time to paint without being overly restrictive. f/16 and f/22 allow much less light to pass, increasing the time you need to paint.

7. Once your ambient exposure is established, begin to practice your painting. Remember, it’s not necessary to expose each of these test shots for the full time. At this point you are just analyzing your painting techniques. The overall length of exposure will have very little influence here.

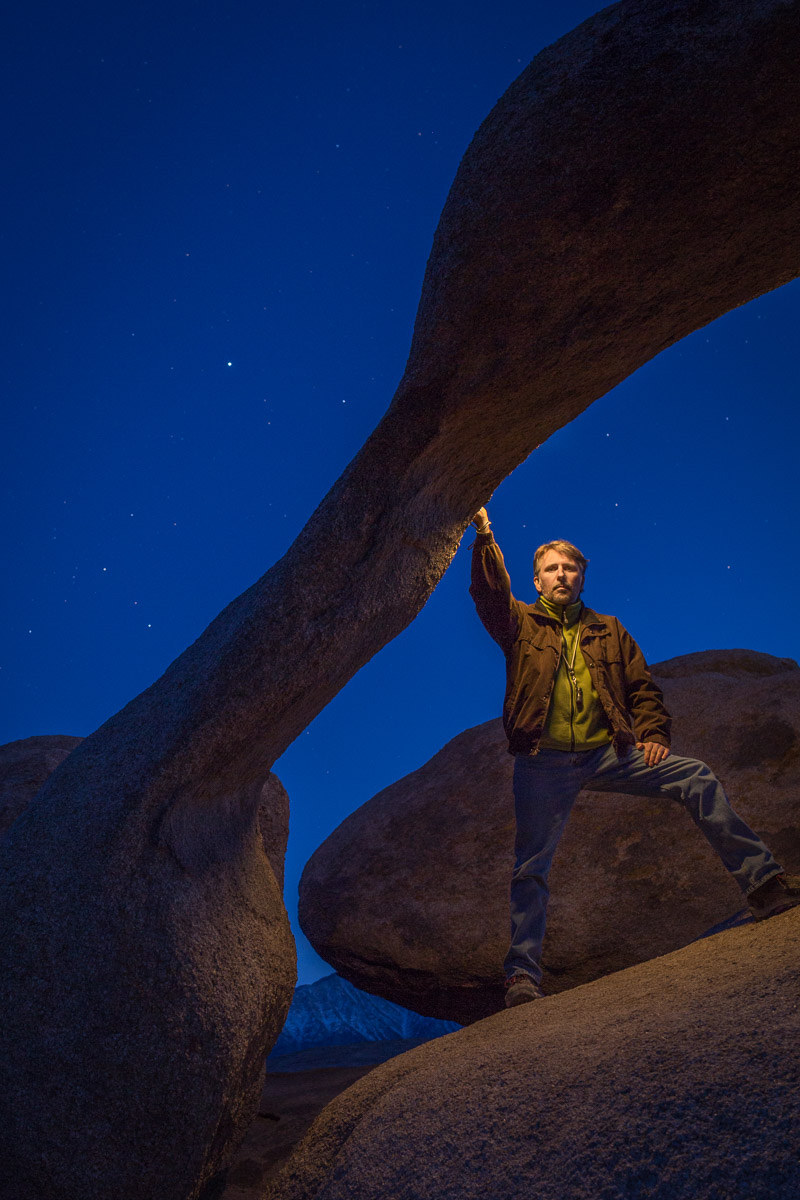
8. If you are working in a bright area, there is a chance that some light can enter through the eyepiece in the back of the camera, causing an odd glow or streaks across your image. Closing the viewfinder eyepiece shutter during long exposures will eliminate these anomalies.

At this point you are truly making photographs instead of taking them. You are creating the light.


Painting the scene

Once the initial ambient exposure is established, the real fun begins. It’s time to put the brush to the canvas. At this point you are truly making photographs instead of taking them. You are creating the light. You are designing the overall look and feel of the image.

Should your subject be brighter? Get closer or spend more time painting. Too bright? Spend less time painting, or back up. Want to change the color of the main subject? Put a filter over your flashlight. Want the ambient light to be more blue? Change the white balance. The possibilities are endless.

The ambient exposure is controlled by the f-stop and shutter speed. But the light painting exposure is controlled by the aperture, length of time spent painting, distance from the flashlight to the subject, and subject reflectivity.

1. Wider apertures = shorter painting times. Smaller apertures = longer painting times. I typically use f/8 or f/11 at ISO 100 or 200.

2. For shorter painting times, get closer to your subject.

3. Subject reflectivity is also an exposure factor. Darker or rougher subjects will take more time to bring up to the desired brightness. Subjects that are smoother or lighter will require less time.

4. Because of all these variables, it is nearly impossible to give an average painting time for any given aperture. Experimentation is key. Don’t be afraid to make mistakes. Simply open your shutter and start painting.

For more on this topic, see "A Guide To Getting Started With The Art Of Light Painting — Part II."

For more information about the equipment mentioned in this post, see the Our Gear page and the following links:

Learn more techniques from Tim Cooper’s book The Magic of Light Painting, available from Peachpit.

Upcoming workshops from National Parks at Night