How I Got The Shot: Star Stacks and Sea Stacks in Olympic National Park

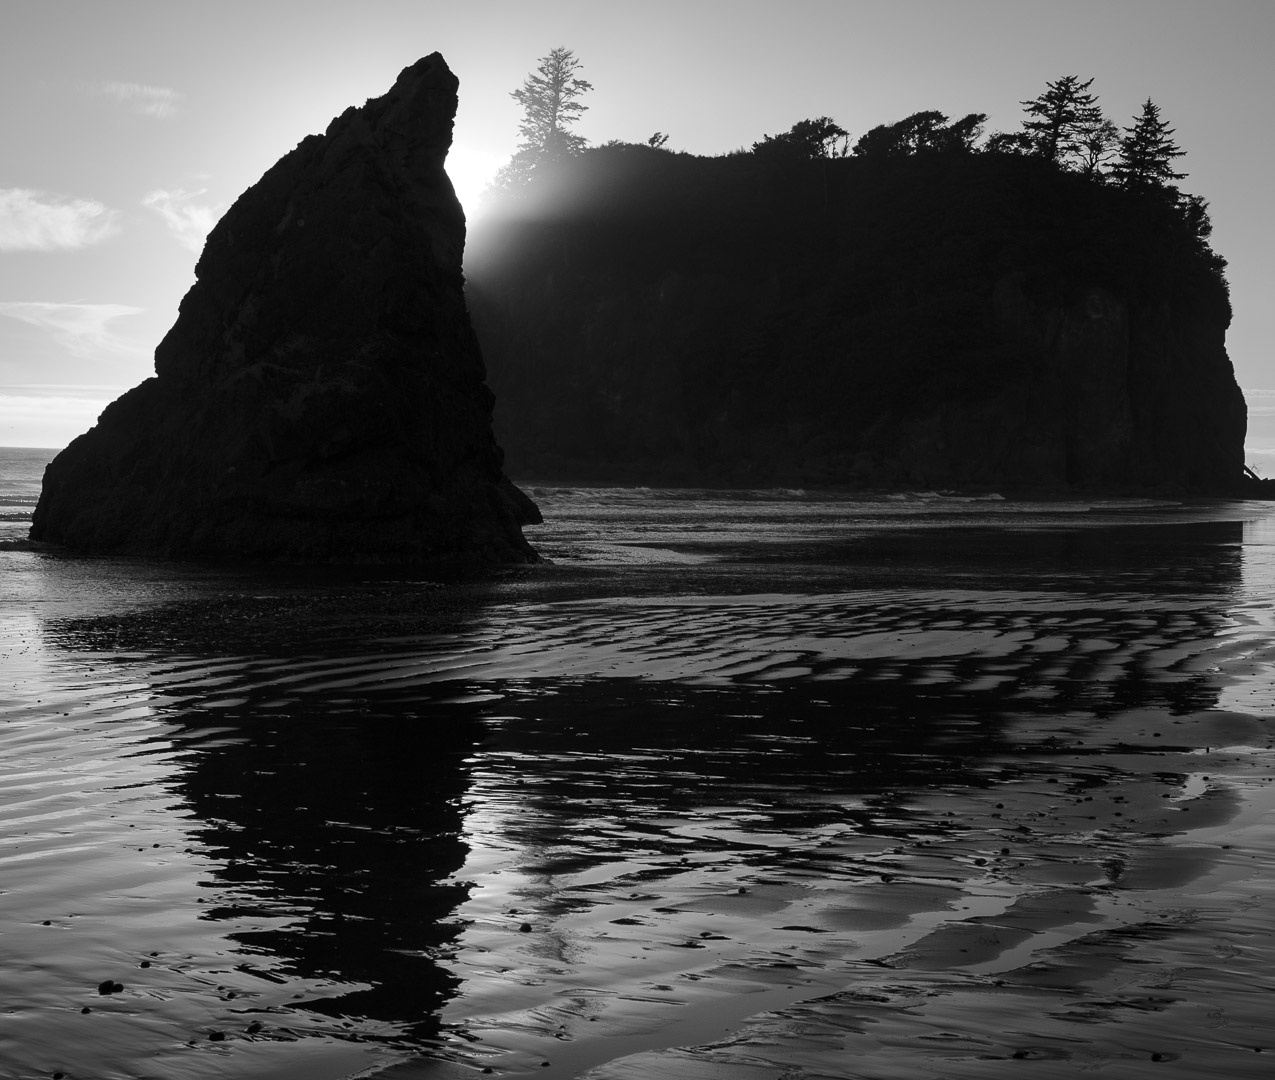
Sea Stack at Ruby Beach, Olympic National Park. Nikon D3s, Nikkor 17-35mm f/2.8. 120 stacked exposures shot at 20 seconds, f/2.8, ISO 1600. Light-painted with a Coast HP7R flashlight. © 2016 Chris Nicholson.

The Location

It’s hard for me to choose a “favorite” national park, because it’s like trying pick a favorite item from a buffet of candy and ice creams. But Olympic National Park would certainly be near be near the tippy-top of my list, if not the cherry at the very top.

Not only is Olympic simply beautiful, but its three distinct ecosystems—mountain, rain forest and coast—all present unique photography opportunities. You could literally be shooting an entirely different scene and genre from one hour to the next.

My favorite of those ecosystems? That’s an easier question to answer: the coast. I grew up in New England only a mile from the shore, so my affinity for the water is strong. And my favorite spot on the Olympic coast to photograph? Ruby Beach.

Ruby Beach is a stunning stretch of coastline ... flanked by high cliffs, lined with hundreds of ancient, massive driftwood logs, divided by Cedar Creek, and punctuated by picturesque sea stacks amid the crashing Pacific waves.

During my four visits and shoots at Olympic National Park, I’ve shot at Ruby Beach in three of them. When I visit the park again this September to prepare for the two workshops we’re hosting there, I’m certain to shoot at Ruby again.

Ruby Beach is a stunning stretch of coastline that is a perfect location for photographing sunsets, in sunset light, on overcast days (tide pools!) and, of course, at night. The shore is flanked by high cliffs, lined with hundreds of ancient, massive driftwood logs, divided by Cedar Creek, and punctuated by picturesque sea stacks amid the crashing Pacific waves.

(Shameless plug: I’d be happy to personally show you around Ruby Beach this September, when Matt Hill and I run our two workshops there. A couple of seats are still open for each week—September 17 to 22 and September 24 to 29—so sign up today!)

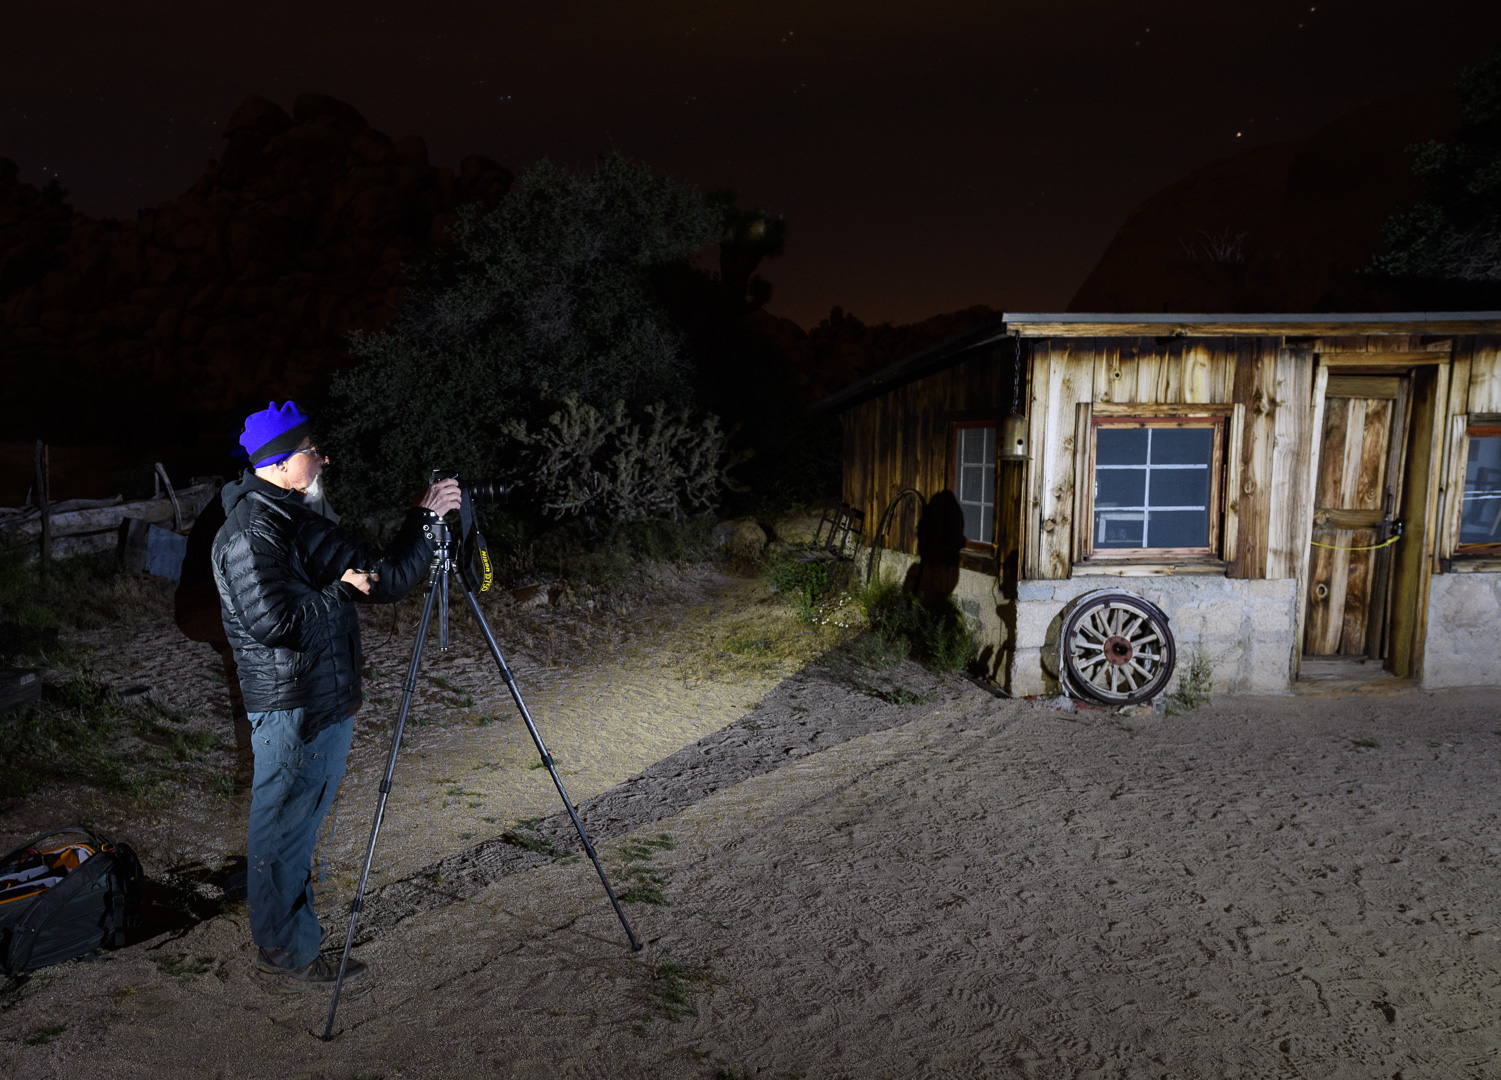
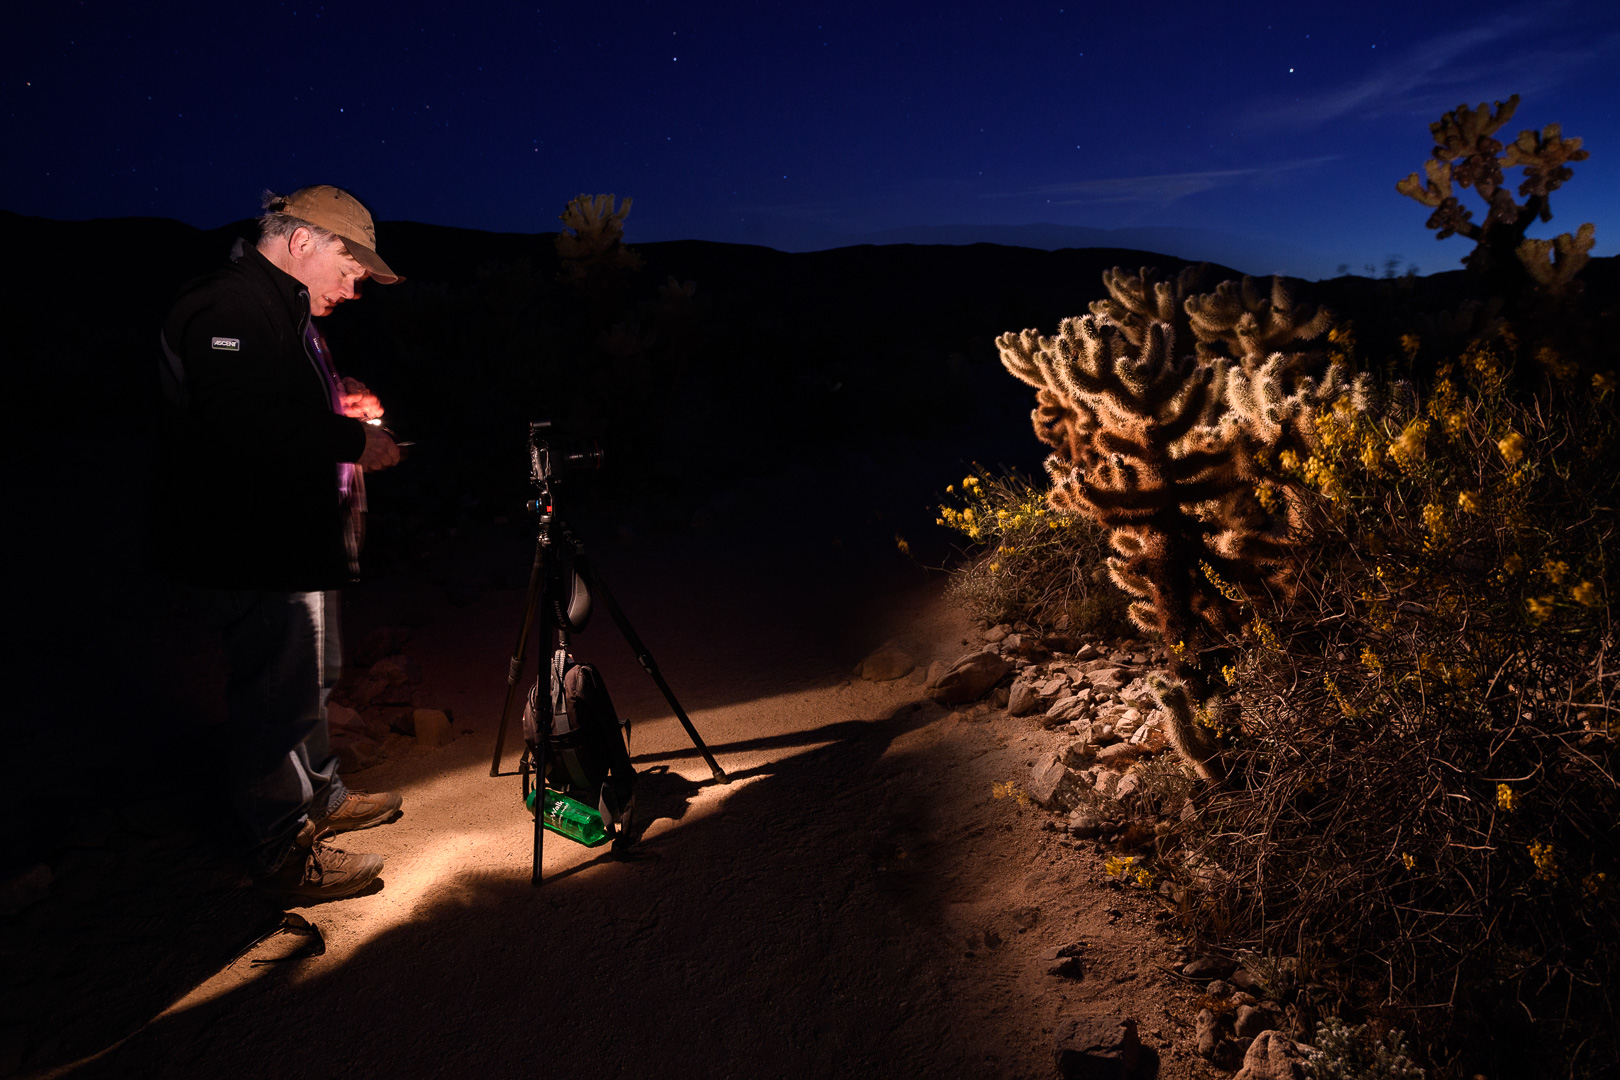
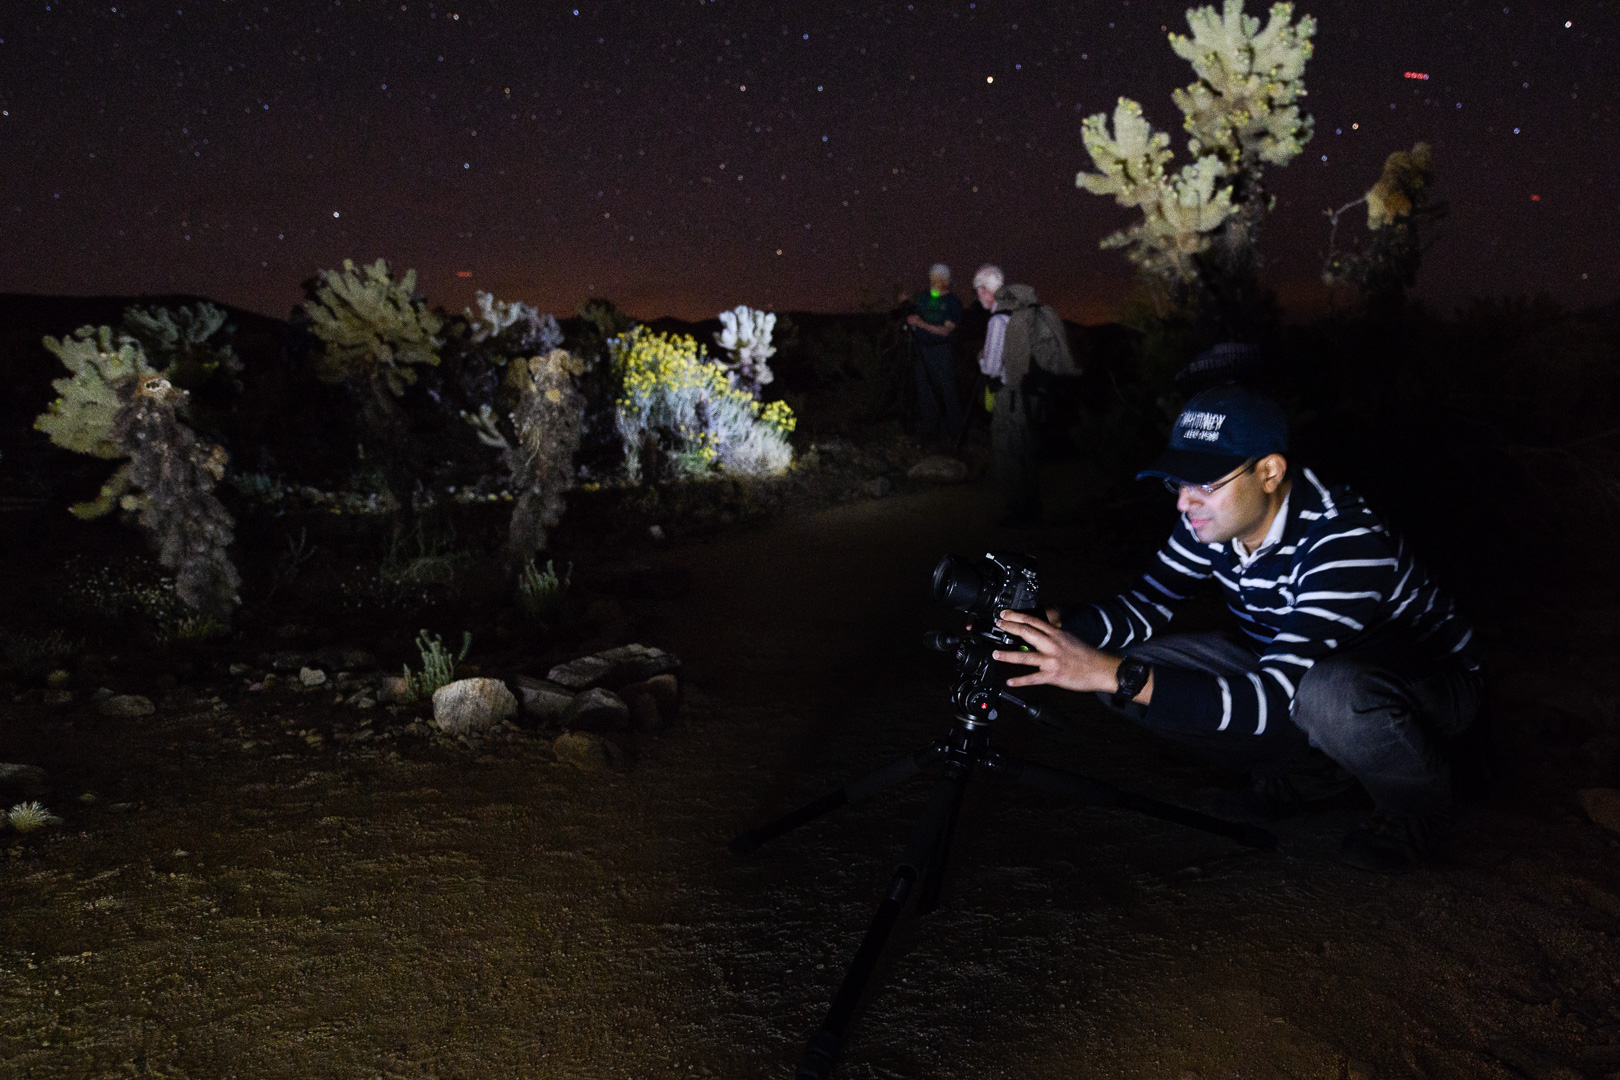
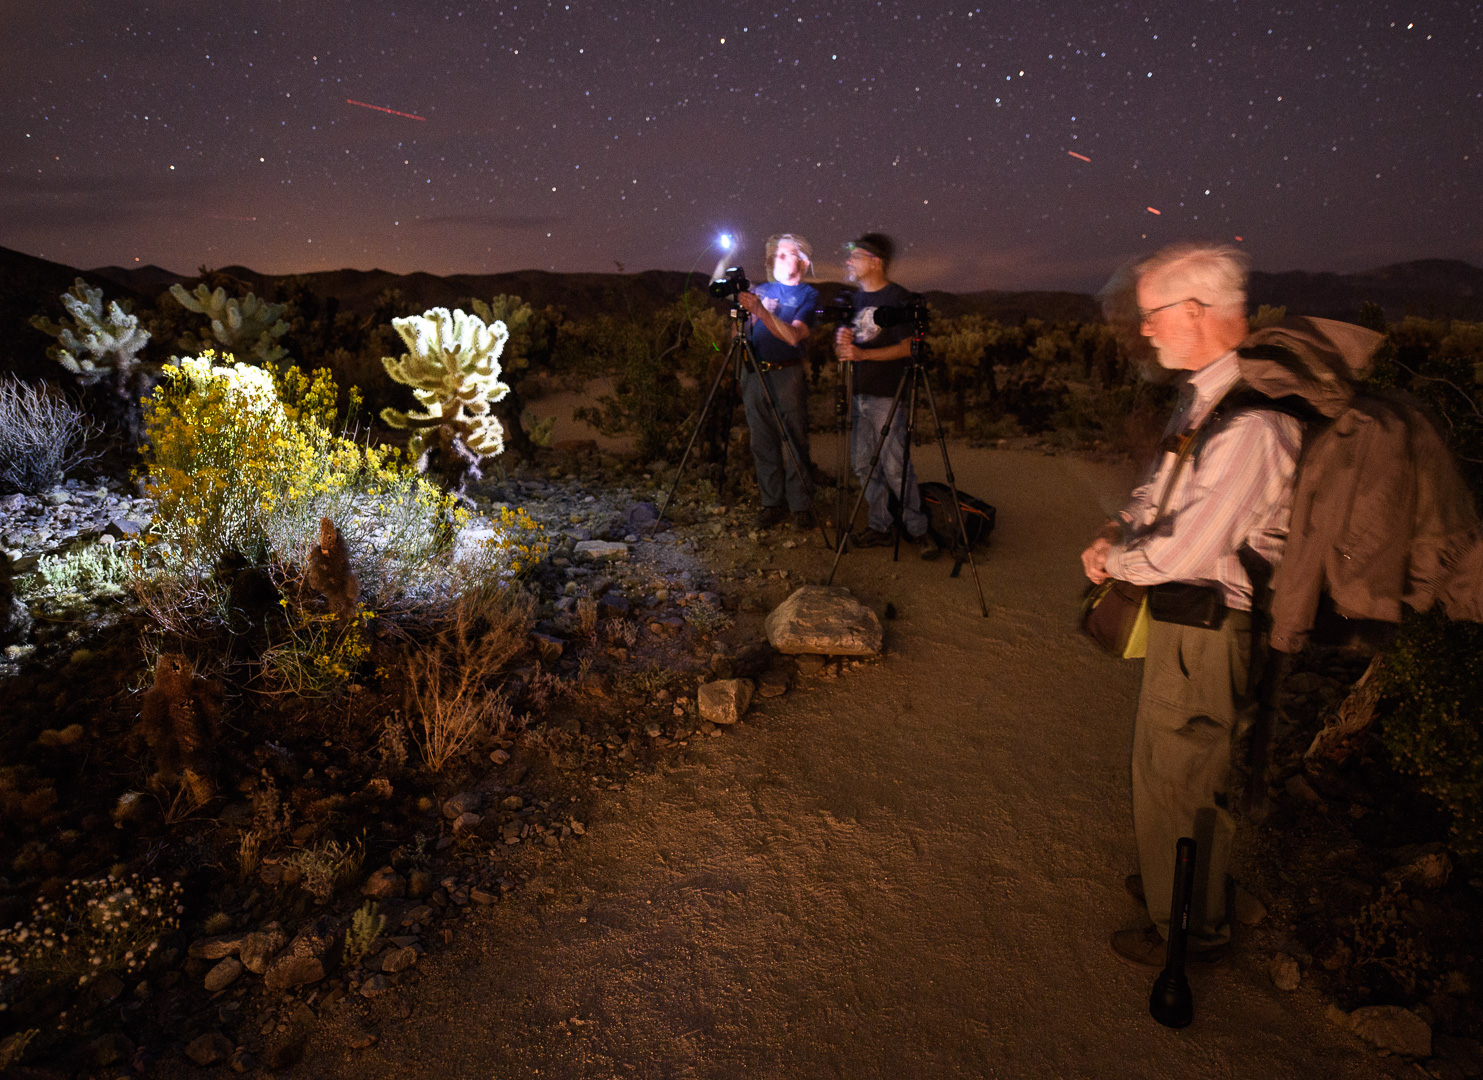
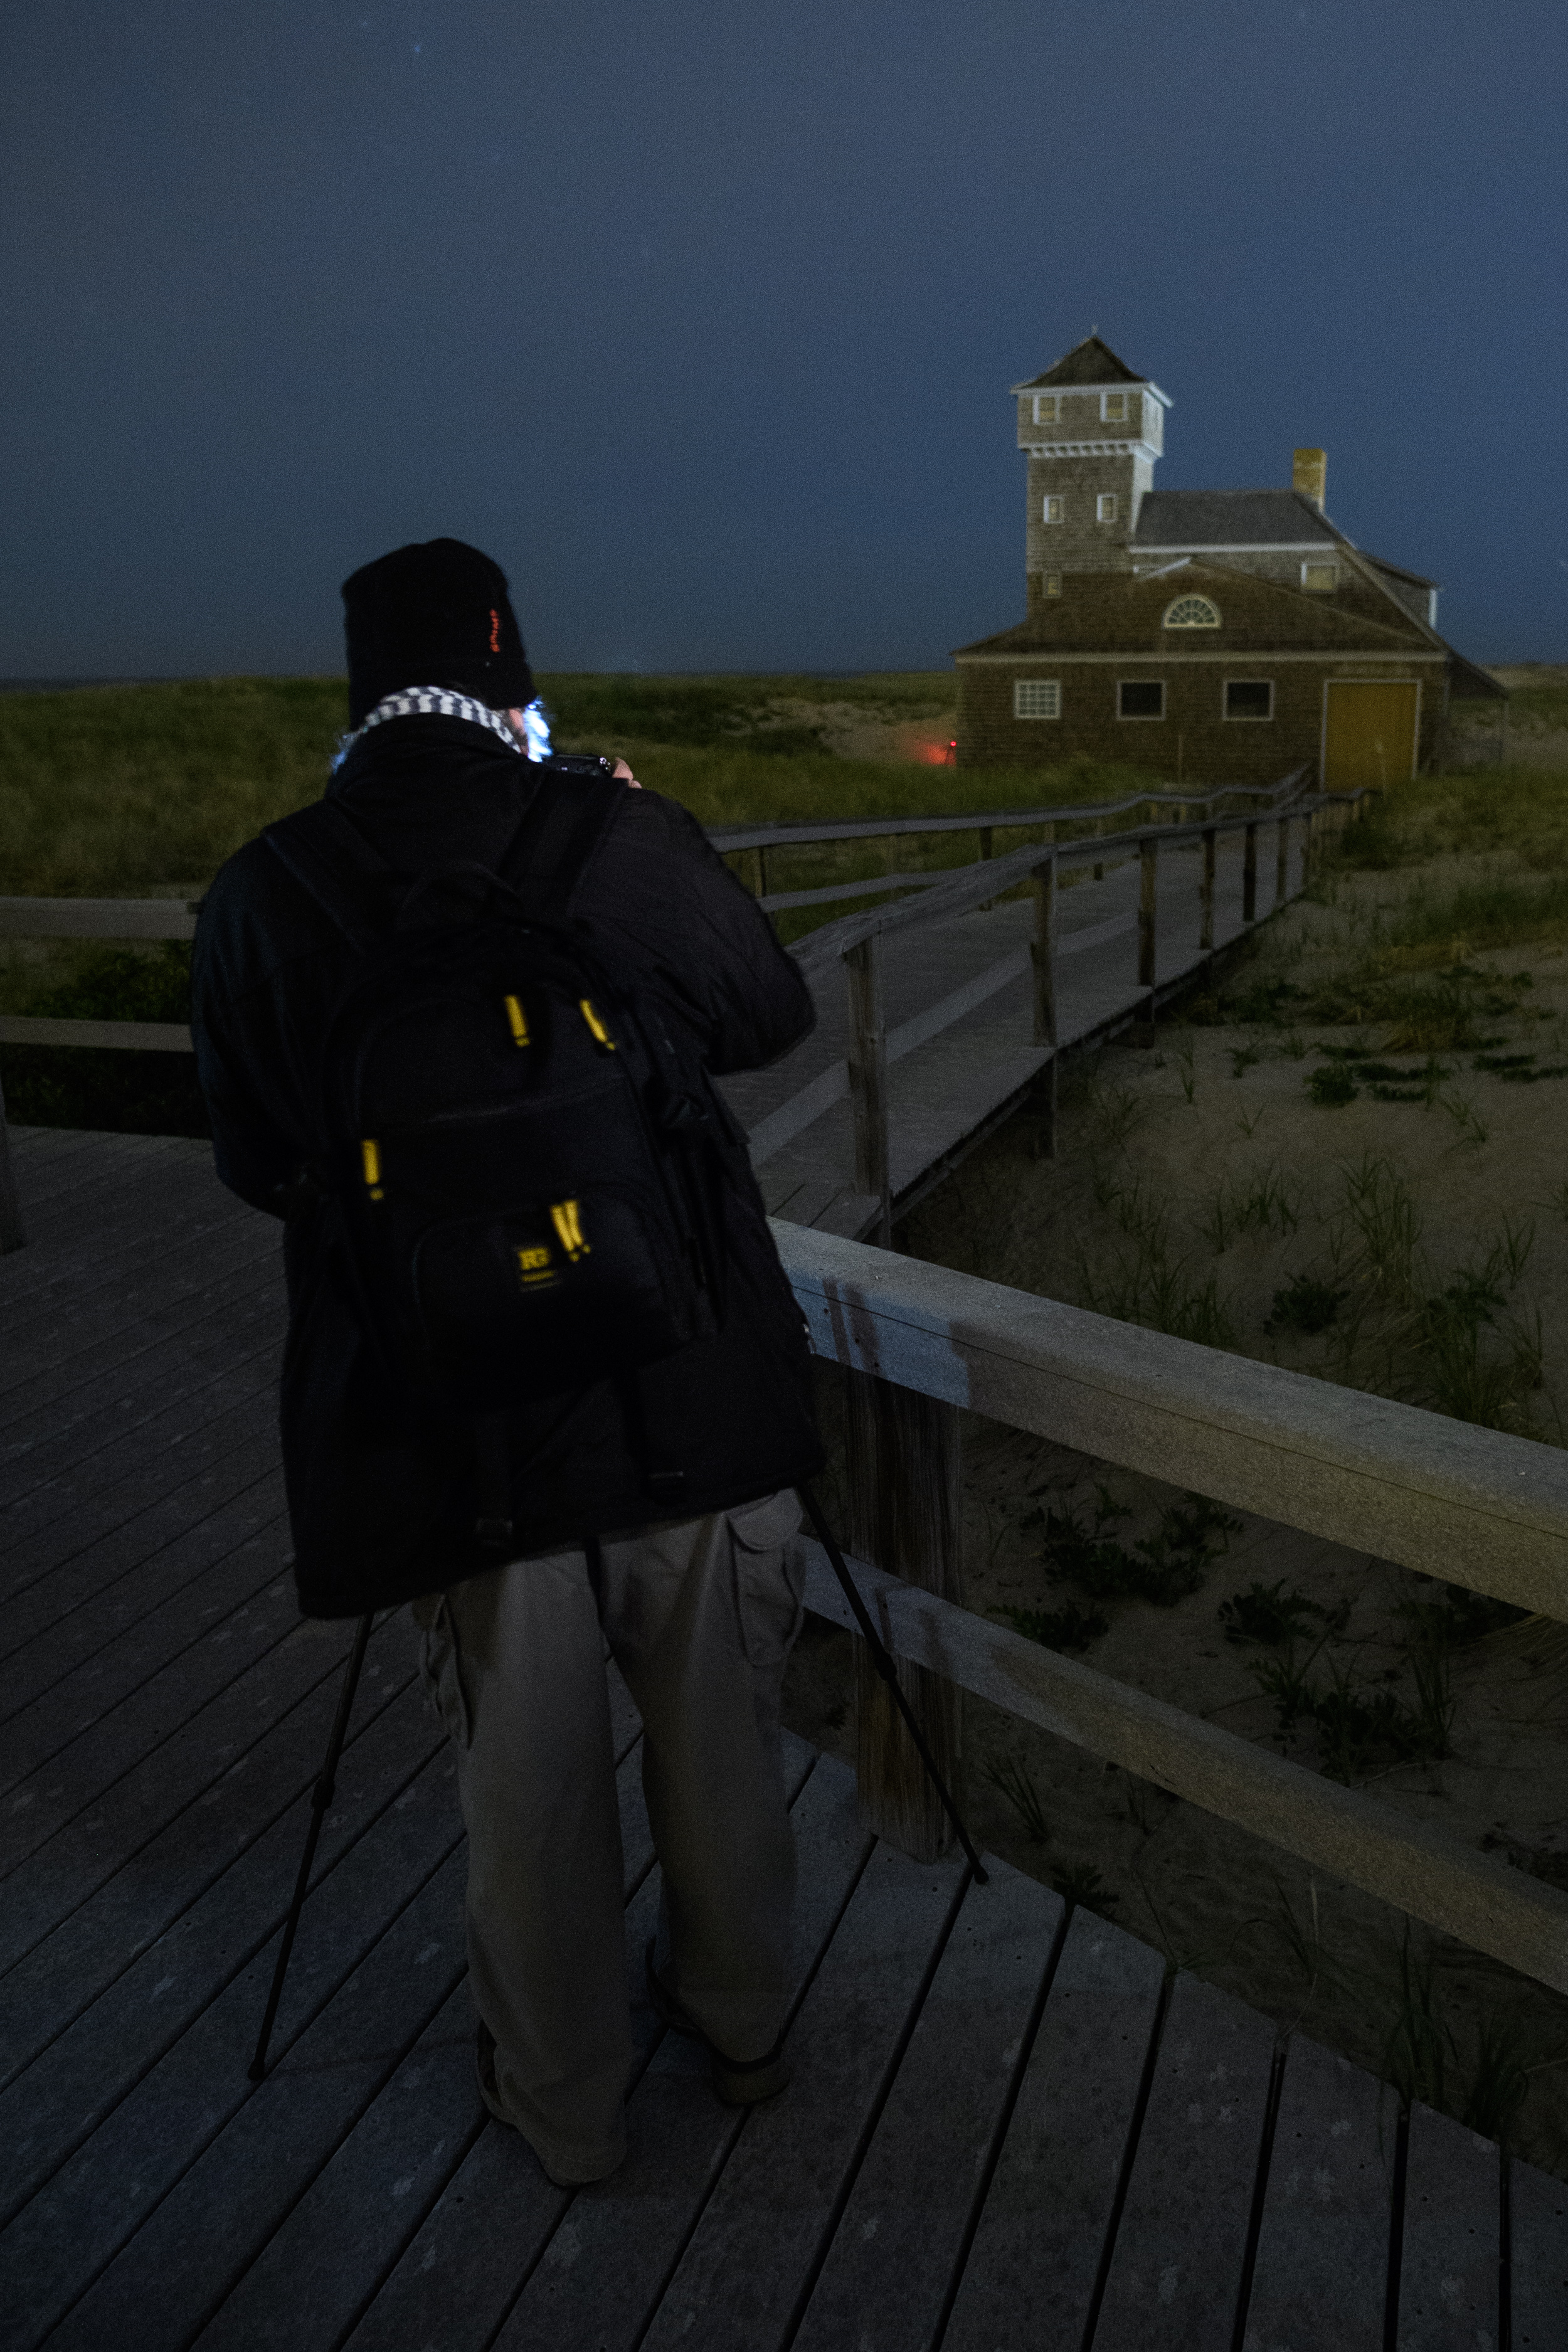
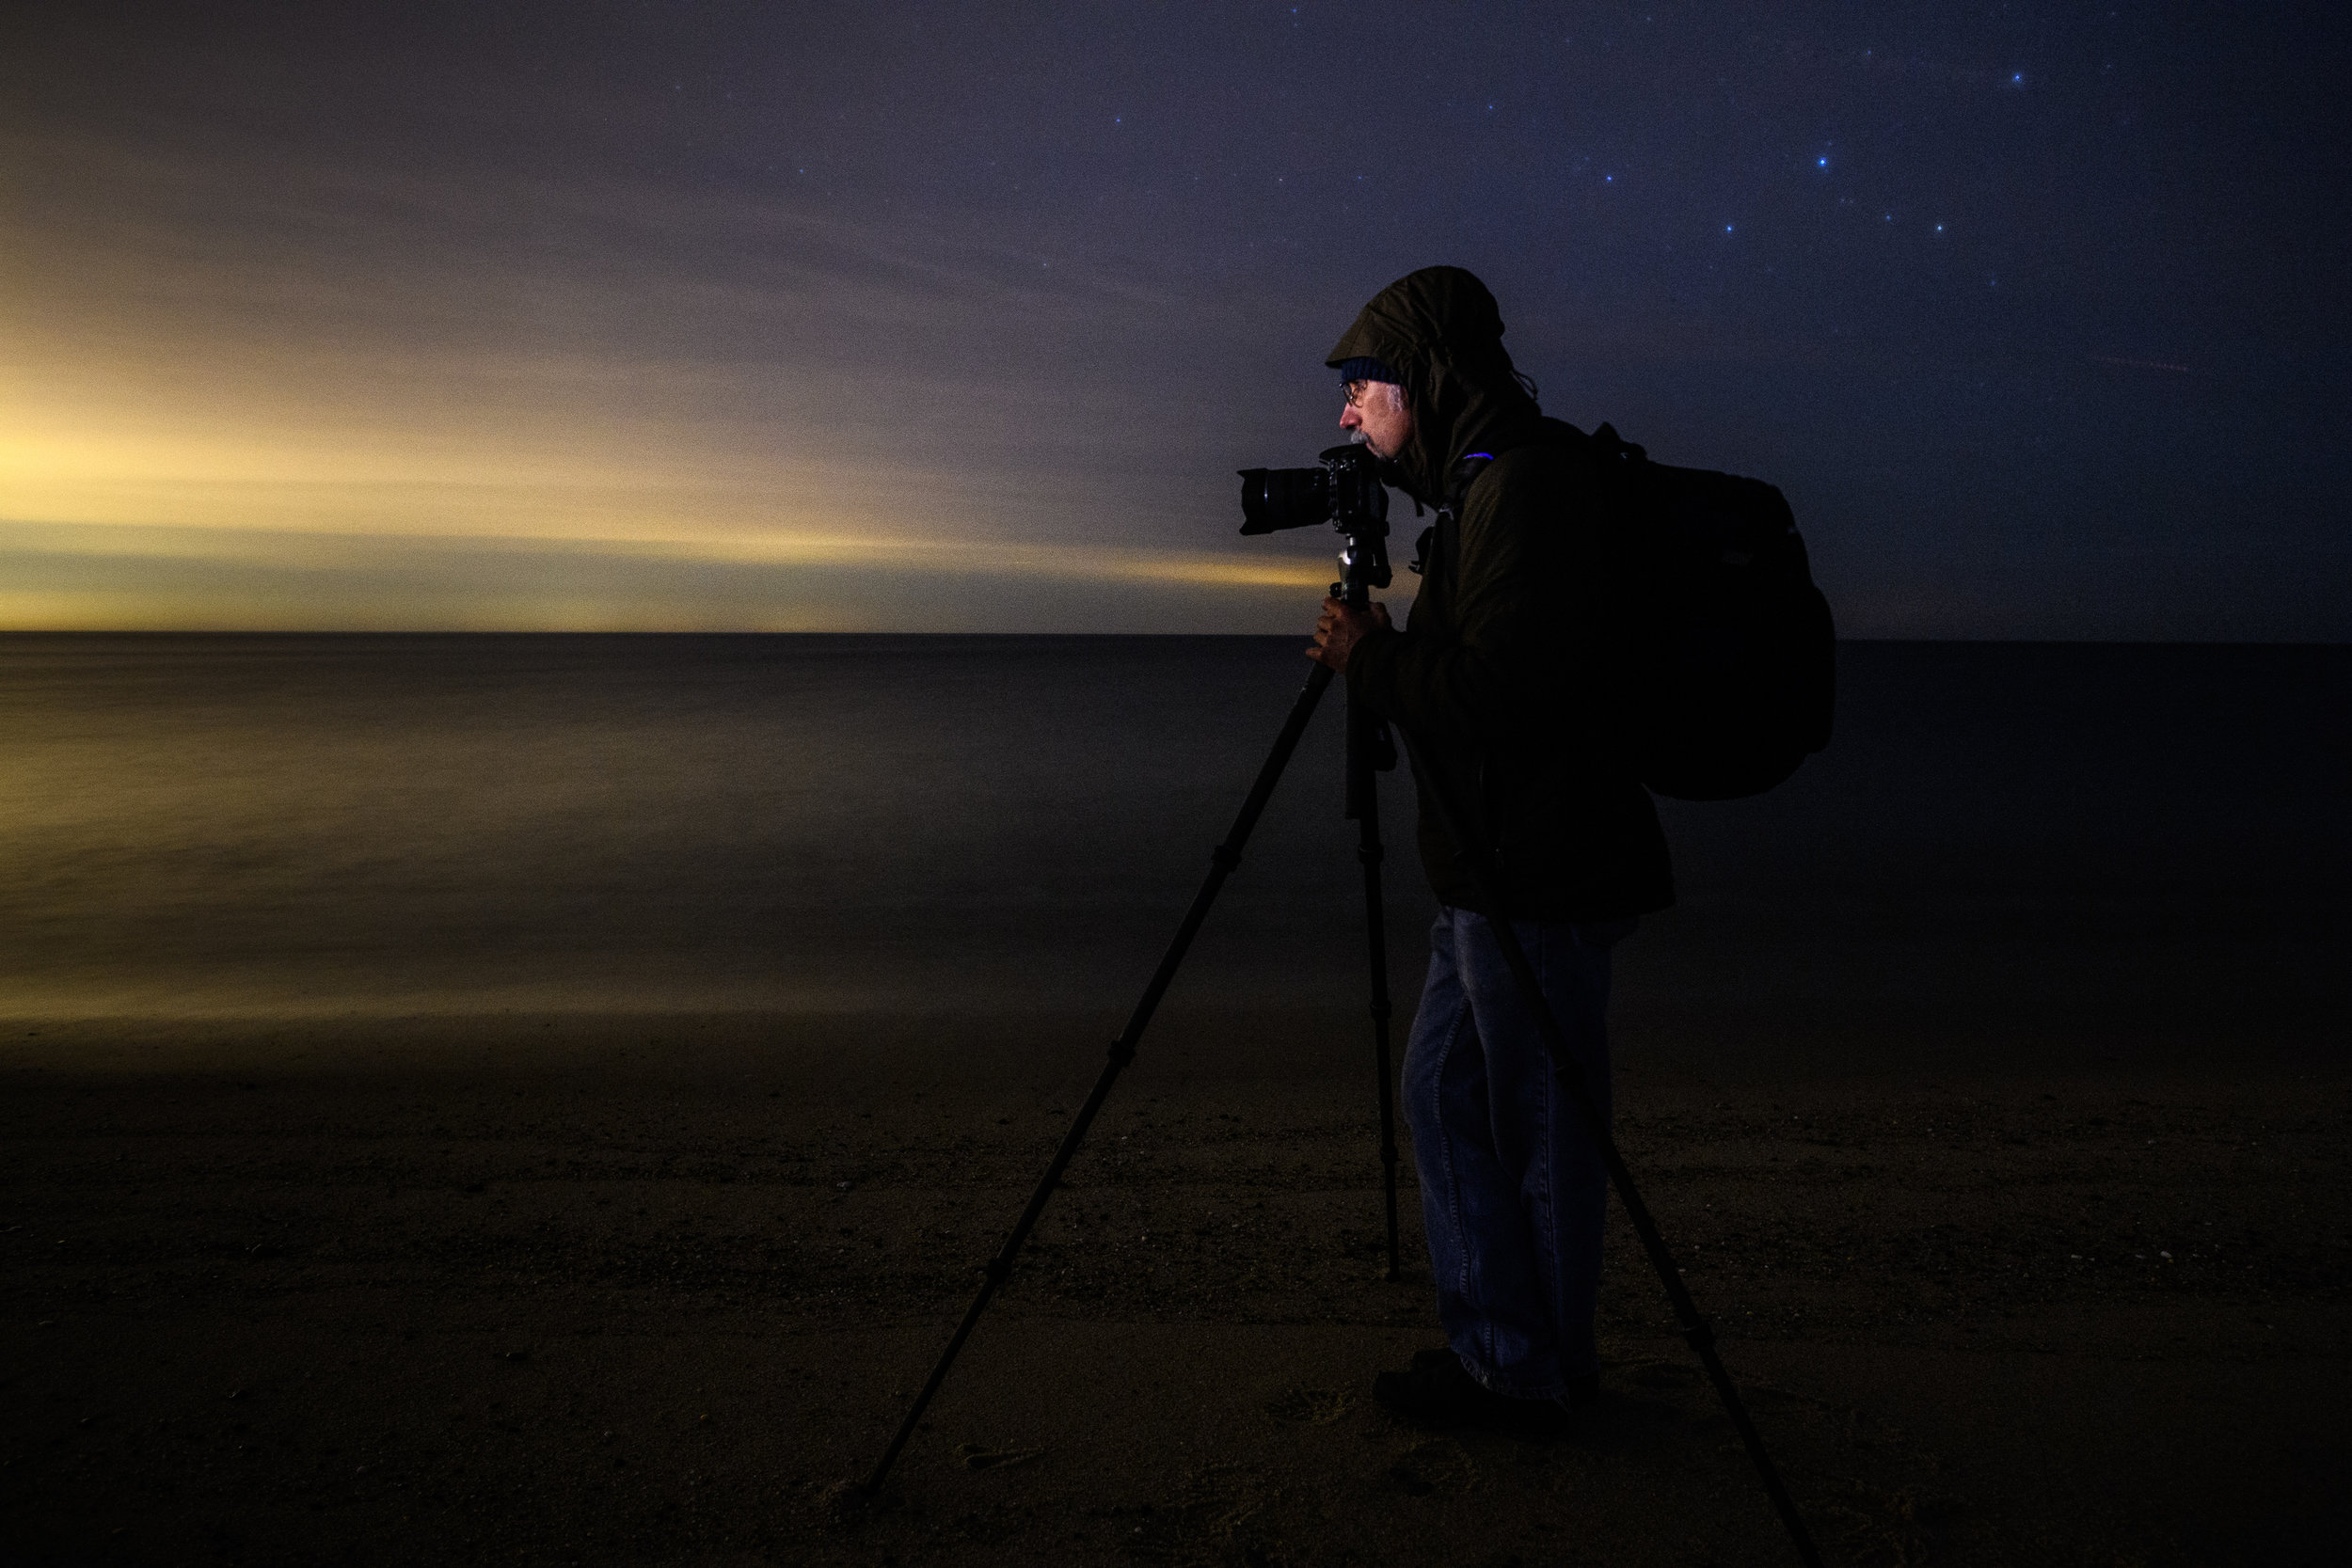
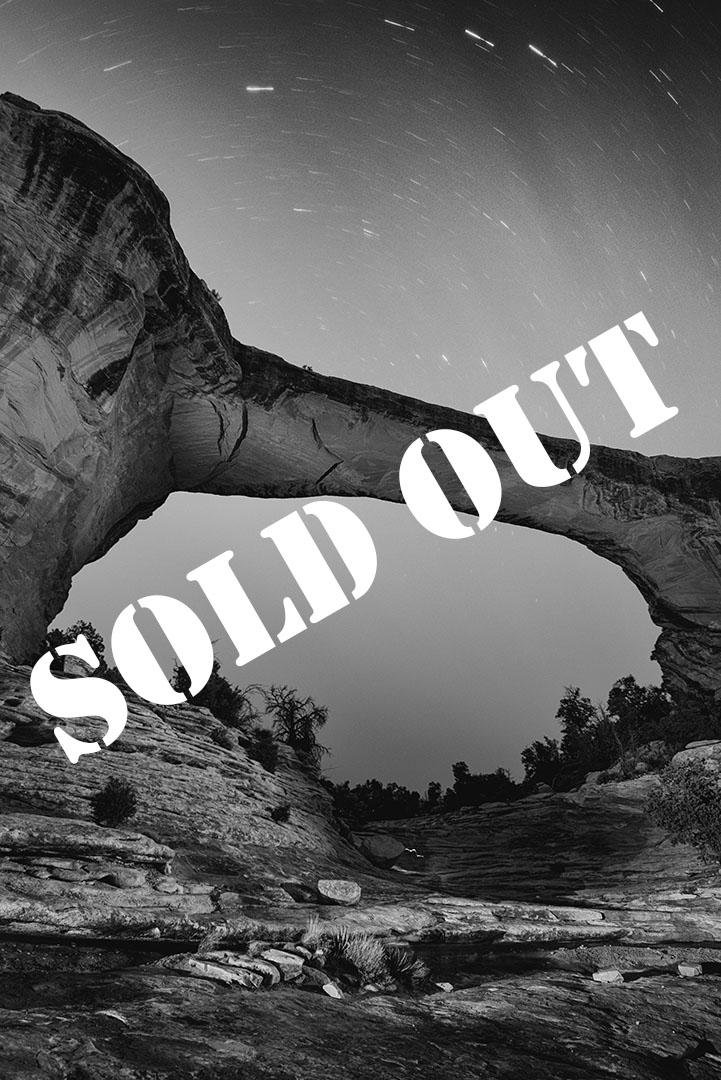
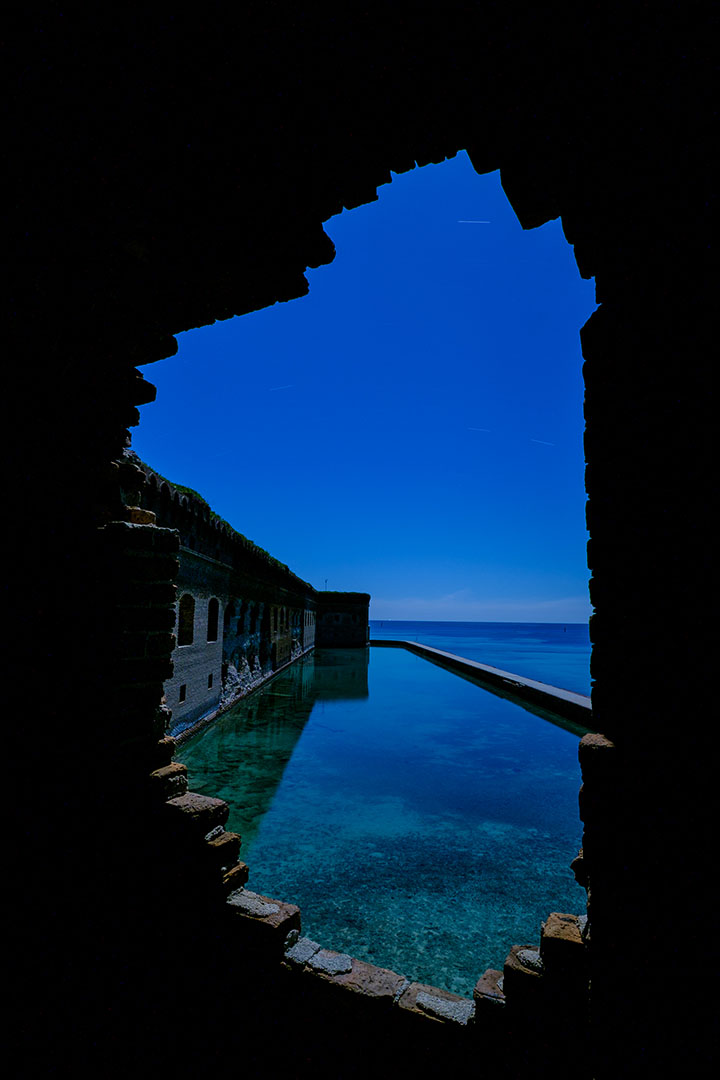
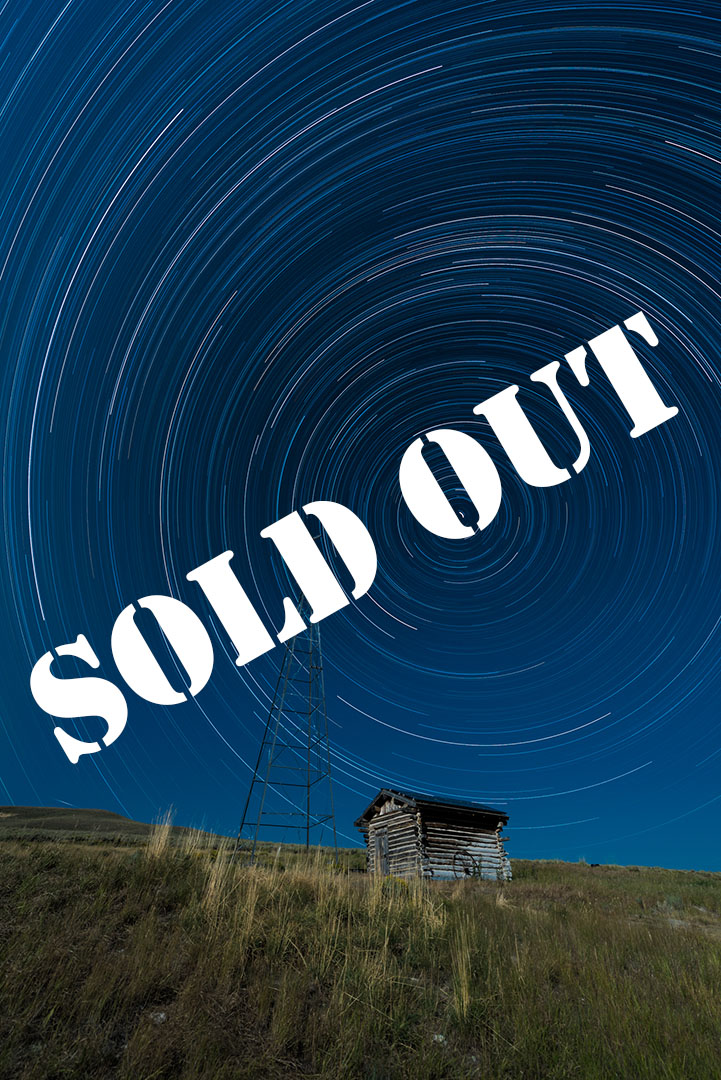
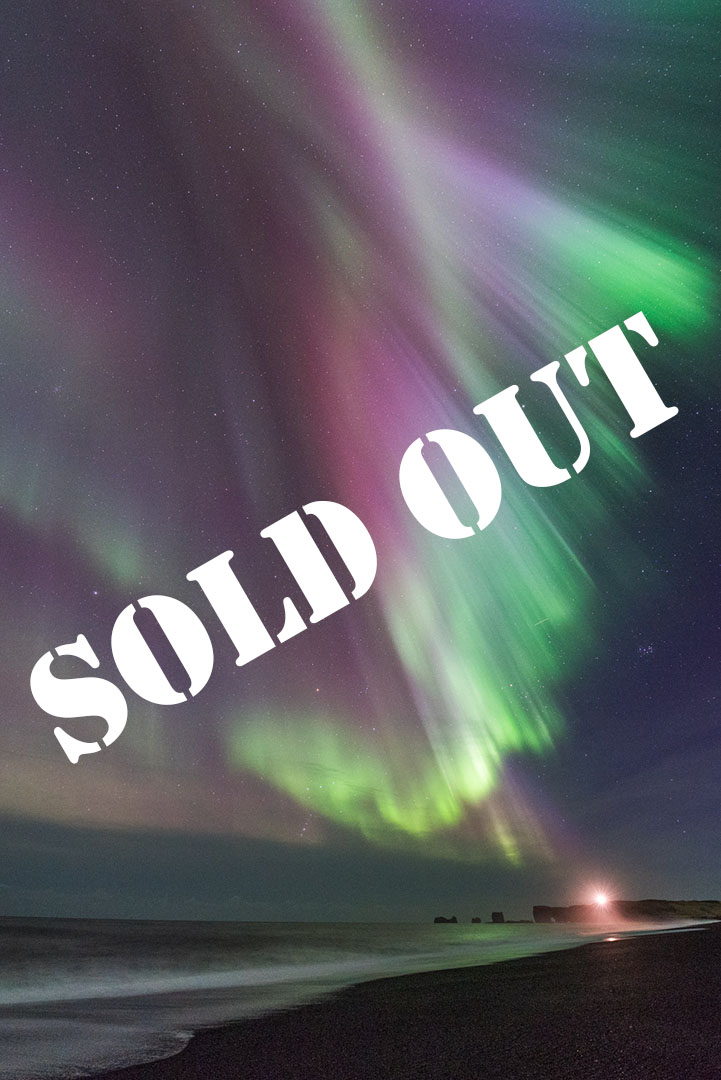
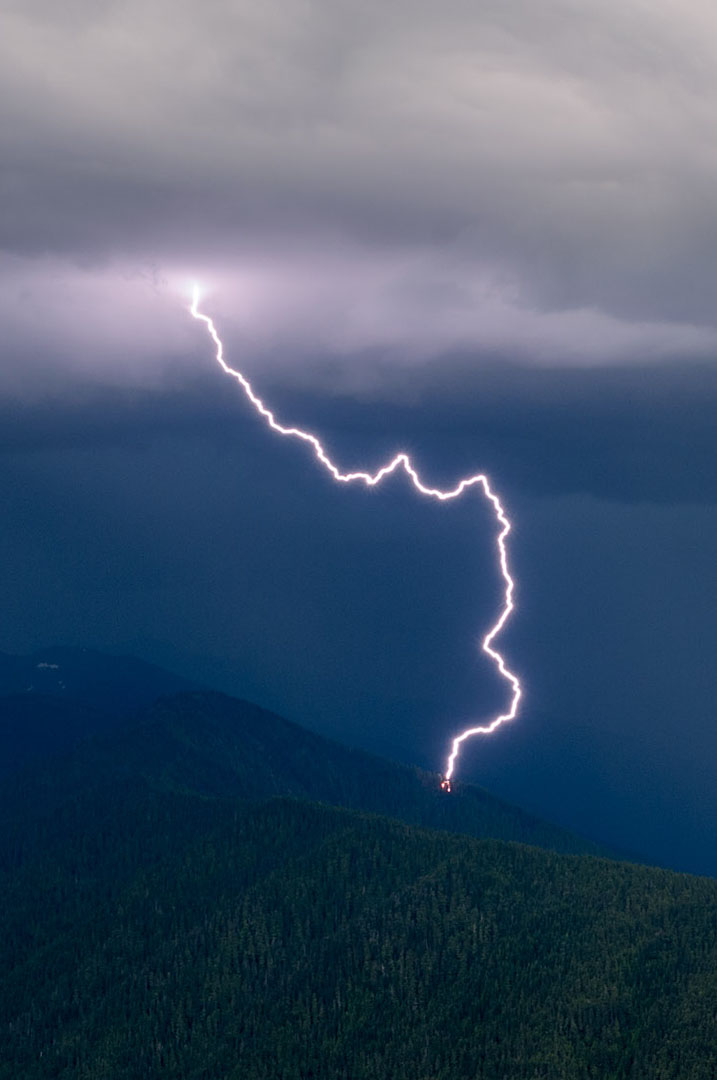
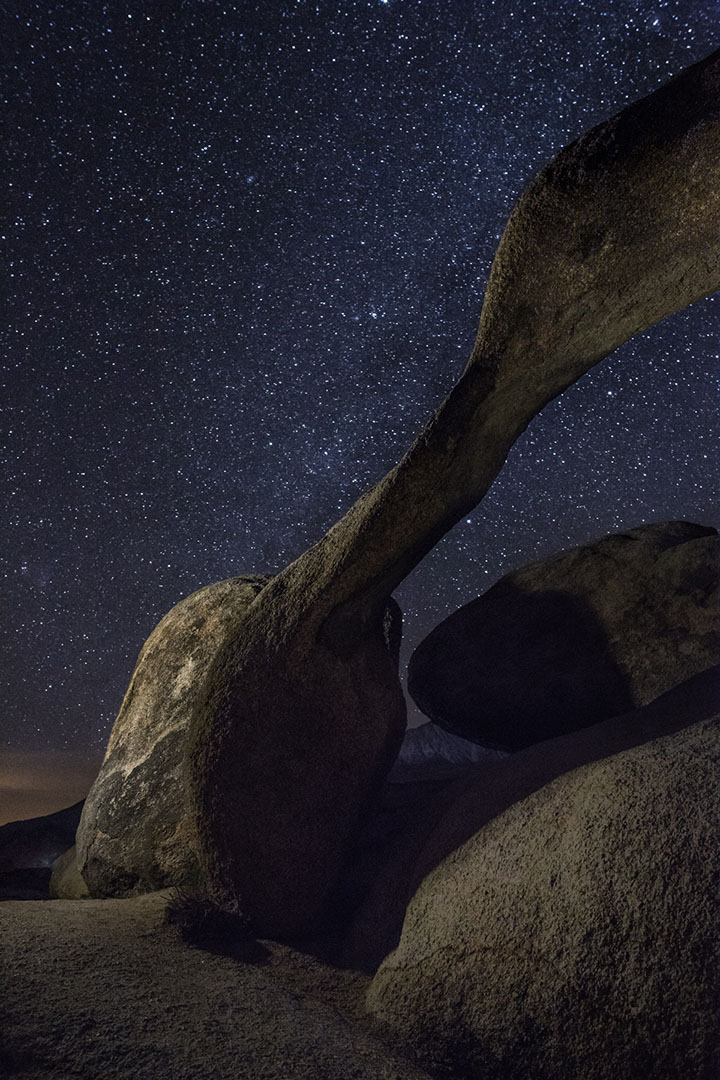
Here are a few of photos to give a sense of what Ruby Beach looks and feels like:

The Setup

On a July afternoon in 2016 I scouted Ruby Beach for a night shoot, and planned three setups for once the sky grew dark. I knew I would have a good view of the Milky Way, and intended to frame it with sea stacks in two of the setups, but also wanted to rip one long exposure to capture some southern star trails.

One thing I kept in mind while scouting is something that can be important when working around the coast: Changing tides affect the appearance of the shoreline. To get a good idea of what the water levels would look like once shooting at night, I used the Tide Graph Pro app. I looked up the tide chart for that date (see Figure 1), noticed where the water level would be during my nighttime shoot (about 9 pm. to 1 a.m.), found a corresponding tide level during daylight (about 1 p.m.), and visited at that time for scouting. This way I didn’t have to imagine what the water would look like later—I knew exactly.

Figure 1. Tide Graph Pro showed me that the tide level during my shoot would be at about 1 foot above the zero tide height. I saw that the water would be at about 1 foot also around 1 p.m., so that is when I did my daytime scouting.

Incidentally, knowing the tides is important for safety too, especially in Olympic National Park, where many headlands are impassable at high tide. You don’t want to venture around a promontory at low tide and get trapped a few hours later when the water floods your trail back.

The Gear

Ruby Beach is certainly not a long hike from the car—it’s only about a half-mile round-trip—but because I was working on a beach, I didn’t want to be burdened with a heavy bag that I’d be tempted to put down in the sand during my several planned hours out. So I left some of my gear in the car and brought along a one-camera, two-lens, one-tripod kit:

The Exposure

For the star trail photo, I chose a single sea stack about halfway between Cedar Creek and Abbey Island, and once set up I started to “work the scene”—i.e., I shot from several different angles, some without light painting, some with varying approaches to light painting, some including the Milky Way, some including reflections in the sand as the tide receded. You can see a couple of the variations in Figures 2 and 3.

Figure 2. My first composition included the reflection in the wet sand, which is how I visualized the photo during my daytime scouting, an approach I abandoned while adjusting the composition.

Figure 3. My second attempt at a composition included a little of the Milky Way to the left. I also tried scraping the wet, pebbly shore with some light painting to emphasize the texture of the wavy sand.

I ultimately chose an angle that allowed me to get a little of the Milky Way behind the sea stack. I didn’t like the position of the galactic core in the frame, but figured that as it moved over the next hour or so, it would eventually be in a spot I did like. This led me to a key decision in how I approached the exposure: I chose to create my star trails using a long series of short exposures that I would later stack in post-production.

I could have created the star trails using one very long exposure, but there are drawbacks to that approach, including a significant drain on the camera battery, along with the introduction of long-exposure noise, which would be particularly problematic in warm midsummer temperatures. So instead I opted for “star stacking.” Star stacking is a post-processing technique for creating star trails that solves many of the image-quality issues inherent in night photography. (I will likely write more about all of that in a future blog post, so please stayed tuned for a year or two.)

Star stacking involves shooting multiple frames of the scene that are later layered together in Photoshop in a way that combines the stars into the same trails they would have made in a long exposure. You can do this with shutter speeds of any length. For example, if you wanted to create one-hour star trails, you could star-stack 12 5-minute exposures, or 30 2-minute exposures, or 60 1-minutes exposures, or so on.

Star stacking is a post-processing technique for creating star trails that solves many of the image-quality issues inherent in night photography.

For this photo, I shot 120 20-second exposures, giving me the equivalent of 40 minutes of star trails. Shooting that many frames meant I’d have more work to do later in Lightroom and Photoshop, but there was a reason I chose this approach, and it goes back to the decision about the Milky Way. I wanted to be able to pick out of my sequence one frame in which I liked the position of the galactic core, and I wanted that frame to have crisp star points.

I had my lens zoomed to 19mm, and using the 400 Rule, I knew that my shutter speed could be no longer than 20 seconds before the stars would start to blur. Therefore, I set my shutter speed to 20 seconds, and calculated that I would need 120 frames to produce my 40-minute star trails.

I set my aperture to f/2.8, and I used hyperfocal distance to ensure that both the sea stack and the stars would be in focus. I set the ISO to 1600, which could normally be quite low for star points, except that the moon was close to rising—not close enough for its light to be seen by the naked eye, but close enough to brighten the sky a bit during a long exposure. Shooting at f/2.8, I would have plenty of stars to trail, so I wasn’t concerned about them being a little dim, and because I would be light painting the sea stack, I wasn’t concerned about lacking shadow detail.

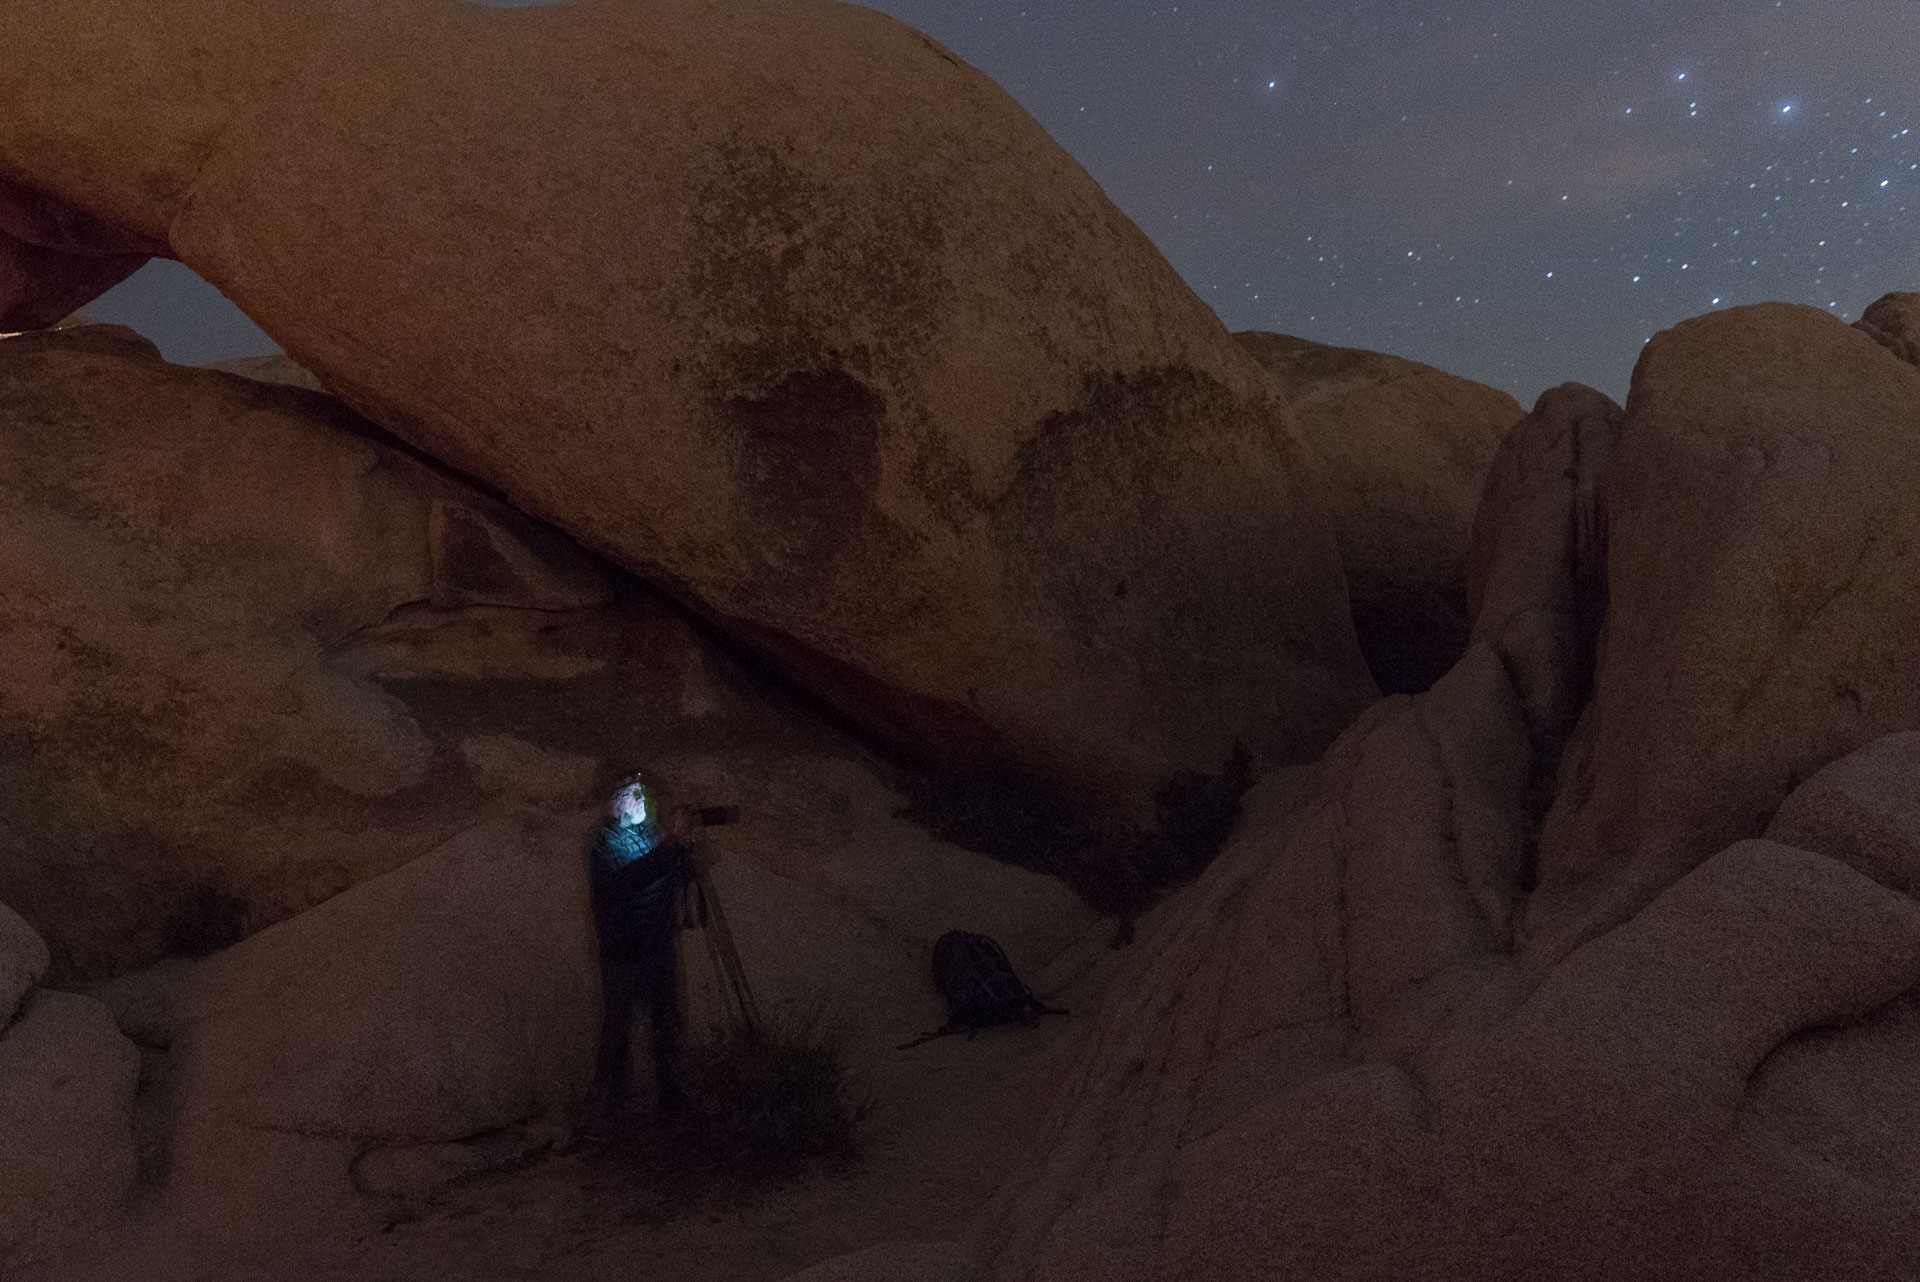
The last piece of the puzzle was the light painting. The sea stack was too prominent in the frame to use as a silhouette—half the composition would have been pure black. So I wanted to light paint the rock in a way that would bring out its texture and color. I experimented with different angles and determined the best option was lighting from the right, standing as close to a 90-degree angle to the sea stack as I could without stepping into the waves. (See Figure 4.)

Figure 4. A self-portrait of me light painting the sea stack.

I also experimented with different flashlights and chose my Coast HP7R, because its wide, crisp edge-to-edge beam allowed me to evenly paint the entire sea stack from a relatively close distance without having to move the light. Figure 5 is the painting approach I settled on.

Figure 5. The final approach to the light painting, after trying several variations.

The Shoot

Once my exposure and light painting strategies were set, all I needed to do was execute the sequence. Because I was shooting 20-second exposures, I didn’t need an intervalometer, so I simplified matters by using a wired remote shutter release that I could lock (specifically, the Nikon MC-30A). The camera was set in Continuous shooting mode, so all I needed to do was push the button on the remote, set the lock, and let the camera do its thing 120 times.

During the first exposure, I did the light painting that I had already practiced. The remaining 119 frames have just a silhouetted sea stack. I went for a walk and enjoyed a quiet night on the coast under the dark skies of Olympic National Park.

Figure 6. The entire 120-frame sequence in Lightroom.

The Post-Production

The star-stack process is actually pretty simple for such a powerful technique.

After dumping the cards into Lightroom, I looked at the images and decided not to make any adjustments other than adding a standard touch of Vibrance and Clarity, and (this is important) in the Len Corrections panel I turned on Remove Chromatic Aberration and Enable Profile Corrections. I made those adjustments to one file, then selected the entire sequence and clicked the Sync button to apply those changes to all the highlighted files.

With the entire sequence still selected, I went to the menu and chose Photo – Edit In – Open as Layers in Photoshop. This maneuver created a new file by making a layer out of each of the selected frames of the sequence I had shot on the beach. (See Figure 7.) Because I initiated this process for over a gigabyte of collective data, once the computer was working I went to the kitchen and made a sandwich and a cup of coffee. My computer is no slouch, but it still needed a good 20 minutes to complete the job.

Figure 7. Each frame of the sequence was imported to Photoshop as individuals layers in one file.

The next step was to select all the layers (Figure 8), which can be done either by shift-clicking the first and last layers, or by pressing Control+Option+A (Mac) or Control+Alt+A (PC).

Figure 8. All layers selected.

Then, using the drop-down menu at the top of the Layers panel, I changed the blend mode to “Lighten.” (Figure 9.) The Lighten mode essentially looks at the layers as a pile of aligned images, searching through each of them pixel by pixel. It searches for the lightest pixel in each pixel pile, then brings that lightest pixel to the top. In the case of stars that are moving against a dark sky, that means the star point in each layer is brought forward, thus creating the trails. (Note to astronomers: Of course we know that it’s actually the Earth moving, not the stars, but it’s easier to explain this way, so please bear with me.)

Also, because I light-painted the sea stack in that one frame but left it silhouetted in the others, the sea stack is also brought forward. No masking needed—it happens automatically.

Figure 9.

That’s a sort-of technical explanation of how the Lighten mode works behind the scenes. What I see on-screen is some nifty magic of star trails appearing where before there were only star points and dark sky. (See Figure 10.) It looks pretty much the same as if I’d shot the 40-minute exposure, except it has no long exposure noise, and my camera battery didn’t have the life sucked out of it.

The Cleanup

The keen observer will note that while shooting those 120 frames, some planes flew through my composition, and they impolitely neglected to turn their lights off before doing so. Some photographers like to keep plane trails in their photos. I’m not one of those photographers. Getting rid of them is a simple matter of masking or cloning them out of the layers they appear in.

I also wasn’t crazy about the bright star trail in the upper right corner of the composition. It’s the brightest and thickest trail, and it’s right in the corner, where it draws attention far away from where I want attention drawn. So I masked it out.

One more bit of cleanup I did was in the lower right corner of the composition, where you can see a big blotch of light that was caused by a moving star being distorted in the reflections on the sand. That was relatively easy to mask out as well.

Figure 10. The artifacts from stacking that I masked out of the layers in Photoshop.

Figure 10. The artifacts from stacking that I masked out of the layers in Photoshop.

The Save

The final decision in creating a star stack is whether to save the layered PSD file. If I had shot the sequence using fewer longer exposures (for example, eight 5-minute exposures), then saving the layers file may have been feasible, and it would have come with the benefit of being able to make adjustments to the individual layers in the future. But I didn’t do that—I used 120 short exposures to create this stack, and if I saved that as a PSD—well, I wouldn’t be able to, because it would have resulted in an 8 GB file, which is too gigantic for the PSD format.

Rather, I would have had to save it as a PSB, which is Adobe’s large document format. But I still would have ended up with a giant file that I don’t want to deal with reserving space for or having to open again. So instead, I flattened the image and saved it as a 70 MB PSD, which while not as flexible for future edits, is much easier to maintain. Should I ever want to approach this image differently, I can always recreate it from the sequence files—and enjoy another sandwich and cup of coffee while doing so.

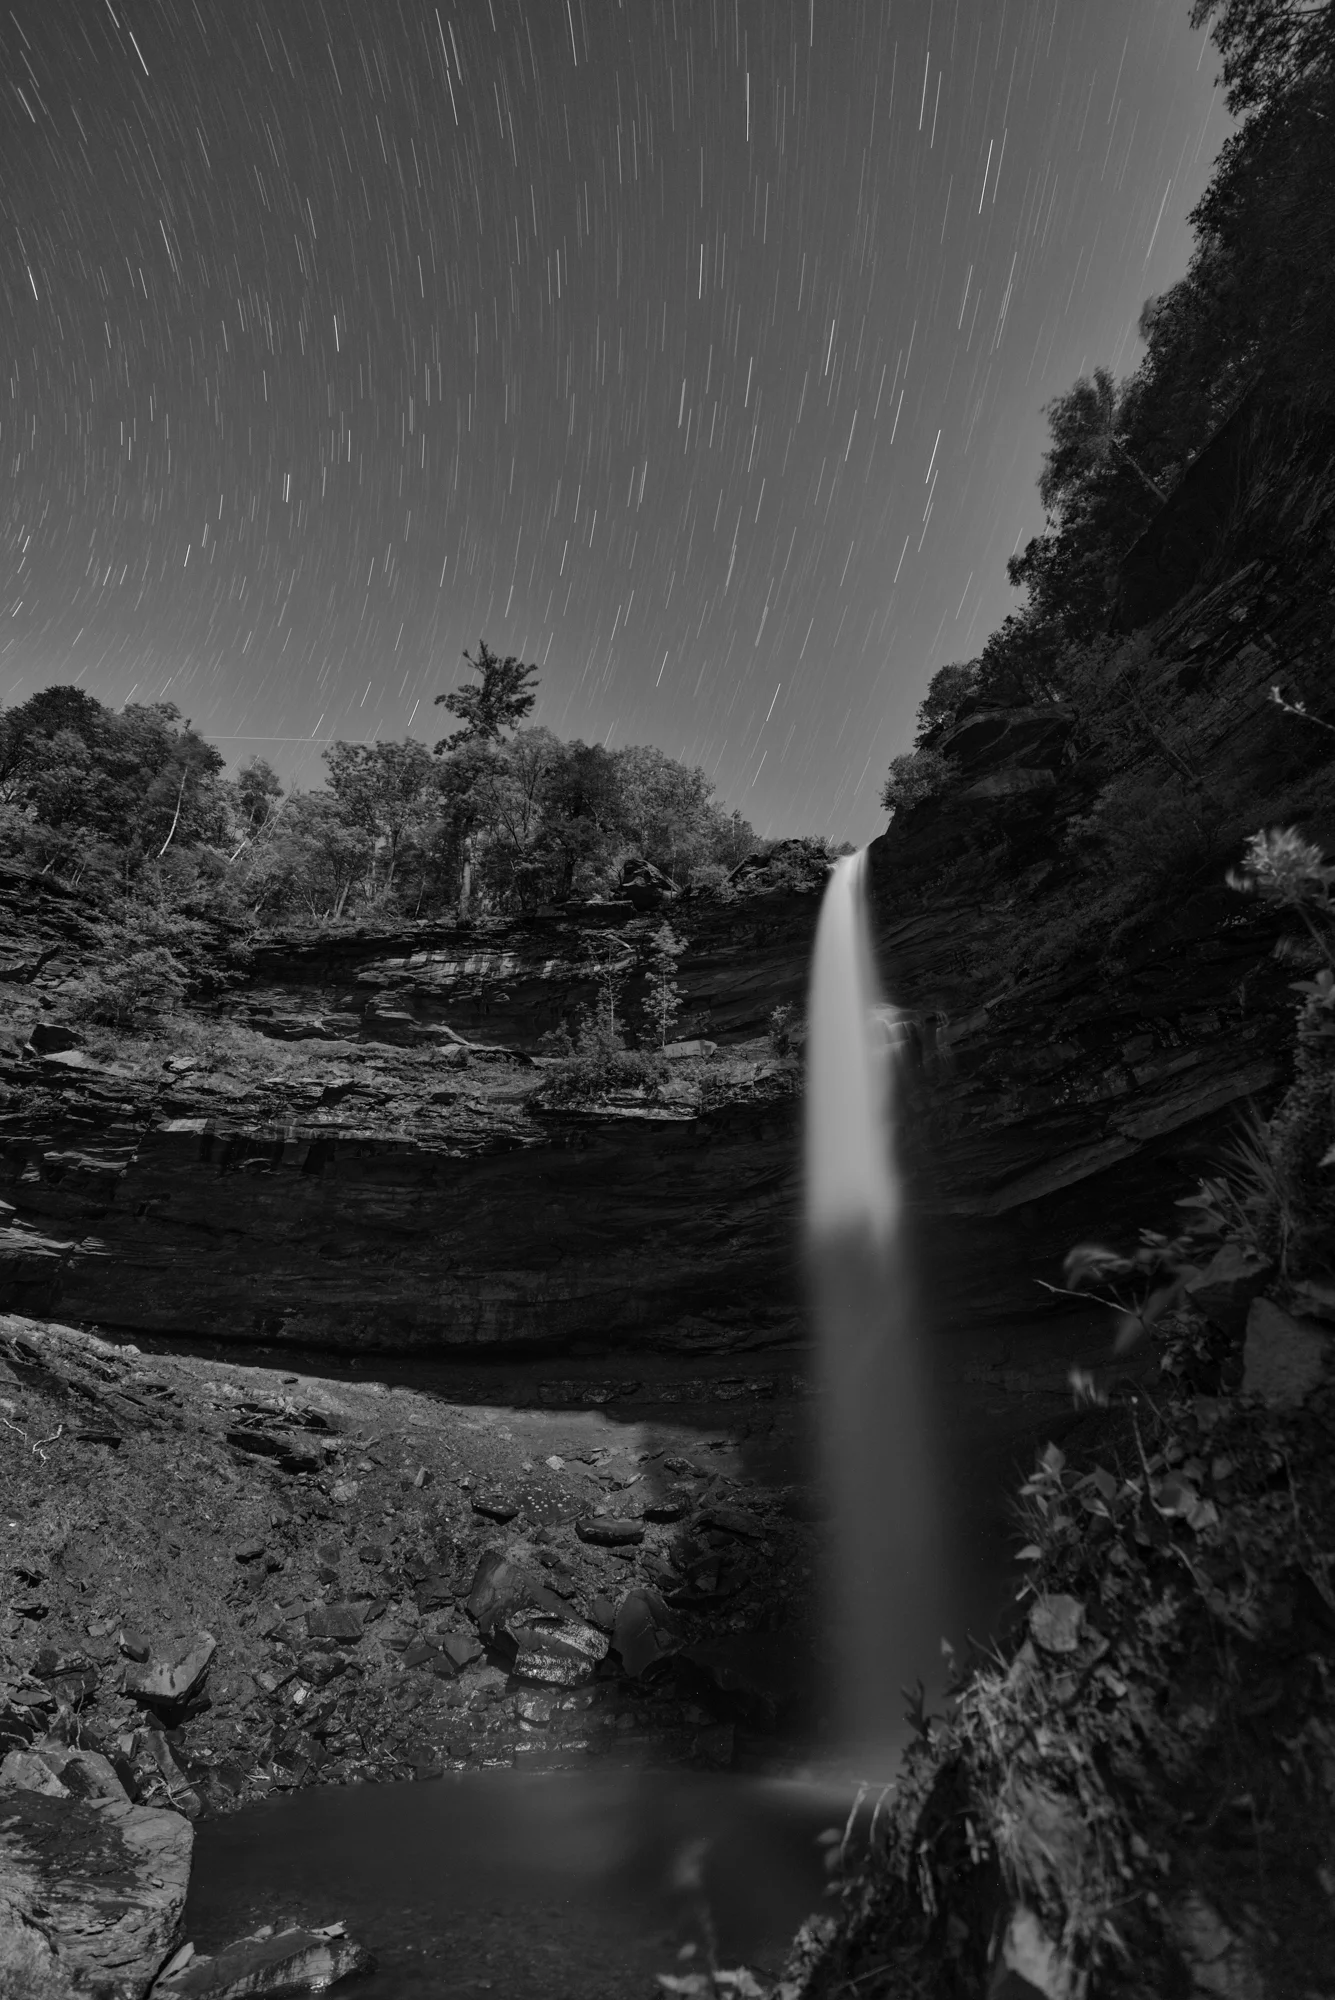
Once the star-stacked photo was saved and back in the Lightroom catalog, I made some minor adjustments to Clarity and Vibrance to optimize the look of the stars, and that was that—star trails over Ruby Beach.

Figure 11. The final image.

And what about that star-point Milky Way photo I wanted to pull out of the sequence? Well, I didn’t like the position of our galaxy in any of those 120 frames. So after I wrapped the star stack sequence, I reframed my composition and shot Figure 12 instead.

Figure 12. The Milky Way over Ruby Beach in Olympic National Park. © 2016 Chris Nicholson.

Speaking of the Milky Way, can you see it in the star trail photo (Figure 11)? It’s to the left of the sea stack, and you can discern it by the telltale cluster of denser star trails. It looks like a streaky cloud of light. That’s what our galaxy looks like in a long exposure!

Note: If you’re interested in joining NPAN instructors Chris Nicholson and Matt Hill in Olympic National Park, there are only a few spots left, so sign up today! We’re offering two weeks in this amazing national park: September 17 to 22 and September 24 to 29.

Chris Nicholson is a partner and workshop leader with National Parks at Night, and author of Photographing National Parks (Sidelight Books, 2015). Learn more about national parks as photography destinations, subscribe to Chris' free e-newsletter, and more at www.PhotographingNationalParks.com.

UPCOMING WORKSHOPS FROM NATIONAL PARKS AT NIGHT

Which Moon Phases are Best for Different Kinds of Night Photography?

Don’t go ’round tonight
It’s bound to take your life
There’s a bad moon on the rise
— John Fogerty

A bad moon may be on the rise. At least for an unprepared photographer. In addition to werewolves, waves and ancient planting customs, the phase of the moon has a strong influence on our night photography. Should we plan our shoots around the full moon? The first-quarter moon? Or is better to use the new moon? How do I plan for the third-quarter moon, and what does that even mean?

If you find yourself asking these questions, you’re not alone. The lexicon of the lunar cycle can be tricky sometimes, but the knowledge is helpful for creating your best nocturnal images. Why? Because different moon phases illuminate the night to different degrees and in different ways, and therefore different phases lend themselves to some kinds of night photography better than others.

To help make sense of the possibilities, here’s a brief primer on the phases of the moon and a guide to which types of photography are better suited for each.

Phasing In

The four distinct moon phases are new, first quarter, full and third quarter. It takes roughly one month for the moon to complete the full cycle from new to full and back to new. This means there is roughly one week between each full phase.

New Moon

The new moon could also be thought of as “no moon.” Because the moon is not visible to us, this phase provides the darkest skies and the least amount of light.

New-moon nights are great for capturing single-exposure star trails. Because there is no light in the sky (provided you are not near a city) you can leave your shutter open for hours without danger of overexposing. This elongated shutter time produces extremely long star trails. This is also a great time to capture those concentric rings around the North Star!

The new moon is also a great opportunity to capture the Milky Way—the darker the sky, the more dim stars we see.

First Quarter Moon

As the cycle progresses, the moon becomes a small visible sliver. We call this a crescent moon. Because it’s on the way to becoming “larger,” it’s called a waxing crescent.

The waxing crescent turns into the first quarter moon—the first full phase after the new moon. The name for this phase is a little confusing because at this point the moon is what most of us consider half full.

Waxing-crescent and half-moon evenings are still good for star trails—even single-exposure star trails. However, the closer the moon is to first quarter, the more light will “spill” into the sky, making the sky brighter. The somewhat lighter sky tends to hide the dimmest stars. It also means you can’t leave your shutter open all night long. Exposures of 15 minutes or so are still achievable, though, providing enough time to create star trails of acceptable length.

Waxing crescent moon. 20 minutes, f/2.8, ISO 100. The illumination on the mountains was provided by the city lights of nearby Sedona, Arizona.

Waxing crescent moon. 20 minutes, f/2.8, ISO 100. The illumination on the mountains was provided by the city lights of nearby Sedona, Arizona.

First quarter moons are great for practicing light painting. The longer exposures give you plenty of time to move around the scene illuminating your subject. But wait, can’t you light paint on new-moon nights? Sure! The only problem is that it’s completely dark and moving around the scene can be difficult. Most of the time you wouldn’t want to use your flashlight to light the way, as that illumination would become an unintended and unwelcome part of your scene. (See “Staying Invisible While Light Painting—The Art of Not Being Seen.”) Oftentimes first quarter moons provide just enough light to get around, without overpowering the sky and hiding dim stars.

First quarter moon. 10 minutes, f/5.6, ISO 200. In Arches National Park, Balanced Rock in the foreground is gently illuminated by the half moon.

First quarter moon. 10 minutes, f/5.6, ISO 200. In Arches National Park, Balanced Rock in the foreground is gently illuminated by the half moon.

Full Moon

On its journey from half to full, the moon becomes three-quarters illuminated, which is a called a gibbous moon. Because it is still getting larger, it’s called a waxing gibbous.

Approximately two weeks after (and before) the new moon, we are treated to the full moon in all of its glory. The full moon is a great time for mixing light painting and the night sky.

Full-moon nights can be so bright that it’s sometimes easy to forget it’s no longer daytime! It’s amazing how bright it is once our eyes become adjusted. This extra brightness makes it quite easy to move about the scene and can be crucial when trying to light paint from many different angles while navigating difficult terrain. It’s hard enough to concentrate on the timing and technique of light painting without adding in the concern of tripping or running into a tree because you can’t see.

Full moon. 20 exposures at 3 minutes, f/5.6, ISO 100 stacked in Photoshop. I painted the foreground tree with a Coast HP7R flashlight covered with an orange gel.

Full moon. 20 exposures at 3 minutes, f/5.6, ISO 100 stacked in Photoshop. I painted the foreground tree with a Coast HP7R flashlight covered with an orange gel.

So what’s the downside of shooting under a full moon? The very same brightness that makes it easy to see and move around also forces us into shorter exposure times. Instead of 15 minutes or half-hour exposures, you’ll need to be shooting 2- to 5-minute exposures. Star trails will be significantly shorter in length when shooting so short.

Is this is a problem? Absolutely not. For many photographers, though, longer trails are the desired outcome. Many folks feel that straight shots of just these short trails and a distant silhouette seem a bit boring. I agree, but I also find that the shorter trails are just fine as long as there is something else of interest in the scene. An interesting moonlit foreground, light-painted subjects, or even man-made illumination or car trails can do the trick.

The extra brightness of the sky in this phase also means that we’ll capture fewer stars.

Brighter sky = fewer stars
Darker sky = more stars

The trick here is to use wider apertures.

Wider apertures = more stars
Smaller apertures = fewer stars

Of course using wider apertures will also shorten your overall exposure, meaning shorter trails.

For that reason, "star stacking" is a common full-moon photography technique. Star stacking is the process of making many shorter exposures in the field and then stacking them together in post using Photoshop or another computer program. While no solution is perfect for all scenarios, star stacking is a great way to achieve longer star trails when the sky is too bright to leave your shutter open for 15 to 30 minutes.

Third Quarter Moon

As the week advances, the full moon starts to lose illumination and once again becomes three-quarters illuminated. Just like the partial moon earlier in the month, we call this phase a gibbous. But because the moon is starting to disappear or diminish, it’s called a waning gibbous.

The waning gibbous of course “shrinks” in size until it’s only half illuminated entering the next full phase, which is called the third quarter. From a photographic standpoint, the techniques and strategies for the third quarter moon are the same as for the first quarter. Moderately dark skies allow for long exposures, and a dimly lit landscape allows you to move about and light paint in relative safety.

Third quarter moon. 8 minutes, f/5.6, ISO 400.

Third quarter moon. 8 minutes, f/5.6, ISO 400.

As the moon loses illumination and continues through its final phase, it becomes what’s called a waning crescent. This last light of the night sky eventually disappears altogether and returns to its new moon (no moon) phase.

Phasing Out

The night sky is miraculous and a wonder to behold, and each phase of the moon offers unique opportunities to the prepared night photographer.

All disciplines of photography benefit from an intimate familiarity with the subject matter. Night photography is no different. Think about your goals as you plan for your shots. Do you want long star trails and an interesting silhouette? Think about shooting under a new moon. Are you interested in light painting a subject but including the sky? Perhaps first or third quarter moon would be best. Is the moonlit landscape your ultimate goal? Consider planning your shoot around a full moon.

Counter to what John Fogerty and Credence Clearwater Revival might have you believe, there is no such thing as a “bad” moon, at least for photography. You can shoot under any moon, as long as you remember which phases are best for different techniques.

For a great explanation of the moon phases complete with diagrams, check out the website MoonConnection.com. For more on light painting, check out Tim’s ebook, The Magic of Light Painting. For more on shooting at night, check out Night Photography: From Snapshots to Great Shots that Tim co-authored with our colleague Gabriel Biderman.

Tim Cooper is a partner and workshop leader with National Parks at Night. Learn more techniques from his book The Magic of Light Painting, available from Peachpit.

UPCOMING WORKSHOPS FROM NATIONAL PARKS AT NIGHT

Recapping Our 1st Workshops of 2017: Joshua Tree, Cuyahoga Valley and Cape Cod

National Parks at Night’s 2017 started slowly, relative to what it would become. The first few months of the year involved a lot of sitting at our home bases planning, planning and planning. But then spring came, and our itinerary revved up to a furious pace of four workshops in five weeks.

That flurry of activity was not only … well, flurrious … but also widespread, covering national parks across the United States, from the California desert to rural Ohio to coastal Massachusetts. We’re happy to now be able to report how those workshops went, which we’ll do below.

After this we’ll be moving our program into summer and fall, including four workshops that still have a few seats open: Florida’s Dry Tortugas National Park, Washington’s beautiful Olympic National Park (twice!) and California’s Eastern Sierra. To come seize the night with us and bunch of new friends, sign up today!

In the meantime, here’s a taste of our first four workshops of 2017. …

Joshua Tree National Park

April 21-26, 2017
April 30-May 5, 2017
By Lance Keimig

Our first two outings of the 2017 season were back-to-back Passport Series workshops at Joshua Tree National Park—our originally scheduled workshop plus an overflow week we offered due to high demand. I was an instructor on both workshops; Gabe and Chris each worked with me on one of them.

The Joshua Tree Week 1 group

The Joshua Tree Week 2 group

For both workshops, National Parks at Night collaborated with the Desert Institute, the educational program partner for the park. Through the Desert Institute we were able to arrange special after-hours visits to Desert Queen Ranch, also known as Keys Ranch. Normally off-limits to the public except for ranger-guided tours, Keys Ranch is a historic homestead within the park that was a spectacular location for night photography and light painting.

To reciprocate for that great access, in the few days off between the two workshops, Chris and I delivered a presentation on night photography in national parks at Copper Mountain Community College in the town of Joshua Tree. It was a lot of fun, as we got to talk about what we love to do, plus meet a lot of local photographers who also love the park.

At first glance, Joshua Tree doesn’t offer the kind of varied scenery that many other parks do. With the exception of Keys Ranch and the remains of a few abandoned mines, the park has relatively little diversity of subject matter. It’s all about the eponymous trees, and the rocks. Fortunately though, the variations in both the Joshua trees and the rock formations are enough to keep any photographer busy for a long, long time.

Moreover, we had a bonus. The rains of last winter had finally broken the California drought, and the wildflowers and cacti were in full bloom when we arrived at the park. It was spectacular.

During the first workshop, we had mostly clear, dark skies with the new moon occurring on the last day. The Milky Way was rising late, around midnight each night, and the weather was unseasonably chilly. The cool temperatures kept our sensors from overheating and the noise manageable with the high ISOs required in the very dark environment. We were bundled up with multiple layers, hats and gloves!

What a difference a week can make. By the second workshop, the weather had changed, and daytime temperatures climbed into the 90s, with comfortable T-shirt-weather nights. The first quarter moon occurred in the middle of the second workshop, which worked out well. By the time the moon was setting around midnight, the core of the Milky Way was rising above the horizon, giving our students the best of both worlds: We had a combination of moonlight to illuminate the landscape and complement our light painting, and dark skies to photograph the arch of the Milky Way core later in the night.

In each group we had a mix of veterans and night-photography newbies, but regardless of experience level the productivity and growth we observed was exceptional. We were proud of the progress made by each and every participant in both weeks.

We always encourage collaboration during our workshops, as we find that the experience is amplified when people share knowledge and ideas out in the field. These two groups exemplified this collaborative spirit, which is one of the most rewarding things for us as instructors to observe. This was on full display all week during both workshops, and also at the end of each when the groups worked together on large light-painting projects (as blogged about by Chris and Gabe, respectively).

Cuyahoga Valley National Park

May 7-12, 2017
By Tim Cooper

There’s a National Park in Ohio? There is, and it’s a good one!

Our National Park system is filled with lesser-known gems that often get overshadowed by the grand western icons such as Yosemite and Grand Canyon. Cuyahoga Valley National Park in Ohio is exactly that—a gem. While most national parks are quite a distance from the glow of city lights, Cuyahoga Valley is somewhat unusual in its close proximity to two major metro areas: Cleveland and Akron. Urban areas like these can often produce a lot of light pollution that makes it a challenge to capture star-filled skies. Thankfully, stars are not the only thing to photograph at night!

The Cuyahoga Valley National Park group

Cuyahoga Valley is filled with vestiges from the industrial revolution. Old quarries, mills, farms, bridges, train stations and tracks all dot the valley that bears the name of the hard-working Cuyahoga River. These structures provided the perfect opportunity for our workshop participants to learn and/or practice the art of light painting.

The week started with light clouds and clear skies, allowing us to get our feet wet with capturing the night sky over Indigo Lake. The train station there also lured many in the class to jump right into light painting. From this point the group just took off. It was a light painting extravaganza! Using flashlights to illuminate a subject at night usually takes a fair amount of practice, but the participants took to it like ducks to water. Chris and I marveled how quickly everyone picked up on the techniques.

The remainder of the week found us in varied locations in and around the park opening our shutters for long exposures and flashlight art. From a light-wand sword fight on the steps of a quarry wall to painting the rusted bodies of retired Volvos in a salvage yard, our participants tackled some of the most difficult scenarios in night photography.

Kudos, folks! Chris and I had a great time and we thank you all for your enthusiasm and hard work!

Cape Cod National Seashore

May 21-24, 2017
By Chris Nicholson

Our few days in Cape Cod marked a bit of an internal celebration for NPAN: It was our very first workshop to have lobster! ... (Just kidding. Acadia had lobster too.) ... In fact, Cape Cod was our very first Adventure Series workshop!

While our Passport Series events submerse attendees in the nighttime experience of a national park, our Adventure Series might bring us anywhere, and can also afford us the opportunity to work on specific night photography techniques that are pertinent to local subject matter. Cape Cod National Seashore certainly presented a prime opportunity for the latter.

The Cape Cod National Seashore group

Unlike most of the locations we visit, Cape Cod is fertile ground for lighthouse photography, with over a dozen beacons in the area. So one of our focuses was shooting lighthouses, exploring techniques such as how to photograph them at night without blowing out the lantern illumination, capturing images with multiple beams extending from the lights, and creating a beam where none might be.

Also, because we were shooting in late spring, the Milky Way was arching over the Atlantic horizon, giving us a great opportunity to work on stitched panorama images of our galaxy over ocean, over sand dunes and (of course!) over lighthouses!

What we couldn’t plan for was the bonus of having different weather conditions to work with, allowing the group chances to create different kinds of images each night.

Our first evening out—to Nobska Light, Chatham Light and Lighthouse Beach—was mostly clear. The attendees took full advantage, creating stunning Milky Way photos at the water’s edge and out amongst the dunes.

Our second night out was in the rain, so we ventured to Provincetown to photograph this unique town with puddle reflections and wet pavement. Afterward we shot the cottages of North Truro and then Highland Light, all in gloriously unpleasant weather. Unpleasant only for comfort, glorious for photography—which was proven not only in the group’s photographic results, but also in their willingness to stay out shooting until past midnight despite the cold spring rains.

Our third night featured thin clouds, which allowed some of the strongest stars to shine through, but also picked up the colors of the sodium vapor lights of Provincetown, which many of the photographers used to awesome creative effect. For this final evening we worked at Nauset Light and Nauset Light Beach, then at the Old Harbor Life-Saving Station and Race Point Beach.

In between shoots? There may have been a little lobster.

Thank you for the perks, partners!

As always, we owe a special thank-you to our brand partners for helping our attendees have an even better experience:

  • Nikon sent some of the best photography gear ever made for students to use for free. The kit they shipped to each workshop included a D5, D810A, D810, D750 and D500, plus a huge selection of lenses, including the awesome 14-24mm f/2.8, 20mm f/1.8, 28mm f/1.4 and more!
  • Coast sent HP1 flashlights for each person who attended our Passport Series workshops in Joshua Tree and Cuyahoga Valley to keep, and a whole kit of lights for anyone to borrow for light painting at all workshops.
  • B&H Photo sent along loaner gear such as intervalometers, remote shutter releases and bubble levels.
  • Our newest partner, BenQ, provided a projector for presentations and the crystal-clear SW2700PT 27-inch display for students to use while post-processing at Cuyahoga Valley and Cape Cod.
  • Light Painting Brushes provided a Deluxe Starter Kit for attendees to practice light writing.
  • X-Rite supplied an i1Display Pro to profile and calibrate anyone’s laptops and the instructors’ projectors.
  • Bay Photo provided free prints to award to attendees in random drawings.
  • Peak Design supplied a random giveaway as well, in the form of their Clutch strap.

Wrapping up ...

Last, but always first in our hearts, is a big thank you to the most important people in our program—our participants. The energy and enthusiasm they brought to the workshops cannot possibly be paralleled.

We have enjoyed working with everyone who attended our first four workshops of 2017, and look forward to those coming along on our remaining adventures in Natural Bridges and Hovenweep (sold out), Dry Tortugas, Great Sand Dunes (sold out), Centennial Valley (sold out), Westfjords (sold out), Olympic (twice!) and Eastern Sierra.

If you would like to join our participants photographing one or more of these great locations, grab one of our few remaining spots by visiting our the pages linked to above and signing up today. We will see you out there ... to seize the night!

Chris Nicholson is a partner and workshop leader with National Parks at Night, and author of Photographing National Parks (Sidelight Books, 2015). Learn more about national parks as photography destinations, subscribe to Chris' free e-newsletter, and more at www.PhotographingNationalParks.com.

UPCOMING WORKSHOPS FROM NATIONAL PARKS AT NIGHT

Safety First: Know Your Wildlife Before You Head Into the Wild

Ah, the call of the night. I get goosebumps thinking about locations, moon phases and opportunities to create something in concert with nature.

But nature has other creatures besides night photographers. Such as bears. And coyotes. Some are dangerous to humans, some are not. Knowing your wildlife and their habits before you head out is vital. Safety first!

A Story

I want to tell you a tale about last night. ... We'll get to the safety part toward the end, so come along with me for a spell.

I was scouting a location near National Parks at Night's (NPAN) headquarters in the beautiful village of Catskill, New York. To the west and into the mountains is New York state's tallest two-stage waterfall, Kaaterskill Falls. It's in the northeast corner of Catskill State Park, and well worth the effort to visit. Must be why it's so popular ;-)

I read all about it on blogs, the official Department of Environmental Conservation (DEC) website and some hiking books I have that detail adventures in the park. I was mostly focused on the difficulty of the hike, how well marked the trail is, and how long it would take.

I consulted the PhotoPills app to see when the half moon would scoot around the lip of the gorge. It happened to be not so long after dusk. Perfect. I decided to hike up during twilight to see the trail markers and note them mentally, and to identify places where I could make a navigation mistake on the way down. Fortunately for the traveler (not for the environment), I noted that this trail is well-worn and marked.

Image uploaded from iOS.jpg

PhotoPills

... helped me plan the shot.

My 30-pound backpack weighed on me as I made my way along dry and wet earth, stone and mud. The 330-foot elevation gain from the trailhead was fairly easy, except for some aggressive staircases (covered with mosquitoes waiting for fools like me wearing no insect repellent).

I made it to the bottom of the topmost stage of the falls. I took a breather, and noticed the trail broke left (away from the falls). Honestly, I was not happy about that. I wanted to get a good view of the tallest portion and it looked like the yellow trail just ... kept ... going.

I kept thinking to myself about the biggest mistake I’d made that night. I was alone.

I tried it for a while and gave myself a pass. Turning around and coming back down, I was feeling silly, coming all this way only to turn back. But there was one area off to the left (toward the falls) I had not tried yet. So I followed this side path and voila! I was exactly where I wanted to be.

It was civil twilight by then, so I relaxed, meditated and waited for stars to appear. When they did, I set up to test for exposure and focus, and to find a spot dry enough to shoot (at the bottom of the falls there is a ton of mist blowing away). I chose a spot that gave me a good peekaboo look at the entire waterfall without standing in the rain-like wind.

I had a wonderful "What if?" moment while shooting my way toward the moon cresting the gorge edge. I asked how orange light painting would look against the deep blue of the night sky. See Figure 1 for the best image.

Figure 1. 8 minutes, f/4, ISO 100. Nikon D750, Zeiss Distagon 15mm f/2.8 lens, Coast HP7R with Light Painting Tools Universal Connector and orange cone, plus a half moon.

Wow. Complementary colors are amazing. I decided to ride that train and work the scene with fiery water below and cool, icy blues above.

Here are a few more images that made the trip worth it. The last one is from after I hiked down and moved to another location. But...

During the shoot, I kept thinking to myself about the biggest mistake I'd made that night. I was alone. Figures that I ignored my own advice and not used the buddy system. So, my vivid imagination being what it is, I started hearing noises. Animal noises! It wasn't really happening, especially over the roaring din of the waterfalls. But the worry stayed at the back of my mind. I solo night stuff all the time, right?

In the end, I packed up and began my way back down the steep staircase. Slow. One step at a time. Safe.

I know it's important to stop and look around, even though it bugs me out. So I continued to do this, focusing in and out with my headlamp. I'd scan the trail for markers first, scan the surrounding bushes for movement or sparkly eyes (yeah, I do that), and the trees for ... and then I saw it.

About four feet up on a tree in the middle of the path was heavily scratched bark. Bear markings. Yup, the survivalist in me started clamoring inside. Yet I stayed calm and chose to be even more aware. (I did not stop, take out my tripod and take a photo complete with beautiful light painting, forgive me. Enjoy these instead.)

I kept moving at a safe pace. I started saying, "Hey bear!" loudly and clapping my hands.

I saw a couple of holes dug in the soft earth. Another bear sign. They love ants. (Again, I did not stop to take a picture, so look at this.)

The road was near, along with salvation from this possibly dangerous situation.

I kept on moving. Steady and careful. My boot soles were wet from mud and water from runoff that crossed the path. I knew it would be easy to slip, so I slowed down a little.

I saw headlights! Yeah, baby. The road was near, along with salvation from this possibly dangerous situation. Another 100 steps and I came upon a very dark pile of scat. Now, if I said I wasn't alarmed by this, I'd by lying. I was. It was, plainly, bear shit. (Once again, I did not think it was an ideal time to be taking photos, so check this out to aid your imagination.)

So I scanned in a circle, looking for movement or sparkly eyes. Nothing. Good. Move on, baby.

In my increased haste, I did slip once, in plain sight of the trailhead. I was navigating some scree and my wet boot slipped on rock. I didn't tumble—it was just an awkward slide. My heavy backpack actually helped to counterbalance me.

I brushed off some blood from my shin and hustled to the trailhead. I was so relieved to see cars coming. And I was safe at last. I made it to my car and jumped in, locking the doors. I know, it's foolish to think a car window can stop a bear, but it made me feel good anyway.

So the moral of the story is that I can share some tips with you!

Advice:

1. Read about the wildlife where you will be visiting.

Great sources are the brochure you get when entering a park, the posted signs, official NPS or state park websites, and more.

Learn when they are active, what they eat (so you can avoid being near it), if they travel on human paths (which black bears do) and how to deal with any encounters.

If you are unsure, ask a ranger. Park rangers rock.

When I was warming up in the car after this shoot, I found this amazing page on CatskillMountaineer.com detailing black bears. All the things I'd learned as a boy in the Adirondacks rang true with their points. And the natural signs I had observed were affirmed when reading this.

So seek out local naturalists and hikers for the area you want to explore and sit under their learning tree. It will be time well spent.

If you want to find a black bear, try Great Smoky Mountains National Park. It has more of them per square mile than any other place in the U.S. Nikon D3S, Nikon 80-200mm f/2.8 lens at 200mm. Photo © 2013 Chris Nicholson. (He doesn't have any night p…

If you want to find a black bear, try Great Smoky Mountains National Park. It has more of them per square mile than any other place in the U.S. Nikon D3S, Nikon 80-200mm f/2.8 lens at 200mm. Photo © 2013 Chris Nicholson. (He doesn't have any night photos of light-painted bears. I can't understand why.)

2. Use the buddy system.

Bring a friend or two with you. The more noise you make, and smells you offer, the less your chances of surprising any animals that could be dangerous.

3. If it's a short hike, try not to bring food.

If animals don't smell something they enjoy eating, they will most likely stay away. If you have to bring food, try to seal it as much as possible.

If you're bringing food into bear country, the current advice is to use a bear canister, because Yogi is smart enough to know about the food you hang from a rope between two trees. ;-)

4. Assume that most animals don't want to be near you.

As fellow NPANer Lance Keimig always says, there are far more plants that want to hurt you than animals. Animals usually attack only when feeling threatened and especially when their young are nearby. So don't freak out if you see a wild animal. Stay calm. Think.

5. Look for telltale signs.

Do you observe tracks, scat or other markers of animals nearby? Are they fresh?

6. Look around.

When you hike, it's normal to be looking at your feet all the time. Stop or slow down and look around into underbrush, shadows, etc.

7. When the wind is blowing in your face, be even more cautious.

Why? Your smell is not being blown ahead of your travel path.

8. Be aware of space.

If you know animals are near, try not to corner them in a gorge or canyon, because they may choose to escape right through you.

9. Stay Navigated.

This is not specific to animals, but always carry a compass, and know the basics of its use. It won't protect you from wildlife, but it will keep you moving in the right direction.

What animals live near you? What do you know about them? Had any close encounters? Let us know in the comments.

Locals bonus: More info on black bears, cougars and coyotes from the New York State DEC.

Matt Hill is a partner and workshop leader with National Parks at Night. See more about his photography, art, workshops and writing at MattHillArt.com. Follow Matt on Twitter Instagram Facebook.

UPCOMING WORKSHOPS FROM NATIONAL PARKS AT NIGHT