A Whole New Bag of Tricks: Check Out the Features in Adobe's Latest Update

Earlier this week Adobe released its latest updates to Lightroom and Photoshop. As happens sometimes, this particular release included some tweaks that are exciting for night photographers.

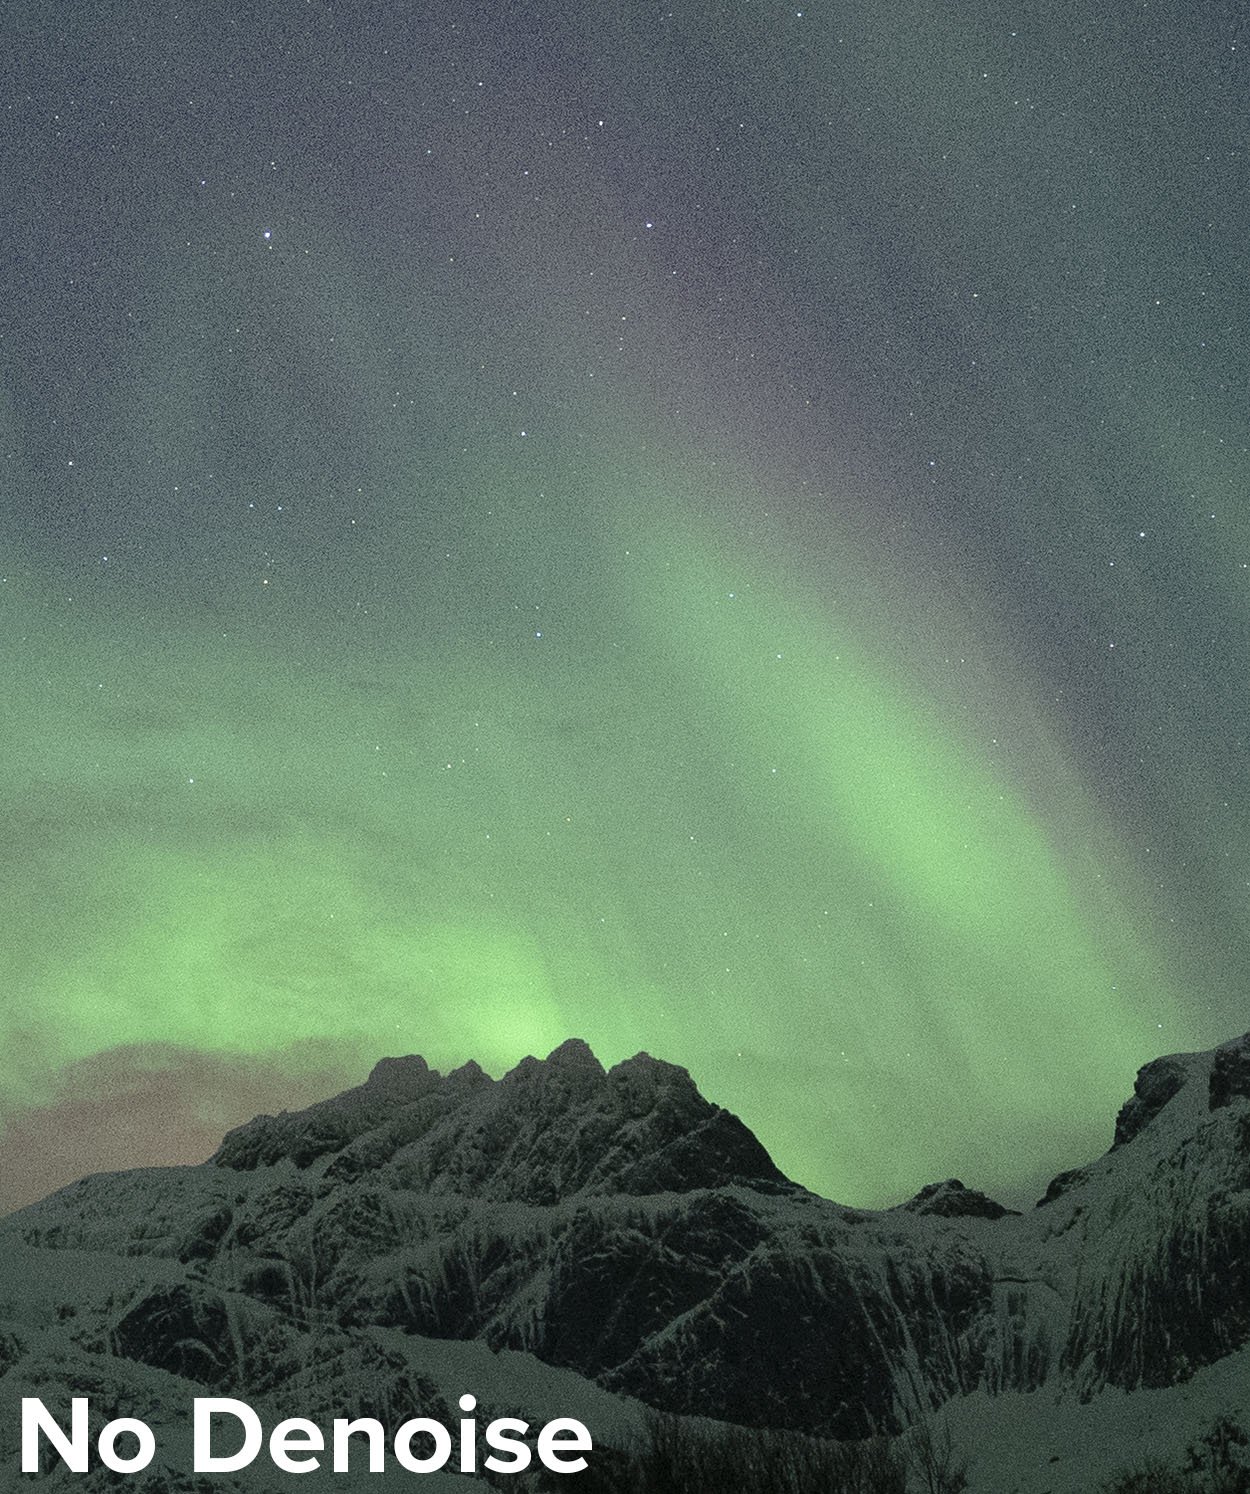
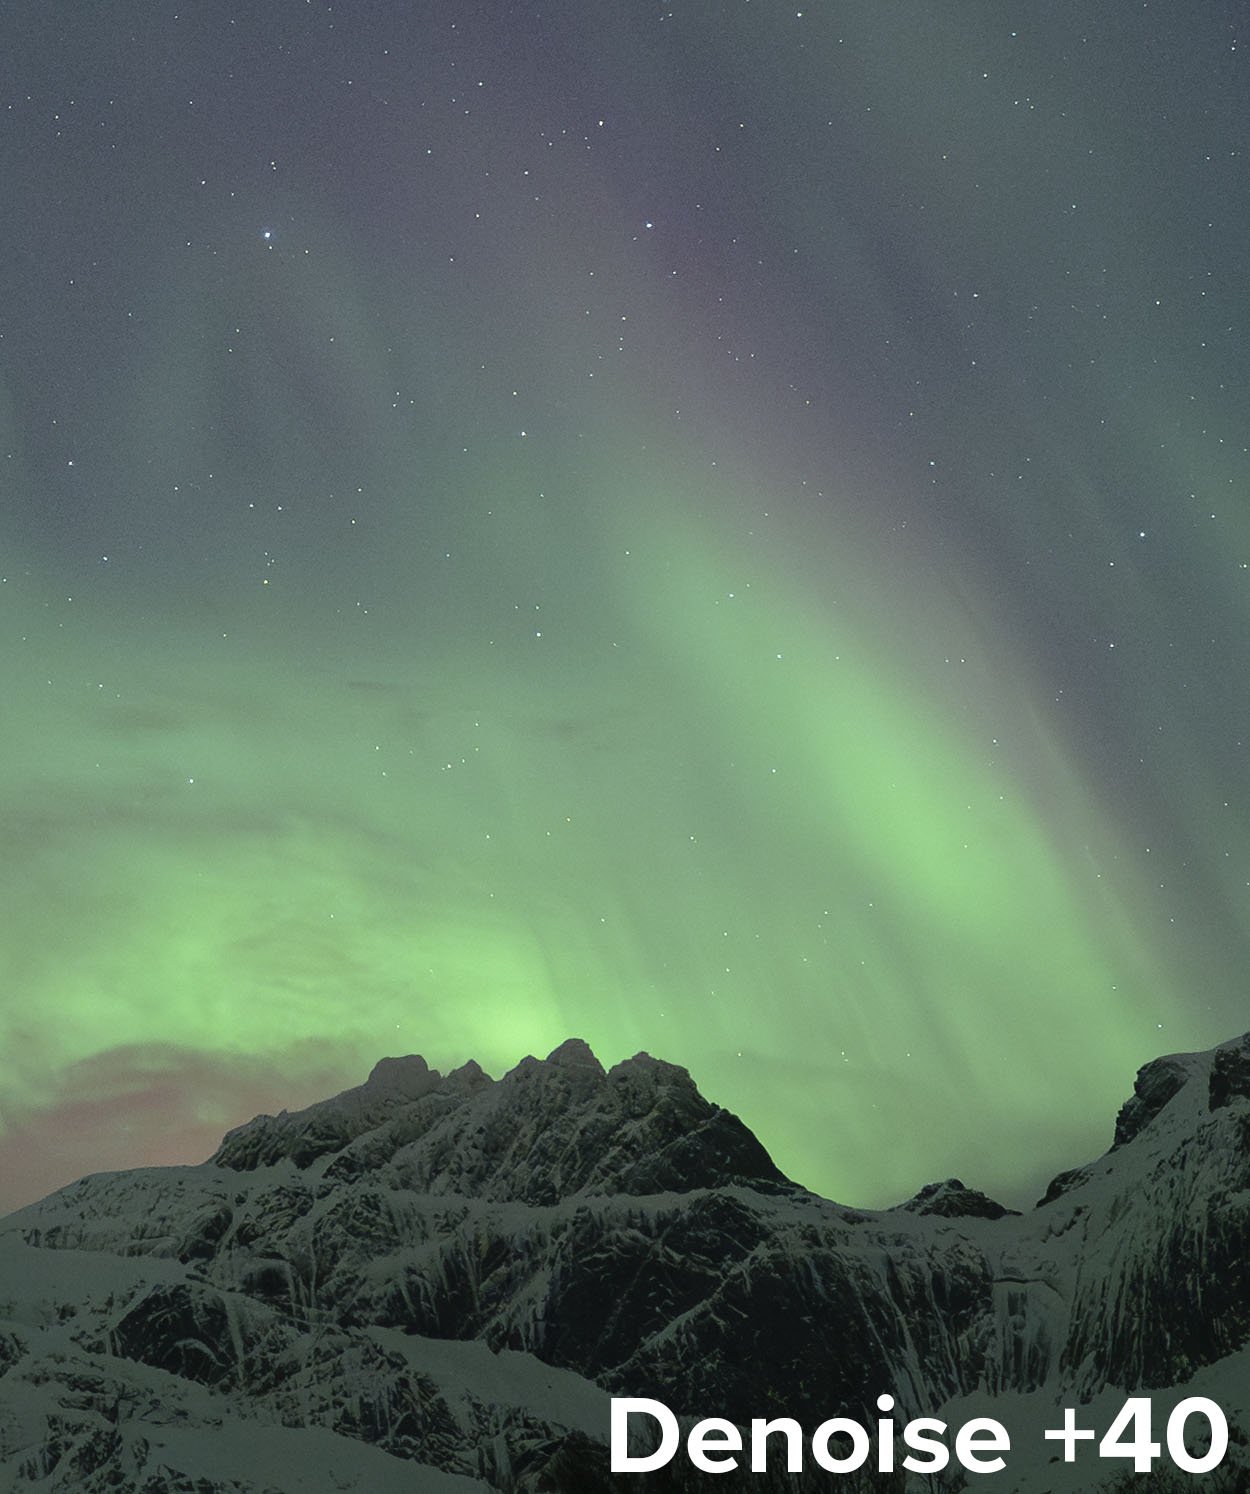
The biggest among those was the introduction of Lightroom’s new AI-based Denoise feature, which is simple to use and amazingly effective. On Tuesday we published a video post that explains the new Denoise feature (see “Cutting Through the Noise: Lightroom Just Made Night Photography Better”). You can see the power of this new tool in these before and after pictures:

But Denoise isn’t the only new thing to be excited about in Lightroom and Photoshop. Several other new features in this release will prove to be a real benefit for the night photography enthusiast. In today’s blog post, I’m sharing a video to show all the new tools and tweaks that you’ll want to look into, as well as some tips on how to use them, including:

  • the new ability to use Lightroom Curves adjustments on a masked selection

  • how to use the targeted adjustment tool to speed up manual changes to Curves

  • the new ability to open multiple images into the same Photoshop file as Smart Object layers (and why you’d want to do that)

  • two examples of using two Smart Object layers for better control when creating a blue hour blend

Check it out below.

Wrapping Up

All in all, it’s a great day to be a night photographer!

What are you most excited about in the latest Adobe updates? What photos are you making with them? Share in the comments below, or on our Facebook page, or on Instagram (tag us @nationalparksatnight #nationalparksatnight #seizethenight).

Tim Cooper is a partner and workshop leader with National Parks at Night. Learn more techniques from his book The Magic of Light Painting, available from Peachpit.

UPCOMING WORKSHOPS FROM NATIONAL PARKS AT NIGHT

Cutting Through the Noise: Lightroom Just Made Night Photography Better

While Adobe’s focus is on creating benefits for all photographers, every now and then they come up with a feature that is a huge benefit to us night owls, in particular.

This is the case with their latest Lightroom update (12.3). As of today, Lightroom users have AI noise reduction—and we’ve tested it, and it’s excellent. For those of us shooting high ISOs at night, this stands to be a game-changing addition to our processing workflow. Simply put: It makes night photos better.

Milky Way at White Pocket. Nikon Z 6II with a Nikon Z 14-24mm f/2.8 S lens at 24mm. 2 minutes, f/4, ISO 1600 (foreground); 8 seconds, f/2.8, ISO 6400 (sky); blended in Photoshop. Both images used Adobe Lightroom’s new Denoise slider at a setting of 23.

Adobe’s new Denoise tool works seamlessly within the Lightroom raw workflow. It can be applied to images just out of the camera or to images that you have already labored over in the Develop module—including those you have processed using complex masks.

The process of ridding your images of noise in Lightroom couldn’t be easier. Check out the following video for our tips and tricks on using Adobe’s fantastic new AI noise reduction feature.

Of course, this isn’t the only update Adobe made this week, but we wanted to immediately get you the news on this huge improvement for night photographers. Be sure to check out our blog post this coming Saturday, in which we’ll cover more about Denoise, plus other new features that will help out night photographers.

Tim Cooper is a partner and workshop leader with National Parks at Night. Learn more techniques from his book The Magic of Light Painting, available from Peachpit.

UPCOMING WORKSHOPS FROM NATIONAL PARKS AT NIGHT

Editing Auroras: How to Post-Process Your Northern Lights Photos

If you’ve read our previous blog post, or if you’ve been reading the news, or if you’ve been outside at night in the past two weeks, then you are already aware of the fantastic displays of auroras that have been dazzling observers even at latitudes that hardly ever see the phenomenon.

We were fortunate to have experienced these auroras on our recent photography tours to Iceland and Norway’s Lofoten Islands, which was the subject of last week’s post (“Spring Solar Storm Brings a Week of Amazing Auroras”), as well as the subject of our Instagram feed all this past week (and next).

Auroras over Gimsoystraumen, Lofoten Islands, Norway. Nikon Z6 II with a Nikon Z 14-24mm f/2.8 lens at 14mm. 6 seconds, f/2.8, ISO 3200.

If you’re outside shooting at night, such an amazing display of northern (or southern) lights tends to generate a lot of of frames to bring home. And that translates into a lot of post-processing on the to-do list.

We’d like to help. So we decided to create a tutorial on how to process your beautiful aurora images.

In This Video

In the following video I’ll show you how I use Lightroom to maximize the visual power of auroras in your night photos. I’ll cover:

  • techniques to control contrast and brightness

  • the Dehaze, Exposure, Shadows and Whites sliders, and how they can be used to better separate auroras from the surrounding sky

  • using profile corrections to even out the sky

  • local and global adjustments to target individual areas of the scene

Your Turn

Have you been out photographing the auroras? We’d love to see your photos! Share in the comments below, or on our Facebook page, or on Instagram (tag us @nationalparksatnight #nationalparksatnight #seizethenight).

Tim Cooper is a partner and workshop leader with National Parks at Night. Learn more techniques from his book The Magic of Light Painting, available from Peachpit.

UPCOMING WORKSHOPS FROM NATIONAL PARKS AT NIGHT