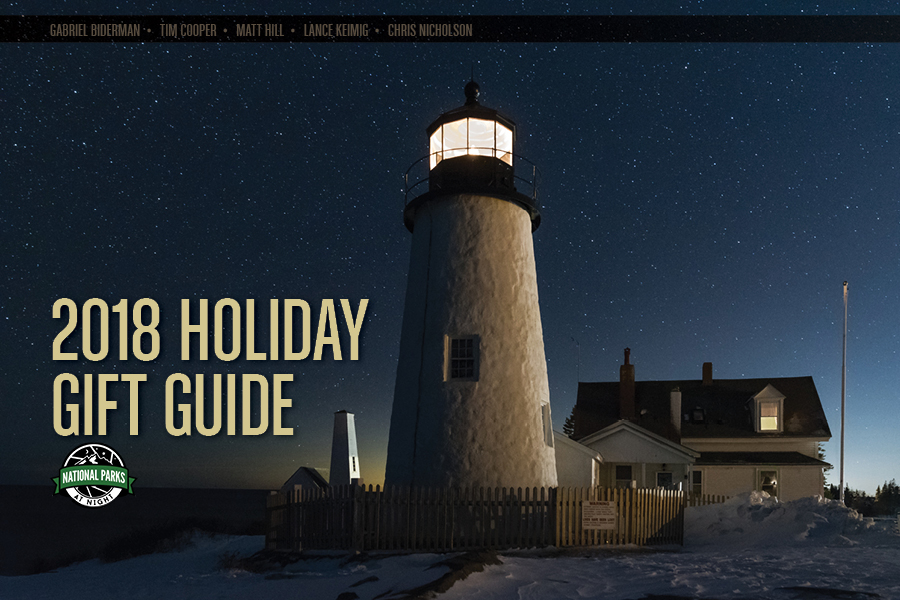
The holidays are upon us, and once again it’s time for us to help you find the best gift ideas for those special photographers in your life. So, welcome to National Parks at Night’s third annual Holiday Gift Guide!
We’ve scanned our camera bags, suitcases, computer files and storage cubbies, and compiled a new list of things that help us enjoy our photography and all the conditions we find ourselves in because of it. From shoe dryers to phone apps, hand warmers to training videos, we’ve created a must-have/seriously-want list that will help you with those tough decisions of what to buy for yourself this holiday season. And, looking through it twice, you may even find the perfect gift for the loved ones in your life!
We’re providing all of our discoveries as a free downloadable PDF ebook, so you can read it and reference it on any device, anytime, anywhere. Inside you’ll find products from major brands such as B&H Photo, BenQ, Bay Photo and Nikon, along with great little finds from smaller companies and startups.
In addition to the product information, the ebook version includes:
a lot more photos
a few extra discount codes and offers
night photography tips from all five National Parks at Night instructors
Help us spread the cheer by posting our guide on your favorite social media channels and share it with other like-minded photographers, friends and nature enthusiasts!
If you prefer to read the guide in our blog, that’s okay too; we’re also publishing it right here, below. (Though, we will say the ebook version looks cooler.)
Carpe Longa Nocte (seize the long night)!
—Gabe, Lance, Matt, Chris and Tim
Note: If you decide to purchase any of the items in this gift guide, please consider using the links included, as many generate a small commission that helps us improve the National Parks at Night workshop program.
Acratech

GPS
Our absolute favorite ball head that keeps our long exposures locked in! Made in America and weighs in at .75 pounds, but supports up to 25 pounds! It accepts all Arca-Swiss L brackets and quick release plates. We prefer the GPS model with the lever lock, so it won’t be confused for the other knobs when we are adjusting our ball heads in the dark. If you own a travel tripod with the 180-degree rotating legs, get the smaller GPSS, which holds the same amount but has a smaller base plate so you can collapse the tripod legs around it for travel.
Special offer: Use promo code “NPAN18” at bhphoto.com for 5 percent off the GPS, until December 20.
Anderson Design Group
National Park Adventure Guide Book
We’ve seen the Anderson Design Group’s WPA-inspired postcards in all the parks and absolutely love them. Now they have been compiled into a travel-friendly National Park Adventure Guide! It has become our new “passport” to the parks. Stickers are included in the book for you to place in the appropriate park, once you’ve visited. Each place includes some basic info on the park as well as “10 Things to Do and See.” There is also a spot for you to take notes, to sketch or to stamp the official cancellation from the park’s visitor center.
Apollo
Moon Light
Send your night photographer over the moon with this photorealistic LED moon globe! Now you too can hold the moon in your hands, or bring it wherever you go. The Moon Light comes in a variety of sizes from 3.5 to 7.9 inches, giving you plenty of options to illuminate your home. Brightness and color are adjustable by simply tapping the moon. We can imagine using a few of these in an upcoming photoshoot as well!
AstroReality
Lunar Pro
The Lunar Pro is a hand-crafted, hand-painted 120mm 3D model of the moon that is so realistic, you may believe you have grown to cosmic proportions. If you want to study Earth’s nearest satellite in detail, load up their companion Augmented Reality (AR) app to view in real-time interesting facts and details about the geography on the moon. And when you aren’t dreaming of gray space cheese, this is sure to be a conversation starter on display in your office or living room.
Atlas Obscura
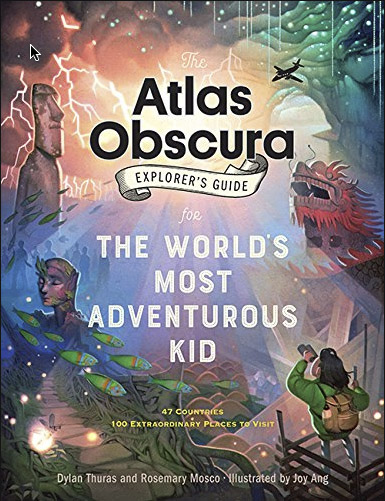
Explorer’s Guide for the World’s Most Adventurous Kid
We have always been huge fans of Atlas Obscura. With their book An Explorer’s Guide to the World’s Hidden Wonders, they initiated us into the mysterious, introduced us to strange places and showed us undiscovered treasures. Now they have upped their game with their latest book, Explorer’s Guide for the World’s Most Adventurous Kid. Why keep all the fun for ourselves? Share a copy with your favorite curious youngster. Or for anyone, really—plenty there for adults as well. This book is interesting for the kid in all of us.
B&H Photo
Gift Certificate
The most universal gift for any image-maker, audiophile or anyone looking for the latest computers, hardware, software, telescopes or home theater. Available in increments from $25 to $500, a B&H gift certificate is guaranteed to make that certain someone extremely happy! Pro tip: Add a trip to NYC with the gift card and visit B&H’s 70,000-square-foot superstore where everything is out on display.
Bay Photo Lab
Xpozer Print
Get your images off the computer and onto your walls! We’re big fans of all of Bay Photo Lab’s print surfaces, but traditional print media can be space-consuming to store and costly to ship. Enter the Xpozer, an ingenious new way to display your art. Printed on beautiful Vivid Satin paper that floats off the wall with Bay’s unique aluminum tension hanging system. This provides a cost-effective way to beautifully showcase your work, and is incredibly portable if you need to cart it around or send it off-site. Available in sizes from 16x16 to 40x80 inches.
BenQ

SW240
For the digital photographer, few things are more important than viewing our images on a high-quality, accurate screen. For years, BenQ has been making some of the best monitors available. And for years, we at National Parks at Night have benefited from using their incredibly accurate products. BenQ offers a particularly intriguing model that is within reach of any photographer: The SW240 has all of the qualities of its larger siblings, such as 99 percent coverage of the Adobe RGB color space and out-of-the-box calibration, while sporting the slightly smaller screen size of 24.1 inches. This high-resolution (1920x1200) monitor is perfect for demanding photographers with a smaller workspace. Its lower price tag doesn’t hurt either!
Benro
TrueNight Filter
Benro’s TrueNight filter is ideal for urban and suburban night photographers who desire a more natural look than artificial lighting in the sky. The TrueNight filter will give you a more pleasing color temperature, which is also easier to edit than trying to combat the yellow, orange and green tones from sodium and mercury vapor lighting. Available in 77mm and 82mm screw-in sizes (step-down rings also available for smaller lens filter threads), as well as a100x100mm drop-in.
Best Maps Ever
417 National Park System Units Map
There are over 400 official units of the National Park System! Start planning your next park adventures and checking off the NPS locations with this comprehensive map. Each spot has an icon for a pin to be placed, and trails, rivers, seashores and parkways managed by the National Park System are also outlined. The 2-by-3-foot wall map is heavyweight to last for a lifetime of exploration.
Chimani
Chimani App
If you’re venturing into national parks with a phone or tablet in hand or in pocket, you’ll want to install Chimani before you go. Chimani relaunched this year as one standalone app that features information about 417 units of the National Park Service, including all 60 national parks. Data includes times for sunrise and sunset, moonrise and moonset, and golden hour and blue hour, as well as information on photo locations, with hundreds of example images. Available for iOS and Android. Also look into the Chimani Perks program, a paid membership that avails discounts at and near parks all across the U.S.—hiking and rafting tours, bed and breakfast, hotels, local breweries, restaurants, cafés, gear rentals, gift stores, outdoor retailers and more.
Coast Portland
G9 Inspection Beam Pocket Light
Night photographers and flashlights go together like beans and cornbread, like hotcakes and molasses. Chances are, the night photographer on your holiday list has more than a few flashlights in their kit, and most of them are bright enough to burn a hole in a piece of paper from 3 feet away. For the last 3 years, our workshop attendees have all received a flashlight compliments of Coast Portland. This year, many got a G9, Coast’s diminutive fixed-beam inspection light. This little guy is almost perfect for navigating at close quarters in extreme low light environments or for adjusting your camera when you can’t find the button in the dark. And with a quick DIY hack, it is the perfect light: Just unscrew the cap and place a small piece of tissue in front of the bulb, and you have a diffused, dim light that won’t spoil your night vision, or your buddy’s shot.

Cosmic Watch
Cosmic Watch App
Want something to do with your time during a long rip or star stack? Download Cosmic Watch for your touch device and dive into learning more about exactly where you are in the cosmos. It’s both a timepiece that would look great on your desktop at the office, and an amazingly rich and detailed planetarium through which you can learn more about astronomy. Our favorite feature is that the app teaches you about time, and what time means. It’s heavy, dude. But what do you think about while practicing the art of dilating minutes and hours with your camera during long exposures?
CreativeLive
Night Photography Week
Video learning is huge. The problem is that not all online content is reliable or accurate. You might find what you need on YouTube, but why not invest a little for a vetted and trusted source? CreativeLive continues to produce some of the best online photography classes with world-renowned instructors. National Parks at Night is proud to have partnered with CreativeLive to present five complete courses on night photography subspecialties, one taught by each of our instructors. The courses are available bundled as “Night Photography Week,” or a la carte for the night photographer who wants to learn a specific skill.

DryGuy
Travel Dry
How many times have you been out shooting in the rain, or even shooting on a clear night, when you stepped into a stream or a bog—or experienc anything else that results in wet feet? Few things dampen the outdoor experience more than walking around in soggy shoes and socks. But, ya know, it happens. It often takes a couple of days to dry those shoes out, but you can accelerate the process with DryGuy Travel Dry shoe driers, often completing the task overnight. A workshop attendee gave us a set, and our feet have never been so happy.
eParks
Park Patches
If you’ve ever seen Matt’s National Parks at Night “boy scout” shirt, or hung out with the National Park Patch Lady (see below), it’s possible you’ve been infected by an enthusiasm to document your adventures with colorful patches. Alas, being night photographers, we sometimes miss the visitor center and don’t get to buy a patch. :-( Fear not, nocturnal adventurers! You can catch up on those missed patches at eParks, as well as pick up a bevy of other cools gifts you may have missed, such as shirts, posters and even the Passport to Your National Parks book for your cancellation stamps.
Hot Hands
Hand Warmers
Having your long exposure night photos ruined by condensation on the front of your lens is frustrating—but avoidable! Condensation on your lens can occur in humid conditions when the lens is colder than the air surrounding it. To avoid or alleviate the condensation, simply warm up your lens by activating two hand warmers, laying them on opposite sides of your lens and securing them with a couple of rubber bands or a koozie sliced down the side. Voila! Warm lens, no condensation. Outside Magazine tests gave the brand Hot Hands the highest marks for chemical hand warmers.
Huckberry
Hand-Blown Whiskey Glasses
Ever wanted to admire some of your favorite national parks through your favorite whiskey or bourbon? Well, you’re in luck. These precious, hand-blown whiskey glasses feature raised topographic impressions of Half Dome, Mt. Rainier and the Grand Canyon, among some other gorgeous global destinations. So crack a bottle of choice libations, and toast your adventurous spirit with friends.
Irix
150mm f/2.8 Dragonfly
Most of the time night photographers gravitate toward wide-angle lenses to capture the grandeur of nature or the city skyline. If you are feeling stuck in your ways or want to create images that stand out from the crowd, consider shooting with a longer lens to change your perspective. And if you’re into star trails but are too impatient to wait for those long exposures, telephoto lenses get the job done much faster than wide angle lenses! The folks at Irix have just announced a new lens, their 150mm f/2.8 Dragonfly. Like Irix’ 15mm and 11mm lenses, the Dragonfly is a weather-sealed, manual focus lens with their unique focus lock mechanism. It can produce 1-to-1 magnification scenes, but also makes a great night-portrait or medium telephoto lens. Available now for pre-order.

Ken Burns
The National Parks: America’s Best Idea
The magnum opus of national parks documentaries. This six-episode series details how the idea of saving and preserving wild spaces was born and popularized, and how the idea and its execution evolved through the 20th century. Learn about the people and places that literally changed the world.
Light Painting Brushes
Universal Connector
At the heart of the Light Painting Brushes (LPB) system is the deceivingly humble Universal Connector. Simply add this to any flashlight from 0.975 to 1.5 inches in diameter and you have a snoot to control the spill of light exiting your flashlight. It’s tiny, so it won’t take up much space in your bag, and can help you perfect those light painting masterpieces you’re dreaming about. When you’re ready to engage in light writing, pop on any of the dozens of cool accessories from LPB to start crafting light art from thin air.
LuminAID
Solar Inflatable Lantern
We first met the Solar Inflatable Lantern at the Atlas Obscura eclipse event in Durkee, Oregon, in 2017. By day, it charges via the embedded solar panel in 10 to 14 hours. At night, you inflate it to create a diffused cube of light with many, many color options you can cycle through by using the buttons on the top handle. The handle also allows you to hang it in a tree, inside your tent or anywhere you dream up. When deflated, the lantern can store in the bottom of your camera bag and you won’t even know it’s there.
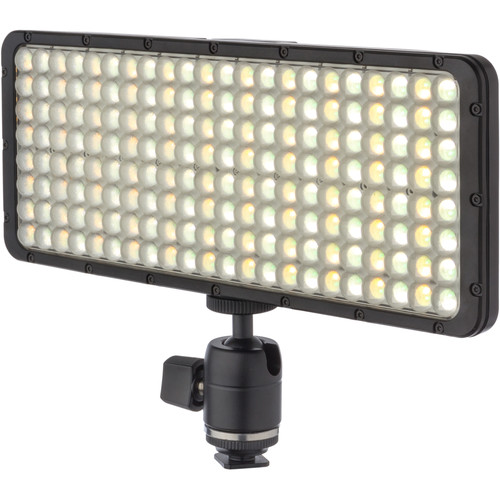
Luxli
Cello
The Lucie award-winning Luxli Cello takes all the things you love about the Viola and doubles—no, triples—your capabilities. It’s twice as wide and as bright. The TLCI is 97 percent from 3000 K to 10,000 K. The Hue mode has saturation control (to dial back juicy colors to within your camera’s gamut). And they added 150 digital gel filters that apply to any color temperature you choose, making color matching your gelled flashlights or LED panels a breeze. Finally, the built-in Fx mode allows for all sorts of playful options, such as CCT change over time, police lights and fire effects.
Mandorra
Smoke Grenades
Now, we must say these are a no-no within the boundaries of national parks. But in places where smoke effects are permitted, well, now we’re going to make some cool stuff happen. Despite the aggressive names, we prefer smoke grenades over smoke bombs. Many smoke grenades come with a pull tab to activate (like a grenade) instead of lighting a fuse. But the effect, oh, the effect! Backlight or sidelight the smoke with a Luxli Viola for a smooth long exposure effect or arrest it with a speedlite for crispy smoke.
Manfrotto
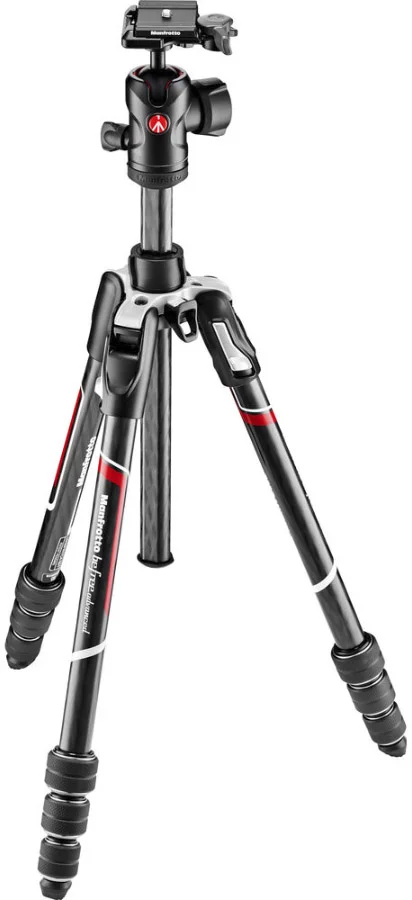
Befree Advanced Carbon Fiber Travel Tripod with 494 Ball Head
Tired of cheap lightweight tripods? So are we. So thank you to Manfrotto for the Befree—a high-quality, lightweight travel tripod! Last year we listed the aluminum version, this year we’re happy to list the carbon fiber option. Weighing in at less than 3 pounds, this tripod and head system can handle nearly 18 pounds of camera while extended to its maximum height of 59.1 inches. You may find that this “travel” tripod becomes part of your everyday gear.
Misty Morning Artwork
National Park Mugs
Enjoy your favorite coffee with (in?) your favorite park, all while supporting an independent artist. A workshop attendee turned us on to these beautiful handmade mugs from potter, painter and illustrator Abbey Stieglitz. Mugs include depictions of Yosemite, Joshua Tree, Grand Canyon, Yellowstone and more. Custom orders available.
Montem
Ultra Strong Anti-Shock Trekking Poles
If you’re going to be trekking to remote (or even semi-remote) places for unique photos, you’ll want to complement your inborn stability with some hiking poles. Particularly when bearing the weight of gear on your back, comfort and safety both dictate having poles for maintaining balance, reducing fatigue, and anchoring yourself on ascents and descents. Look into Montem Ultra Strong Anti-Shock Trekking Poles for a good rundown of desirable features, including low weight, shock absorption and adjustable height.
National Park Service
America the Beautiful Pass
With a deal this good, how could we ever exclude it from our gift guide? For less than a C-note the annual pass grants access to 60 amazing national parks, plus over 2,000 federal recreation sites including national monuments, wildlife refuges, national forests and grasslands, and sites managed by the Bureau of Land Management, Bureau of Reclamation and U.S. Army Corps of Engineers. The pass covers entrance fees for a driver and all passengers in a personal vehicle. The cost of the annual pass is $80, or $20 for seniors over the age of 62. Seniors can also buy a lifetime pass for $80. Passes are free for American veterans, Americans with permanent disabilities and fourth-graders. Now that’s a deal!
National Parks at Night

2019 Calendar
With National Parks at Night’s “Long Nights, Beautiful Spaces” calendar, follow 2019 in the night photographer’s way, with all the info you need for scheduling shoots during new and full moons, meteor showers, festivals and more. Each month is adorned with a night photograph from some our favorite places: Olympic, Grand Canyon, Big Bend, Great Smoky Mountains, Lassen Volcanic and Bryce Canyon national parks, as well as Cuba, Devils Tower, Valley of Fire and more.
Biscayne and Redwood Prints
Biscayne and Redwood National Parks celebrated their 50th anniversaries this year. We were honored to be part of their ceremonies that culminated with a group print show of our workshop attendees’ photographs at both parks, sponsored by Bay Photo Lab. You can help continue to support those parks as well as get some great artwork on your wall when you purchase a print from our online gallery. You can choose from multiple formats—metal, canvas and paper, all at a plethora of sizes and price points. All profits go to Biscayne and Redwood. Support our parks!
Photography Books

Looking for some national park and night photography inspiration and education that you can always have at your fingertips? Choose from one of the four books written by members of the NPAN team!
Photographing National Parks by Chris Nicholson is a portable and concise look at each of our national parks and how to best capture them. Includes best locations, times and great info on each park to help you plan your next adventure.
Have someone new to the night? Gabriel Biderman and Tim Cooper’s book Night Photography: From Snapshots to Great Shots (now in its third printing) is a great introduction to night photography, and it inspires you to get out there and seize the night!
Want an even deeper dive into the night? Lance’s book on night photography, Night Photography and Light Painting: Finding Your Way in the Dark, has long been the ultimate tome for those interested in a deep dive into the genre! The latest edition has an amazing chapter on the history of light painting and does an excellent job of balancing theory, history and enthusiasm for taking your night visions to the next level.
Light Painting is the most creative expression in night photography, and Tim Cooper’s ebook The Magic of Light Painting is a detailed exploration of all the illuminating possibilities that can happen when we practice the craft.
Night Photography Adventure Workshops
We simply love the outdoors, teaching and helping people get awesome pictures. So we’re super excited that many of our 2019 Passport Series workshops are already full. But we want you to share some of the magic as well! Our Passport workshops in Great Smoky Mountains, Grand Canyon and Lassen Volcanic national parks still have a few openings.
We also have some seats in our Adventure Series workshops. These workshops were developed so that we could visit the varied and limitless beauty that lies outside of our national parks and the more typical workshop schedule. Experience the stark beauty of Devils Tower National Monument, camp and hike the hither regions of Olympic National Park on our Shi Shi Beach Backcountry adventure, or immerse yourself in the culture and night vibe of Cuba. Wherever and whenever it may be, we’d love to have you join us in 2019. Come and help us Seize the Night!
National Park Patch Lady
I Brake For Brown Signs Bumper Sticker
Who doesn’t get excited by those brown road signs? They always point us to something fun, interesting or awe-inspiring. Show your love for our national treasures by sporting this “I Brake For Brown Signs” bumper sticker from our fellow parks enthusiast Sandra Ramos, aka National Park Patch Lady.
Nikon
Z6
We are very excited to see Nikon join the full-frame mirrorless world, and we have put the Z7 through the night paces. It’s frickin’ amazing, but those 100 MB file sizes make stacking stars a longer process than we prefer. We’ve been able to get our hands on the Z6 for a only hot minute, but it looks like the perfect companion to bring on our nocturnal adventures. The 24.5 megapixels will still give us tons of image quality to work with, without having to buy a new computer! The ISO image quality is an absolute game-changer. 6400 ISO is the new 1600, and we would not hesitate to use 12800 or even dabble with 25,600. If you are already a Nikon user, get the kit that comes with the FTZ adapter so you can use your current glass!

Palette
Starter Kit
The digital darkroom is far superior to the image-making technology of yesteryear, but let’s admit it—a mouse, touchpad or tablet doesn’t really provide intuitive controls for the sliders, buttons and checkboxes found in image-editing software. Enter Palette! Their system of interchangeable modules of physical sliders, buttons and dials allows you to take easy control of apps such as Lightroom, Photoshop, Illustrator, InDesign and more. Magnetic connections allow you to rearrange the modules however they make sense to you, and the control app allows you to set whatever commands and functions you want quick access to. New to the Palette game? Try starting with the Starter Kit, which features a slide, a dial and two buttons. When you’re ready to grow, simply add more modules individually.
Peak Design
Travel Backpack 45L

The Travel Backpack 45L is the ultimate travel backpack that adapts to all of your journeys. Beautifully, comfortably and simply designed with the single idea that no two trips are the same. The exterior is incredibly durable with easy-to-access pockets and the interior is totally customizable for both photo and general travel. The large camera cube is perfect for a pure photo trip, but the packing cube, tech pouch and larger wash pouch convert the photo backpack into the perfect weekender. Shipping in December!
Photographers Breakthrough
Adobe Lightroom: Inside Library and Develop
Understanding how to organize, find and enhance your images in Lightroom is an essential skill for any photographer. Produced by our colleague and noted author Tim Cooper, the “Adobe Lightroom: Inside Library and Develop” video is as beneficial to the first-time user as it is to those who have been using the program for years. This 33-part, 6-hour training video starts at the very beginning with catalog creation and image organization, and ends by demonstrating high-end image enhancement. Concentrating on only the Library and Develop modules allows Tim to fully explain and demonstrate the most relevant aspects of this powerful program.
Special offer: Use coupon code “night” during checkout for 20 percent off.
PhotoPills
PhotoPills App
Take Your Medicine. National Parks at Night just spent a weekend teaching with and learning more from Rafael Pons, the bard of PhotoPills. He’s the public face of the world’s best photography utility app, and he’s here to help. We’ve used and loved PhotoPills for years, but Rafa took us all, as well as our New York Night Photography Summit attendees, to the next level. The “pills” are individual utilities to help with different photography tasks. Convert exposures, calculate depth of field, determine where the Milky Way will be, or plan a photo idea from 3,000 miles away so you know in advance when the best time to get the shot will be. It’s really the only photo app you, and every photographer on your list, needs. Available for iOS and Android.
Shimoda
Explore 60
Creating a photo backpack that wears comfortably, and has smart organizational features inspired by serious backpackers, is a challenge. Fortunately, Shimoda nailed it. Their Explore 60 (it holds 60 cubic liters of gear) has an innovative harness system that adjusts for XL, L, M and S body types. The interior system has many module options, and each comes with a lightweight zipper bag for when you want to just go hiking without your camera gear. Matt lovingly calls his Shimoda 60L “the Kitchen Sink,” as it allows him to come prepared for almost anything on a workshop. Available in “blue nights” or “sea pine” colors.
Tether Tools
ONsite D-Tap Battery
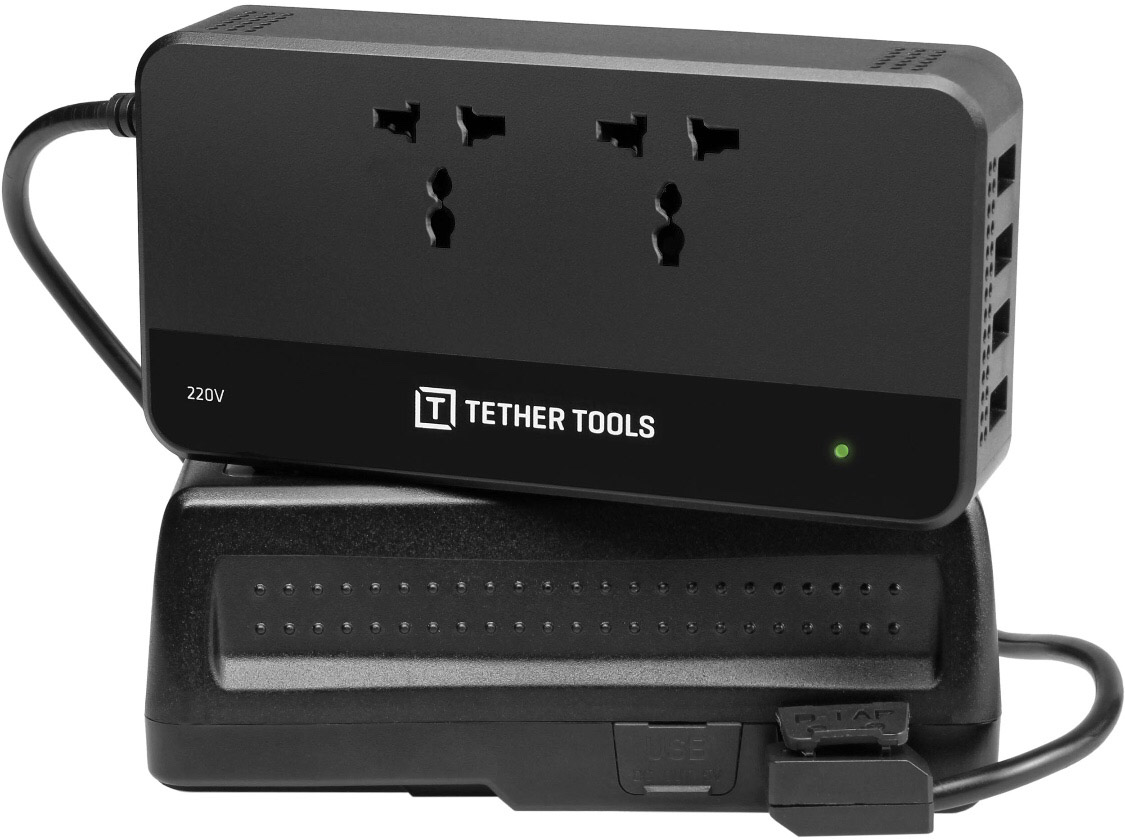
Tether Tools is known for their studio solutions, and their new ONsite Power system is keenly geared to plugging in your computer wherever your shoot. However, it’s also a great solution if you need to recharge in remote locations. The ONsite D-Tap to AC Power Supply comes with two AC outlets and four USB connections, and when you connect the D-Tap Battery with V-Mount (sold separately) you get a ton of juice! It’s the perfect solution for day-to-night time-lapses, for long nighttime exposures, or for 2- to 3-day wilderness trips. Charge devices such as laptops, camera and flashlight batteries, tablets, phones and more—wherever power is needed. TSA approved for carry-on luggage.
Vallerret

Skadi Zipper Mitt Photography Glove
The Folks at Vallerret just don’t slow down. Their tireless pursuit of warm hands brings a crop of new releases this year including a revised version of the Markhof Pro model for mid-winter use, the Alta Over Mitt for Arctic conditions, and the new Skadi Zipper Mitt which provides the warmth and comfort of a mitten with the versatility of a glove. A warm, windproof merino wool and thinsulate lined mitten with an easy-to-grasp zipper covers a form-fitting glove that has touch sensitivity and allows for unimpeded camera adjustments in cold weather. The mitten is fully removable, and has an integrated leash so you don’t have to put them down if you need to momentarily take one off. The mitten has plenty of room for a hand warmer if you need it.
Van Cleef & Arpels
Midnight Planétarium Watch
Not just a watch. It’s a timepiece. One geared toward aficionados of the night. One that brings the story of the solar system to life on your wrist. Encased in pink gold, the Midnight Planétarium Watch depicts the real-life orbits of five planets—a serpentine Mercury, a chloromelanite Venus, a turquoise Earth, a red jasper Mars, a blue agate Jupiter and a sugilite Saturn—while a shooting star indicates earthly time. Priced a little over $200,000, which is far less than NASA spends to track the same information remotely.
Western Digital
My Passport Wireless Pro
Want to travel light on your next adventure but still have security for backing up your files? Western Digital’s My Passport Wireless Pro will make you think twice about hauling your laptop. This hard drive-plus offers direct download via SD slot, or you can plug your card reader into the USB 2.0 slot. From there you can wirelessly transmit and view the files on your tablet or phone. It’s compatible with both Mac and PC and can charge your USB connected devices as well. Available in capacities of 1TB to 4TB.
X-Rite
X-Rite i1 Photographer Kit
Are you trying to master your color management workflow? If you aren’t, then think again. Starting from a profiled and calibrated neutral setting for your camera and your computer monitor helps you to make better edit decisions. You’ll have the confidence of knowing that the colors you choose are the ones you will share with the world when you export your masterpieces. The X-Rite i1 Photographer Kit will help make that happen.
Yaktrax
Chains

Named after the sure-footed Himalayan yak, Yaktrax help you get a grip! Night photography presents all sorts of challenges from basics like finding your way in the dark to the technical limitations of pushing your camera to the limit. Slipping and sliding on snow or ice shouldn’t get in the way of getting the shot, and Yaktrax are a simple and affordable solution to the slippery situations you might encounter this winter. They create a solid, secure grip with a patented system of coils or chains that bite into the ice below your feet. We used them last year in Iceland and found that the basic Walk model provided a measure of confidence in packed snow, but the Chains model gave us extra traction on both snow and ice, allowing us to safely get wherever we needed to go in order to get the shot.
YES Watch
Equillibrium
We’ve always been a fan of the YES Watch, as a tool for keeping track of the times of sunrises and sunsets, moonrises and moonsets, and other similar information while globetrotting for photography. This year YES released a brand new model, the Equilibrium, that brings time tracking to a whole new level. Available with a wide choice of bevels, straps and finishes so you can customize your look.
Happy Holidays!
Remember, just like holidays, and just like gifts, gift guides are meant to be shared! Please feel free to forward this to anyone and everyone you think might be interested. Particularly if it’s someone who buys a gift for you!
And remember, this gift guide is also available as a PDF e-book that includes lots more photos, some exclusive discount codes, and photo tips from all five National Parks at Night instructors. You can download that for free right here:

Get your 2018 Gift Guide ebook
… for free!
From all of us at National Parks at Night, we wish you and your loved ones a wonderful holiday season.