How to Master Color at Night with the Luxli Viola

Luxli Viola 5" On-Camera RGB LED Light

Luxli Viola 5" On-Camera RGB LED Light

Rarely do I find a tool that causes a paradigm shift in creativity or efficiency. The Luxli Viola 5" LED light is one of them. Why? Simply put, I can be very, very deliberate and accurate with the color of light I choose when light painting.

Prior to this, only a few tools really made me say, "Now I can really do something different/better." Those were:

  • a 4x5" view camera (total control over the image)
  • PocketWizard flash triggers (those changed photography forever, and for the better)
  • a light/flash meter (because I could focus on being creative instead of finding the right exposure)
  • the on-camera histogram (this unlocked the High ISO Test so we can all nail a proper long exposure)
  • the Pixelstick (because, damn … its potential for creativity as a light writing and painting tool is limitless)

Each one of these tools opened new realms of creativity. Once I started using them, I was eager to experiment, and I found new efficiency in what I could do (well, except for view cameras—they slowed me down in a truly terrific way).

As with these other tools, the single most important characteristic of the Luxli Viola is that it solves a technical problem. The result is that it allows me more time to focus on being creative.

The Real Problem this Solves

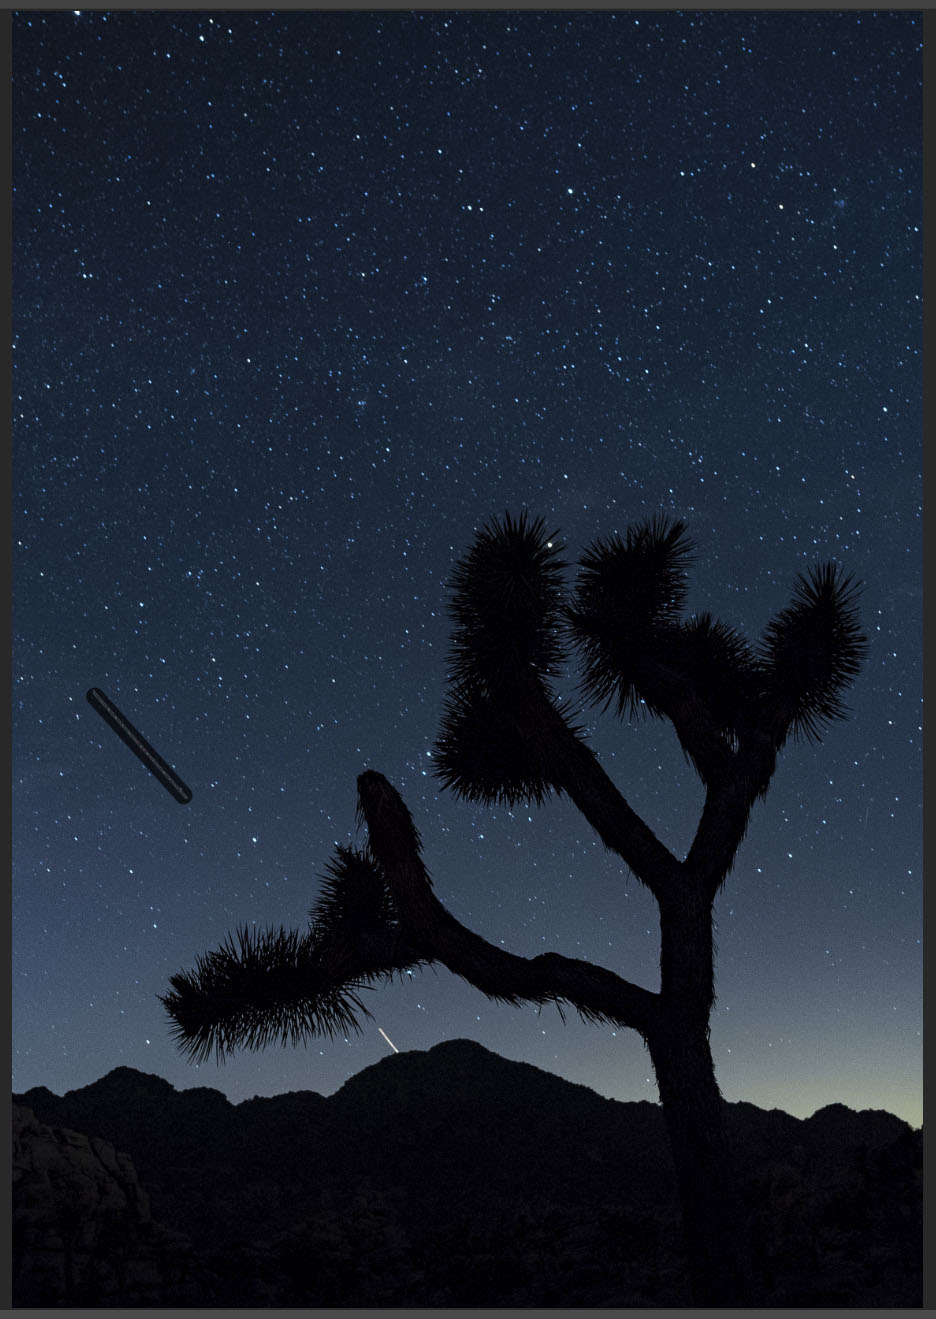
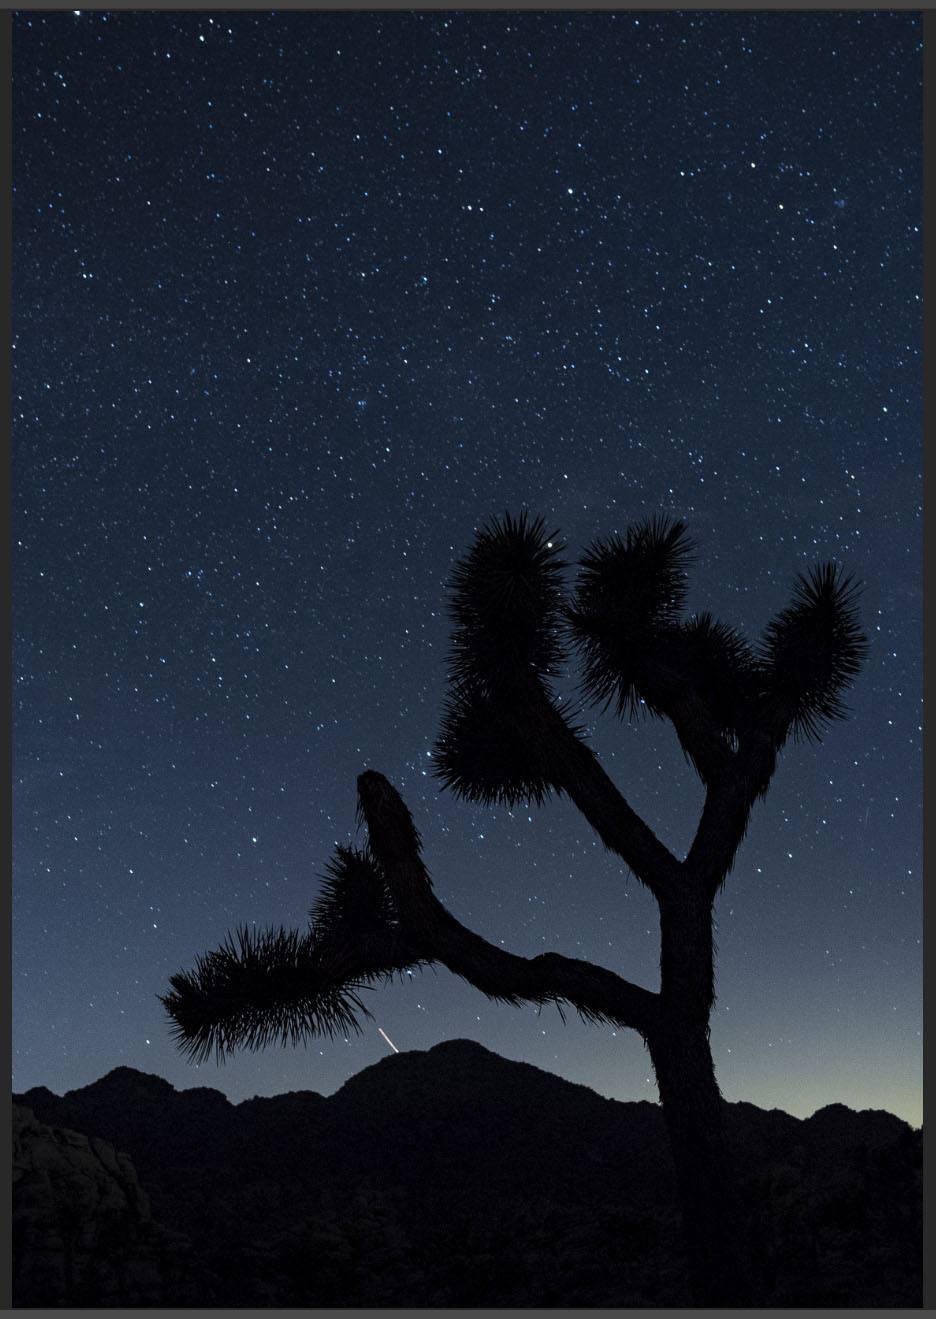
This problem is illustrated best when light painting using multiple flashlights, which often happens when working in a group. In the images below, you can see the color difference between my flashlight and Gabe's:

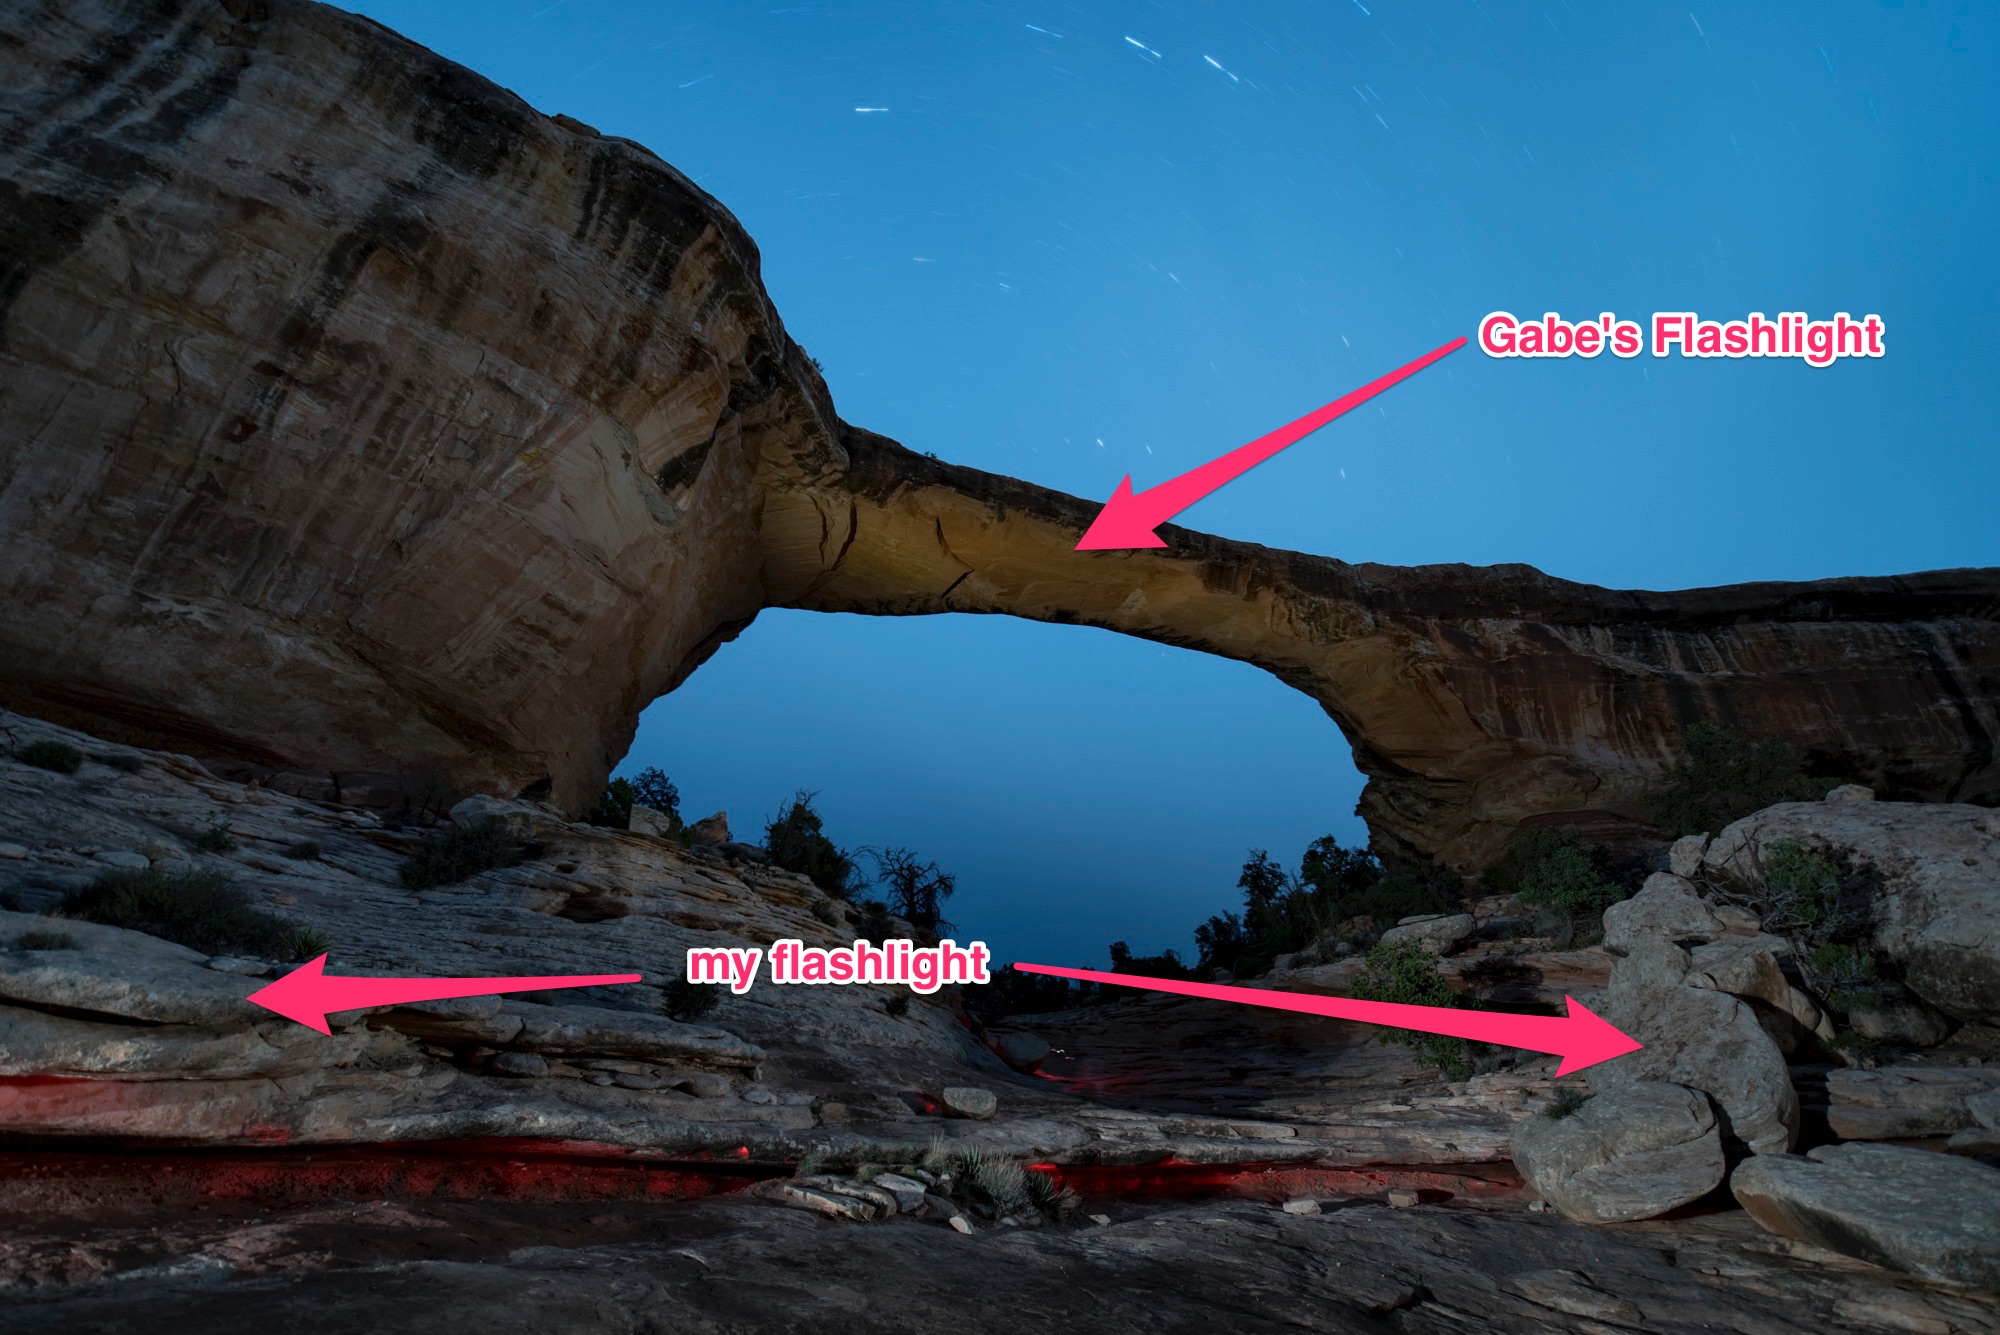
Note that Gabe's flashlight is warmer than mine. When I choose one flashlight source as neutral at 2600 K, the other is warm. If we had the same model flashlight and same strength and color gels, it would be the same. But we didn't. It doesn't look wrong, but I started to notice when it happened and thinking about how to collaborate better to create group masterpieces. You can even see the difference in the original 4000 K captures in-camera. 

My 2017 Self-Challenge

At the beginning of the year I asked myself, "What makes me uncomfortable? What should I be better at doing, but perhaps am avoiding putting time into practicing?"

Well, I am very fond of black and white photography. I love it so much that I practice it almost as exclusively as I do night photography. So I challenged myself to master color. And not just color in general, but being very particular and deliberate with how I use color.

My new BFF

Then in walks this rather humble-looking LED source. There are tons of on-camera LEDs for video. What sets the Luxli Viola apart and directly applies to my night photography is that it 1) renders all color temperatures from 3000 K to 10,000 K and 2) renders any hue on the color wheel that I desire. Why, you may ask, is that so groundbreaking?

Well, I've been gelling flashlights for years and frankly I hate doing it. It's awkward. It reduces the output. Sometimes I lose them. And most of the time, the color correction of blueish LED sources doesn't quite render the 3200 K or 3000 K or whatever warmer tone that I want. Sometimes it's too warm and causes the delicate reds and yellows of my beloved desert features—such as arches and bridges—a bit too garish. 

Knowing I can simply roll a dial on this LED panel and nail a color temperature got me so excited.

How I make the sausage

The first place the Viola really made an impact was when shooting Milky Way star point exposures. I'm consistently using a 3800 K white balance to accurately render the galactic core. What if I want a neutral light source for the foreground? Easy. Dial the Viola in to 3800 K.

With a flashlight instead, the illumination may end up too cool with a light CTO gel, or too warm and slightly tinted red with a bastard orange gel. But with this LED, no fuss. If I want something a little warmer, I cheat down to a lower color temperature. If I want cooler, I do the opposite. So easy. If I want to go crazy and use straight hues for color accents, I switch to color mode and dial in any darned color I want.

The only other tool I've heard of that exceeds the Viola is the ProtoMachines LED8, which is a light painter's dream (and a also pretty serious investment at $559). Anyone familiar with Troy Paiva's work has witnessed the power of this tool in the hands of a master. I just discovered that ProtoMachines released the Radium light painting wand, an upgrade to the LED2 that runs only $275. However, I have heard is that patience is sometimes required to obtain one, since they hand-build these tools.

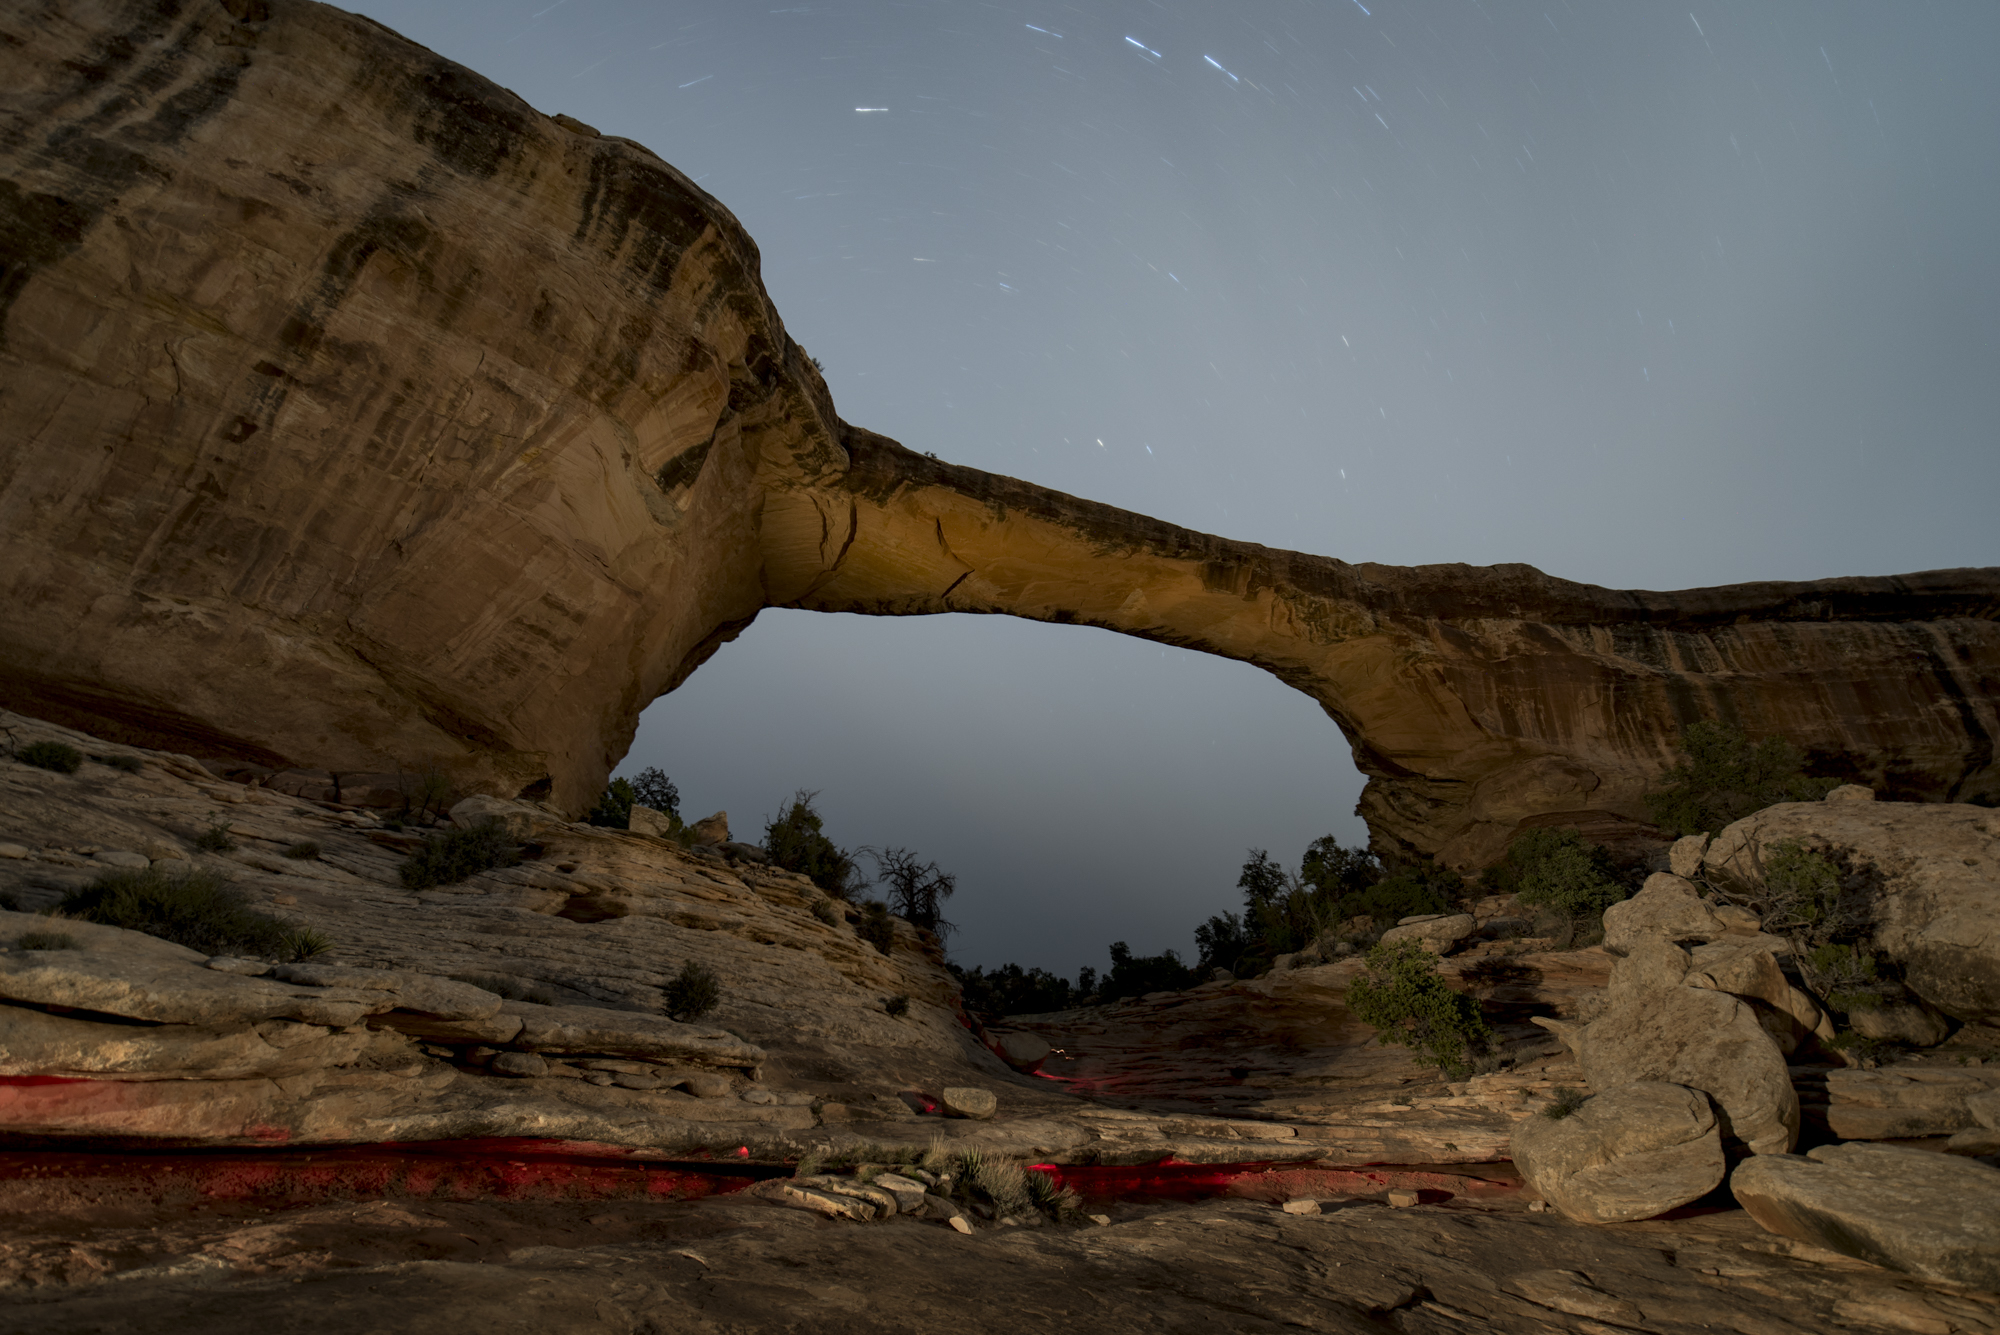
Figure 1. Owachmo Bridge at Natural Bridges National Monument. Shot with a Nikon D750 and Distagon T* 15mm f/2.8 lens. 22 seconds, f/2.8, ISO 6400, blended with a dusk image shot at 78 seconds,
f/2.8, ISO 400.

The Luxli Viola 5" LED is also spectacular when applying the Low-Level Landscape Lighting technique. For the photo in Figure 1, I set the Viola to 1 percent output and placed it below Owachmo Bridge. The panel provided a constant, barely perceptible glow that complemented the exposure time needed for star points and the Milky Way. (This image was then blended with an indigo dusk photo for the shadows—more on that in our recent post, "Finishing Touches: 3 Killer Post-Production Tips For Night Photography.")

Figure 2. Tower Point at Hovenweep National Monument. Split exposure of 22 seconds and 480 seconds, f/2.8, ISO 400.

When it's really hot out, sometimes you have to make two exposures—one for a low-noise foreground, and one for the spectacular dark skies you get in southern Utah in June. For the photo in Figure 2, I made a 480-second exposure to blend with the sky of a 22-second frame. For the long exposure, I didn't to add light the entire time. So I used another of the Viola's cool features: Bluetooth control. I turned on and off the light for a few seconds at the beginning of the long exposure with my phone. How convenient, right?

I placed the LED to craft textures and faithfully render the bricks' delicate colors at the same 3800 K that I'd set my D750 to. I was so confident about the results that I simply sat back and enjoyed the view. ;-)

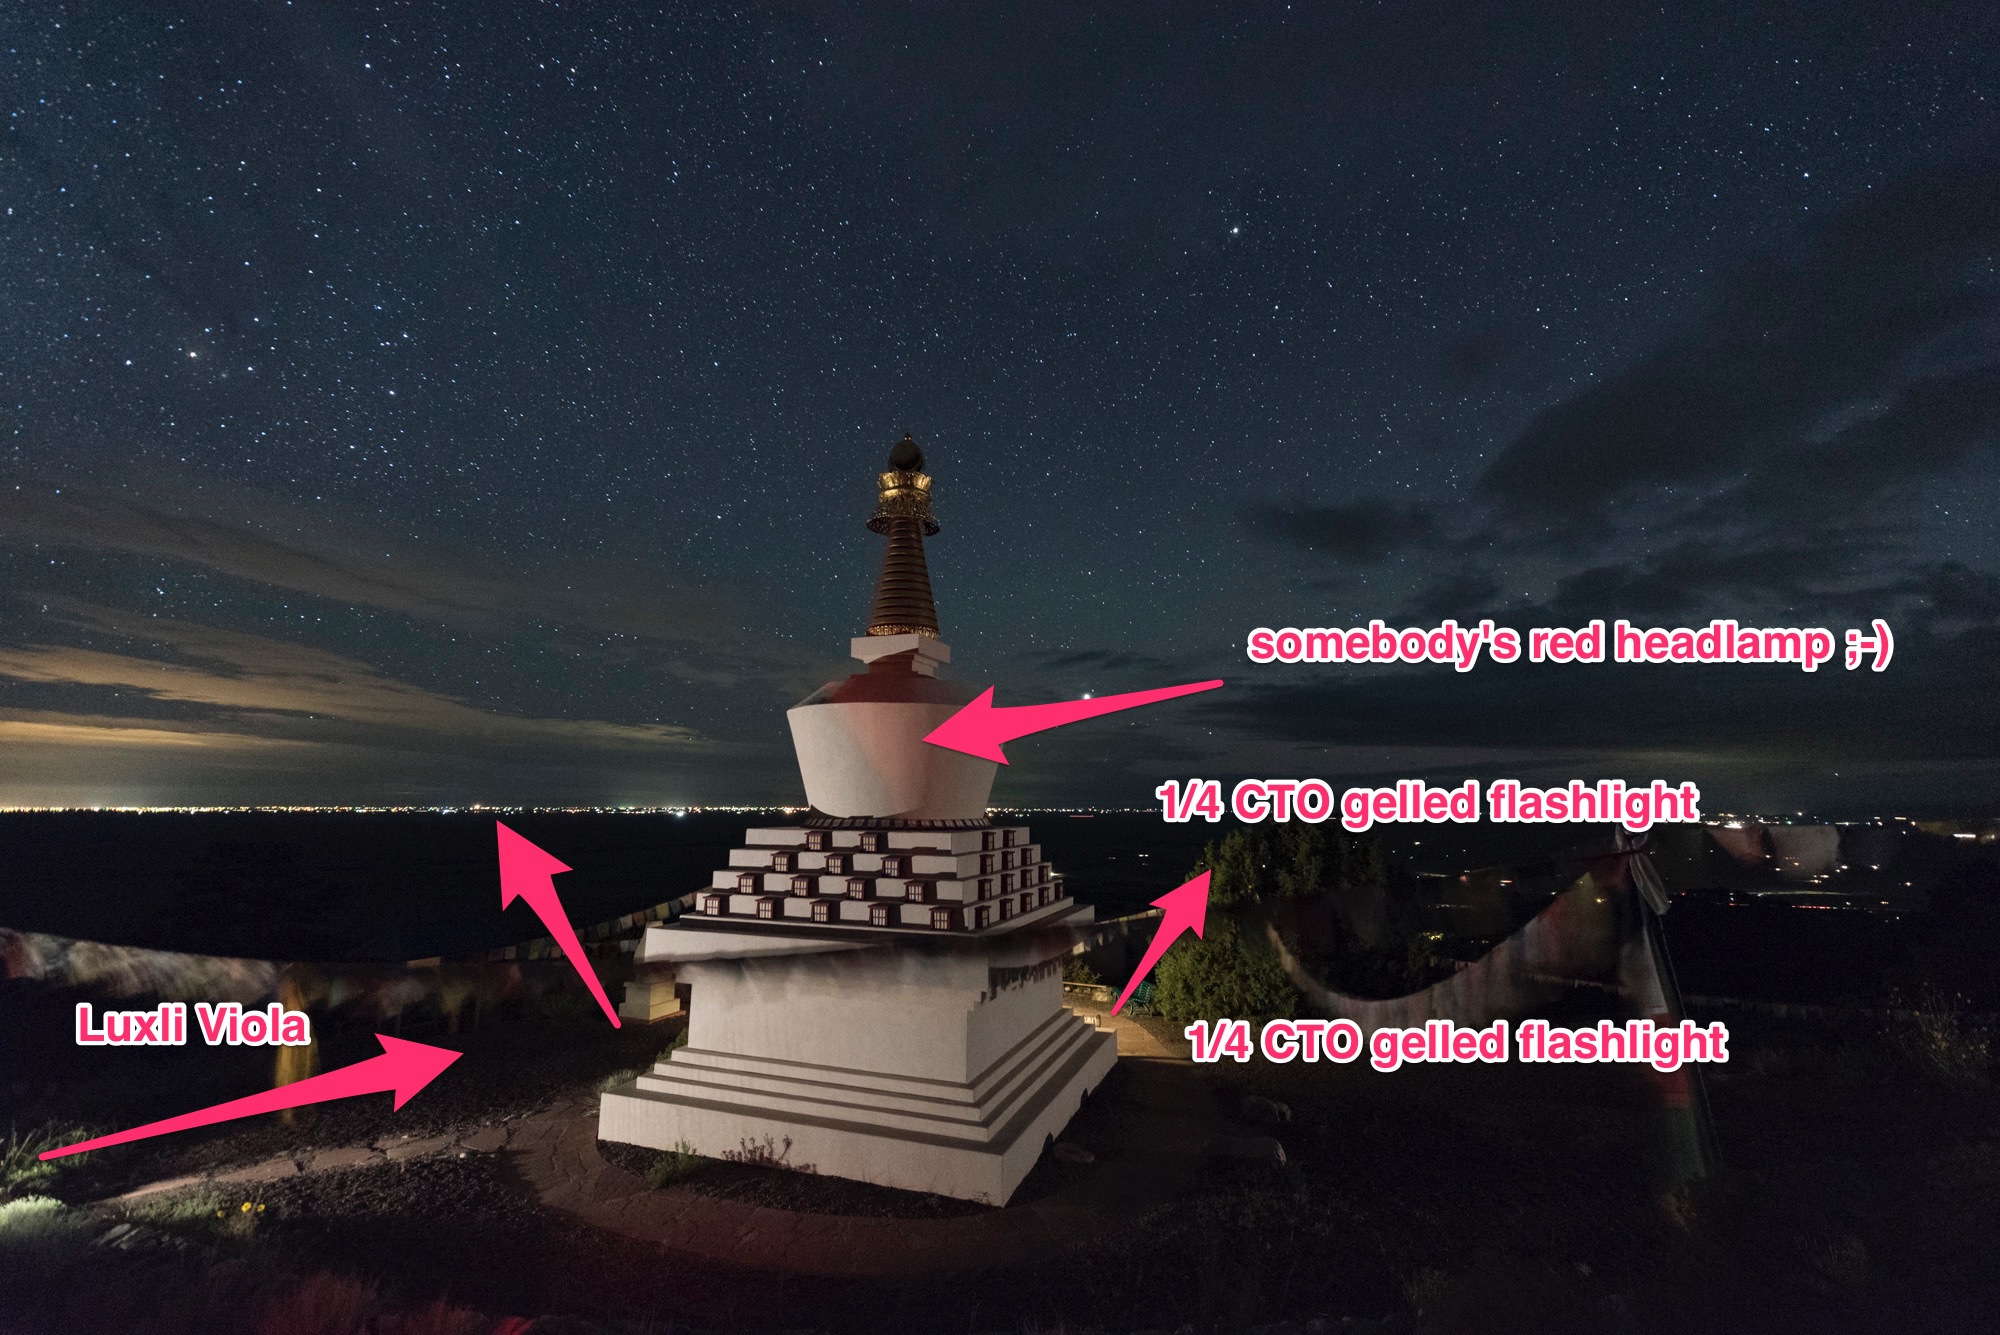
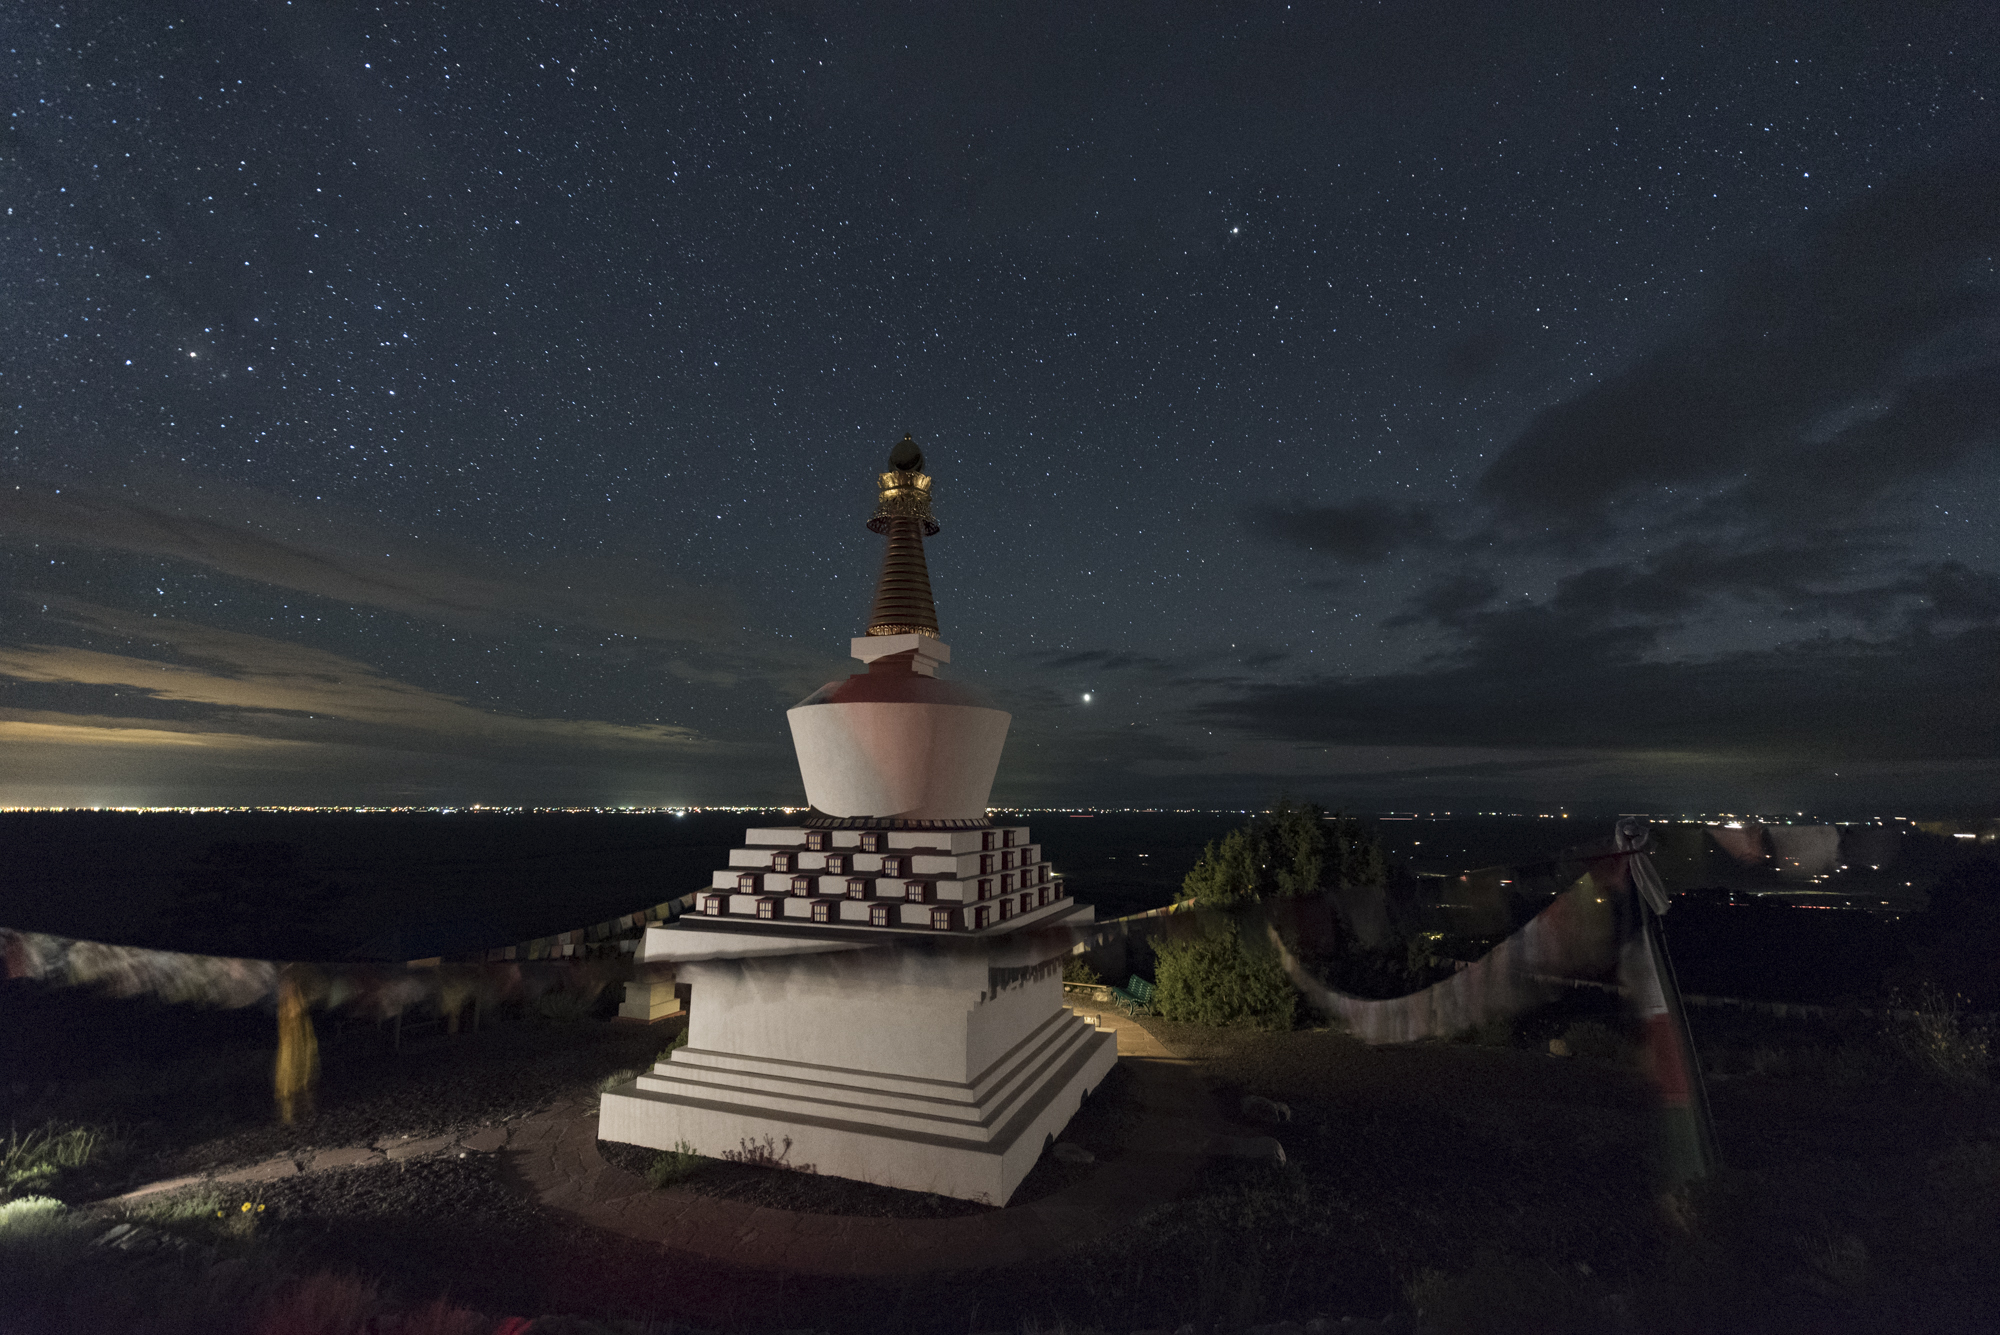
At Tashi Gomang Stupa (above), we used a Luxli Viola on a low-to-ground tripod at the bottom left corner to illuminate the main body of the structure. The camera and Viola's white balance were set to 3200 K. If you observe at the light spilling out from behind the stupa, you'll see a warmer light from a 1/4 CTO-gelled flashlight. See the difference between a color-corrected source and one that is simply correct?

Now, aesthetics also come into play. I wanted a warmer splash behind, so this was intentional. But the flashlight-plus-gels scenario is limited to what you carry, and also eats time while setting up. I am enamored with starting with a neutral light source and then cooking the color to taste. 

Mixing and Matching Color Balances

Because of the I put this to the test in the field at Olympic National Park. At Second Beach, I found a sea stack in the distance with some rocks in a tide pool in the foreground. The tide was coming in and making sweet swirls around the rock. This effect was also aided by the thick foam (which Chris commented wiggled like Jello-O when prodded with a toe).

Figure 3. All images above shot at 26 seconds, f/2.8, ISO 6400 with a Nikon D750 and Zeiss Disatgon 15mm f/2.8 lens. Download a high-res version of this chart here.

Keep in mind that there is no right or wrong when it comes to color temperature. There is knowing what affects your sky and foreground in a manner that you find pleasing. For the scene in the test above, I prefer the 3800 K camera and 5700 K LED. I was surprised by that—I had thought I'd like the 3800/3800 combination. Test and experiment!

Night Portraits

The Viola is also hella cool to use for night portraiture. It's not a flash, so don't expect crispy edges—people do move. But if you use the Viola briefly and your models hold still enough, it can be a great light source. 

Figure 4. The B&H marketing crew and astrophysicist Summer Ash at the Atlas Obscura eclipse event in August.
Nikon D750, 22 seconds, f/2.8, ISO 6400. White balance 3800 K (camera and LED).

For the photo in Figure 4, I matched the color temperature of my Viola to my CTO-gelled flashlight at 3800 K. The Viola is on the left of camera and the flashlight is low on the right.

Bonus: Bluetooth!

On top of all this, as mentioned earlier, the Luxli Viola has Bluetooth that allows you to control up to nine lights. When is this useful? When you want to simulate a flash, but can't use one, like for this group photo of our workshop participants at Olympic National Park last month:

I'm operating the lights with my phone behind Chris' back at left. Camera is set on intervalometer. 10 seconds, f/4, ISO 6400.

Wrapping it all up

I am enjoying the process of thinking critically about color and its application. I feel like I've grown as an artist and have another vital tool in my toolbox. I am equally excited about color and black and white imagery, but I think the results were worth going outside my comfort zone. And I'm keeping the Luxli Viola in my bag. Now I have to decide what to vote off the island, since gels didn't really occupy all that much space. ;-) 

Here is a recap of the benefits I find using a Luxli Viola:

  • Constant light makes it easy to repeat lighting effects, including exact shadows, intensity and placement.
  • Choosing a color temperature that matches my color balance in-camera will faithfully render the color of the objects in the scene.
  • Choosing a warmer or cooler color temperature can add creative flair.
  • It's very light and small.
  • When running at 1 percent power (which is most often for me), it will run all night and then some.
  • Adding the collapsible diffuser kit gives me a soft snoot to kill light spill at the edges, plus an even softer effect. 

There are a few disadvantages, however:

  • It's $350* (way more than a good Coast flashlight and gels).
  • The optional diffuser kit (which is amazing) is another $100*, or you can get both together for $429*.
  • An LED array is many little lights in rows and columns. It will never throw as far as a flashlight with a focused reflector on the front. So, you'll likely not be able to use it as a focusing aid, or for illuminating things very distant, unless you go for a longer exposure, or walk it deep into your frame and point it toward the thing you want to light up.
  • It's bigger than a flashlight. (That's a hint! hint! for any manufacturers out there who want to put these features in a flashlight form!)

* At the time of writing, these are the prices listed on B&H. Prices can fluctuate, so check back. 

Let's talk about color in the comments! How do you feel about your control and use of color? What tools do you use? How are you challenging yourself to grow? 

Matt Hill is a partner and workshop leader with National Parks at Night. See more about his photography, art, workshops and writing at MattHillArt.com. Follow Matt on Twitter Instagram Facebook.

UPCOMING WORKSHOPS FROM NATIONAL PARKS AT NIGHT

Leveling Up by Layering Light: How to Paint with Short Exposures

I love painting with light. Crafting the illumination in my scene by carefully painting my subject with a flashlight is both fun and challenging.

One of the biggest problems I run into, however, is not having enough exposure time to paint my entire scene. Shooting under a full moon, working in brightly lit cities or even trying to capture the Milky Way all require shorter exposures that limit the amount of time you can paint with your flashlight.

The solution? Paint each part of your scene on a separate exposure and layer them together in Photoshop.

In the following example—shot in Jerome, Arizona—I take this method to the extreme. I made this image at dusk, but I wanted it to look like a night photograph. My base exposure was 1/125, f/11, ISO 100. This very short exposure did not allow me the time to paint with my flashlight like I normally would. So instead I used my Nikon SB-700 speedlight (flash unit) to light different parts of the scene in three separate fast exposures, with the goal of layering them together in post-production.

This technique can be used with longer exposures too, and with any light painting tools you like to use. Maybe light pollution or moonlight is limiting your ambient exposure to 30 seconds, and you have 2 minutes of light painting to do. That's another perfect time to layer light painting frames.

The Technique

Shooting to blend later in Photoshop is actually pretty simple.

Start by establishing your base exposure. Again, in this example, using a 24mm lens, my base exposure was 1/125, f/11, ISO 100 (Figure 1).

Figure 1. Jerome, Arizona. Base exposure of 1/125, f/11, ISO 100.

This is the exposure you’ll use for all the subsequent frames. Keeping the exposure constant keeps the background illumination uniform in your final image.

With your base exposure established, simply click the shutter and jump into your scene and paint as much as you can. Click the shutter again and paint another area. Continue in this manner until everything you want illuminated has been painted. In this example I shot and light painted three frames, but you could do four, six, ten … whatever it takes the get the lighting right.

Figure 2. First exposure painted from the left, second exposure painted from the right, and third exposure painted from behind.

Once your images are made, it’s time to blend them.

1. Begin in Lightroom by selecting the images you want to blend.

2. From the menu choose Photo–Edit In–Open as Layers in Photoshop (Figure 3).

Figure 3.

All of the images will open in Photoshop in separate layers within one file, as seen in Figure 4.

Figure 4.

3. Click on the top layer and then hold down the shift key while you click on the bottom layer. This will select all of the layers in the stack (Figure 5).

Figure 5.

Figure 5.

5. With all of the layers selected, it’s time to change the blending mode, which is what makes the magic happen. Choose "Lighten" (Figure 6).

Figure 6.

Voila! As you can see in the image below, all the of the areas that I painted are now visible, creating one comprehensivley lit scene.

Save and close. The image will now return to Lightroom.

Figure 7. Final layered image. Nikon D4, Nikkor 24mm f/2.8 lens. Three layered images shot at 1/125, f/11, ISO 100, each with flash.

Using the Lighten blending mode is a great trick for night photography. It allows for shorter exposure times, multiple attempts at light painting during star stacking, and even the ability to control the color and brightness of the individual exposures back in Lightroom!

Tim Cooper is a partner and workshop leader with National Parks at Night. Learn more techniques from his book The Magic of Light Painting, available from Peachpit.

UPCOMING WORKSHOPS FROM NATIONAL PARKS AT NIGHT

How We Got the Shot: Light Painting the Upright Stone in Iceland

Nikon D750, Sigma 24mm f/1.4 Art lens. 73 seconds, f/8, ISO 200.

One of my favorite moments of our recently completed Westfjords of Iceland photo tour was working with three of our travelers on a joint light painting image one night while we were waiting for the aurora to appear. (The aurora did eventually appear, and in a big way!)

We were positioned high on a hill with 360-degree views in order to be able to see and photograph the aurora no matter where it appeared in the sky. The weather was perfect, the sky mercifully clear, and the vistas magnificent. The group was excited with anticipation as the KP index of 5 was a good sign that the sky would put on a good show for us.

There was a large upright stone, about 5 feet high, perched neatly near the edge of the hill. It reminded me of an image by the Czech photographer Jan Pohribny titled “Positive Energy Emitter” (Figure 1). Pohribny’s photo was of an ancient standing stone at twilight, and he had circled the stone with a red light held overhead and also pointed down at the ground to create the “energy vibrations” implied in the title.

Normal
0


false
false
false

EN-US
X-NONE
X-NONE


Figure 1. “Positive Energy Emitter," 1992 Jan Pohribný. From the series New Stone Age.
 <w:LatentStyles DefLockedState="false" DefUnhideWhenUsed="t…

Figure 1. “Positive Energy Emitter," 1992 Jan Pohribný. From the series New Stone Age.

I thought that this would be the perfect opportunity to attempt an homage. My thought was that the stone before us could be a beacon to summon the aurora, as well as a tribute to an early light painting innovator.

After my standard procedure of framing the composition, focusing and determining the ambient exposure, I made my initial attempt at creating the rings of light around the stone (Figure 2).

Figure 2. Initial experimentation. Nikon D750, Sigma 24mm f/1.4 Art lens. 30 seconds, f/16, ISO 100.

First I set up a Luxli Constructor Large Block Bi-Color LED Light on the ground pointed at the stone, set on low power at 3200 K––partly to illuminate the stone, and partly so I could see to move around without tripping over the other rocks on the ground.

I also used a short section of frosted plastic tube that I had removed from a collapsible light sword from Light Painting Brushes, and fixed it to my Coast HP5R flashlight on low power, which created a DIY light wand. I wasn’t satisfied with the look I was getting with the wand, so Erika, one of the workshop attendees, suggested using a different Light Painting Brushes tool that she had, a purple translucent light writer (Figure 3).

Figure 3. Second attempt. Nikon D750, Sigma 24mm f/1.4 Art lens. 30 seconds, f/13, ISO 100.

We liked the look with the translucent light writer better, but since there was still a lot of light in the sky, we were limited to a 30-second exposure at ISO 100 and f/11. Because the ground around the standing stone was covered with rocks of various sizes, it wasn’t possible to move around very quickly in order to create the desired light writing effect in such a short time. We could make only a few revolutions during the half-minute exposure. But I knew that as the sky got darker, we would be able to extend the exposure time and create more light rings.

Meanwhile, Erika’s husband Dan suggested adding another element to the image using shadow painting rather than light painting. His idea was to project a hand shadow onto the rock by placing his hand between the rock and a light source. We loved the idea, and the initial result reminded us of pictographs found in ancient rock art sites around the world.

The first attempt was encouraging, so we made a few refinements until we came up with an iteration we all liked. I also added some illumination to the foreground by sweeping a flashlight low to the ground on the left and right sides to fill in the shadows and reveal some detail (Figure 4).

Figure 4. Third attempt. Nikon D750, Sigma 24mm f/1.4 Art lens. 30 seconds, f/11, ISO 100.

By this time, things were getting complicated, as Erika was making the rings around the stone, Dan was holding his hand in position for the shadow, and I was lighting the ground and creating the hand shadow, which took precise alignment of Dan’s hand and the flashlight. Each of us had our cameras set up and were shooting side by side.

Fortunately, Steve, another participant, was available to assist us by opening all the shutters, which gave us time to get into position before the exposures started. We made one more frame just as the aurora was starting to appear in another part of the sky, and that frame was exactly the vision we were working toward (Figure 5). So we called it a wrap, and repositioned ourselves to photograph the aurora.

Figure 5. Final image. Nikon D750, Sigma 24mm f/1.4 Art lens. 73 seconds, f/8, ISO 200.

So many elements came together to make this image succeed:

  • the references to ancient cultures associated with mystery and spirituality––the standing stones of neolithic cultures in Europe, and the pictographs reminiscent of Native American Kokopelli
  • the ritual of light painting and the call to the gods asking for the aurora to bless us with its magical presence
  • and most importantly, the collaborative spirit that we shared to create the image, which made this special moment a highlight of our trip to the magical place that are the Westfjords of Iceland

Thank you Erika, Dan and Steve. It was an honor sharing this experience with you!

Lance Keimig is a partner and workshop leader with National Parks at Night. He has been photographing at night for 30 years, and is the author of Night Photography and Light Painting: Finding Your Way in the Dark (Focal Press, 2015). Learn more about his images and workshops at www.thenightskye.com.

UPCOMING WORKSHOPS FROM NATIONAL PARKS AT NIGHT

Finishing Touches: 3 Killer Post-Production Tips for Night Photography

In the whole history of photography, at least half the magic of creating images happened after the shoot, in that period of prestidigitation known as “post-production.”

In the film days, post happened in the darkroom, where many of us got stinky hands and forgot how to socialize with people who lived on the other side of the door in light. These days, post happens mostly on a computer, in which the millions of data points that make up our image are rearranged and altered in a way that produces the final photograph as our minds saw it in the field.

And when it comes to night photography, post-production tools can be used in all sorts of unique ways to help us seize the night exactly as we see fit. Below are a few of the techniques a few of us here at NPAN use to bring the image down the homestretch.

Working through post-production on a 27-inch BenQ SW2700PT monitor at our workshop in Cuyahoga Valley National Park.

Working through post-production on a 27-inch BenQ SW2700PT monitor at our workshop in Cuyahoga Valley National Park.


Chris Nicholson

Making Planes Disappear

Remember when David Copperfield made a Learjet disappear on national TV? I do that trick too.

If you have photographed anywhere within the region of a major airport at night, or even just along major flight paths, then you know how conspicuous planes can be in an otherwise pristine dark sky. Many star trail photos have been bisected by plane trails.

Some photographers don’t mind that, and some do. Even among us five NPAN instructors you’ll find varying opinions. I, for one, don’t want planes in my sky shots, so I usually remove them in post-production.

Fortunately, Adobe has made this really easy to do, in both Lightroom and Photoshop. In the old days of digital darkrooms (as in, like, five years ago), to clone out a plane trail could take a fair amount of effort—it generally involved stamping over the offending pixels with the Clone tool while sourcing various other spots in the sky to avoid telltale digital artifacts, and then doing some cleanup work to make things look normal. But these days you can use the Spot Removal tool in Lightroom or the Spot Healing Brush (in Content Aware mode) in Photoshop to do most of that work for you.

But that’s not the tip, as many people reading this already know what a great job those tools can do to quickly and effectively remove unwanted elements of a photo. The tip is something that many photographers don’t know: You can draw a perfectly straight line with either the Spot Removal or Spot Healing Brush tools by shift-clicking on two points. This is enormously useful for quickly wiping out a straight unwanted element—such as an airplane trail in a night sky!

Simply zoom in on the airplane trail you want to remove, hold down the shift key, click once at one end of the trail, then once more on the other end. The trail will disappear from your composition, almost always without any artifacts to clean up afterward. It’s like magic. Like David Copperfield.


Matt Hill

Blending a dusk shot with star points

When you shoot on new moon nights, shadow detail is pretty hard to come by. One way to fix this—to add detail in the shadows, to mask high ISO noise and to add a “fantastic” sparkle to your image—is to blend in a photo that was shot during the tail end of dusk.

Of course, this requires patience. But trust me, it’s worth it.

Owachomo Bridge in Natural Bridges National Monument, as photographed during our workshop there this summer.

Owachomo Bridge in Natural Bridges National Monument, as photographed during our workshop there this summer.

When I see the light turn that special indigo color, I set the camera on its tripod and go through all the motions of composing and getting ready for my night photo. Then, with twilight light still in the air, I shoot (in RAW, of course) one to three photos at a low ISO, with a white balance of Daylight, to faithfully render that delicate color.

Then I wait patiently until all twilight has left the sky (which happens faster if you face east) and then take a high ISO photo for star points, preferably with the Milky Way in plain view, and even better if the galactic core is in your frame.

During post-production, I cook the two images to taste, being careful to not accentuate the shadow details on the star points photo. Then I select the two images in Grid view, right-click one of the chosen thumbnails, and choose Edit In–Open as Layers in Photoshop. I put the dusk photo on the top layer, add a layer mask, and then mask out the sky (Figures 1 and 2).

Figure 1.

Figure 2.

Finally, I reduce the layer opacity to taste (Figure 3). I usually use anywhere tom 10 to 20 percent. The more you show, the more the final image looks more like fantasy. My ideal effect is to simply add a little sparkle to those dull shadows with color and quality.

Figure 3.


Gabriel Biderman

Creating and Saving a Milky Way Brush in LR

The great thing about our latest batch of digital cameras is how sensitive they are to light and how much better they can see than our own eyes. Take a look at the multitude of Milky Way photos populating the World Wide Web. Unfortunately most of them are a bit too over-processed for my taste. In their understandable enthusiasm, many photographers push the  Clarity and Dehaze sliders too far to the right so that every pixel is sharpened and we are seeing a very unnatural shift in the colors of the night.

A more subtle way to “treat” the Milky Way is by locally applying a gentle brush adjustment. I do my global adjustments and general processing first, but I do like the Milky Way to stand out a bit from the background of all the other stars, which is when the brush comes into play (Figure 4).

Figure 4.

To achieve this, start by clicking on the Brush tool and selecting a default Effect, such as Highlights. To aid me in seeing where I am brushing, I will generally adjust the brush to the extreme—like +100 highlights (Figure 5). Once I have brushed in the appropriate places, I start bringing back the effect and finessing the look.

Figure 5.

In Figure 6, you can see the adjustments I made to make the Milky Way, which make it pop a little bit more.

Figure 6.

That general separation between Milky Way and sky is created by adding contrast and clarity. I like to adjust contrast by not only using the Contrast slider, but also by raising highlights and lowering shadows. Clarity is a slider you need to respect though, as too much clarity creates noise and a halo effect along the edges of the contrasty regions of the image. That’s why it is so important to first apply any clarity and sharpening globally. Then you can really see how much, if any, is needed for the Milky Way.

Here’s the fun part—the real core of this tip. Those adjustments probably took a solid 5 minutes to make. But you don’t need to take 5 minutes to make them next time, or any time after that. Why? Because you can save those adjustments as a permanent brush that you can use at any time.

If you look at the top of the Brush panel, in the Effect drop-down menu, you’ll see an option called Custom. Click on Custom and a scroll-down menu of brush options will appear. Go to the second to last option and select Save Current Settings as New Preset (Figure 7).

Figure 7.

You’ll need to enter a title for your preset (Figure 8)—“Milky Way” makes sense, but you can call it whatever you want. Once you’ve entered your title, click the Create button.

Figure 8.

Now you have a Milky Way brush that you can paint onto all your dark sky shots! Any time you edit a Milky Way photo, make all your global adjustments first. Then select the Brush tool, choose “Milky Way” (or whatever you named it) from the Effects drop-down, and paint in your home-cooked adjustments.

Chris Nicholson is a partner and workshop leader with National Parks at Night, and author of Photographing National Parks (Sidelight Books, 2015). Learn more about national parks as photography destinations, subscribe to Chris' free e-newsletter, and more at www.PhotographingNationalParks.com.

UPCOMING WORKSHOPS FROM NATIONAL PARKS AT NIGHT